
How to install an operating system from the installation media in OpenStack environment?
We often receive questions about creating a new instance from its own installation media in OpenStack environment. We decided to create simple instructions which will show you step by step through the installation of a new instance in OpenStack environment from ISO file. The point is that the ISO is copied to the new volume, from which the system is installed.
Quick guide:
1. Register installation ISO as a new image.
2. Create a new volume from the ISO image.
3. Create a new clean volume for the future boot disk.
4. Start a new instance as the boot from volume from step 2.
5. Connect the clean volume from the step 3 to instance.
6. Install the system on the clean volume.
7. Term the instance and create a new one as the boot from volume of installed system.
8. The possibility to take a snapshot of a clean system and then run instance as the boot from volume snapshot.
1. REGISTRATION OF THE INSTALLATION ISO FILE:
For the test of the functionality we chose ISO CentOS 6.5 64b, it can be loaded into OpenStack right from a local disk or by URL to the file. We recommend the second option.
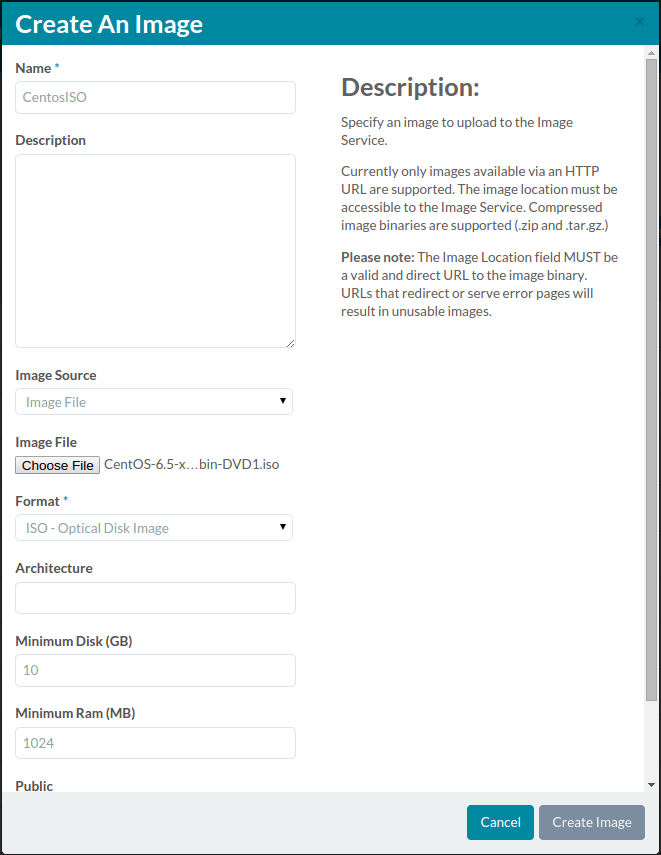
Storage - Images - Create Image
2. CREATE A NEW VOLUME FROM THE ISO IMAGE:
We choose: Volume Source – “Image”
Use image as a source – our uploaded ISO from step 1.
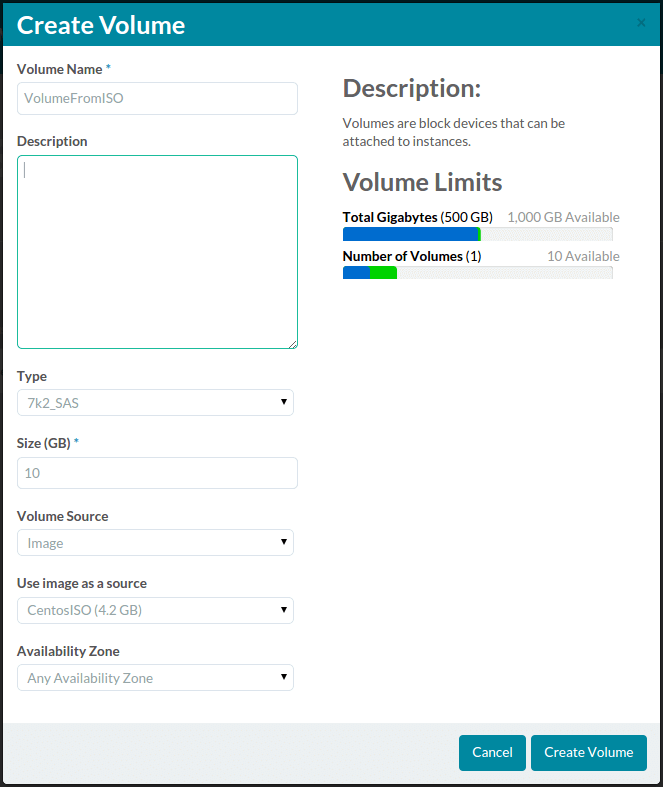
Storage – Images – Create Volume
3. CREATE A NEW CLEAN VOLUME FOR FUTURE BOOT DISK:
We choose: Volume Source – “No source, empty volume”
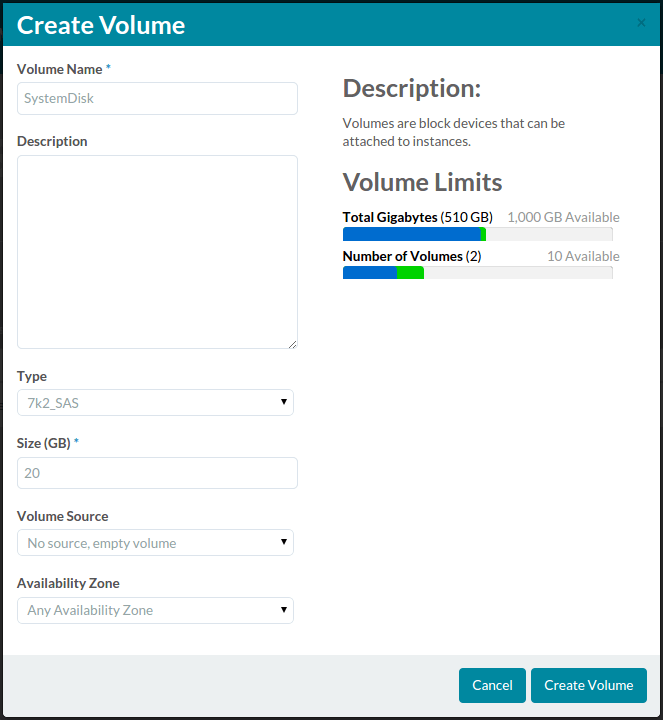
Storage – Images – Create Volume
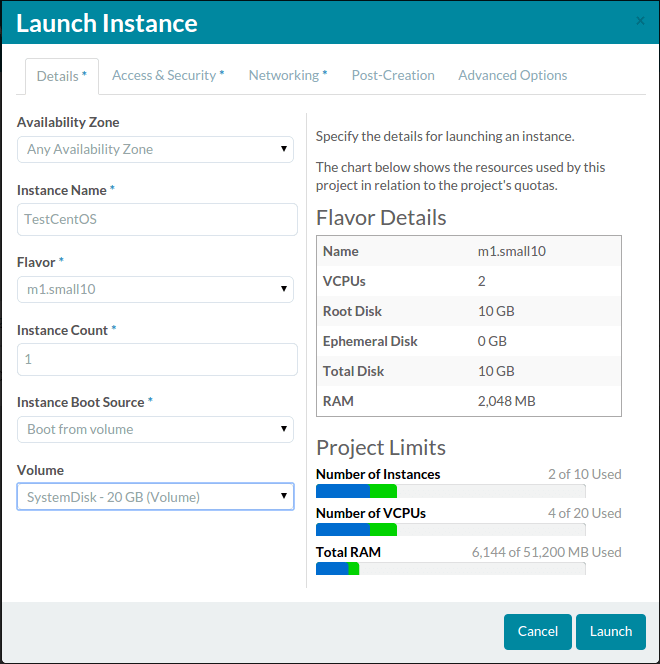
4. START A NEW INSTANCE AS BOOT FROM VOLUME FROM STEP 2:
We choose: Instance Boot Source – “Boot from volume”
Volume – disk created from ISO file from step 2.
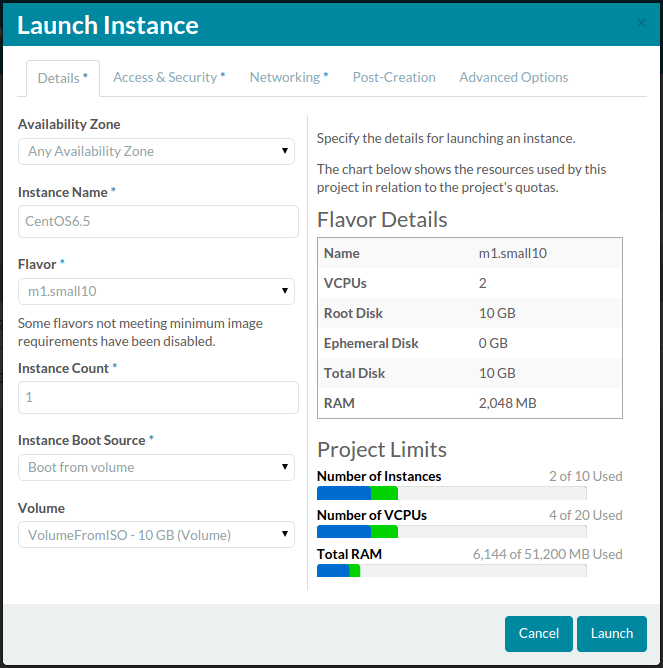
Compute - Instances - Launch Instance
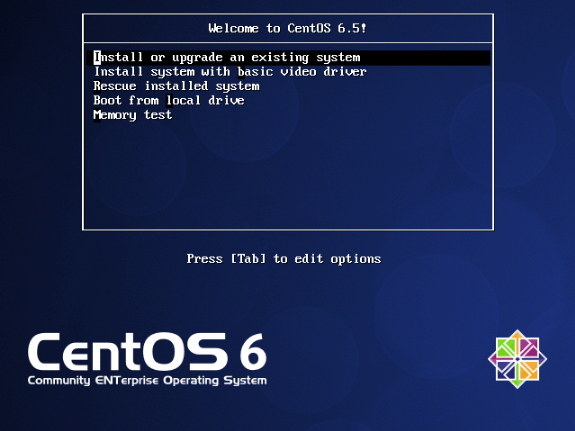
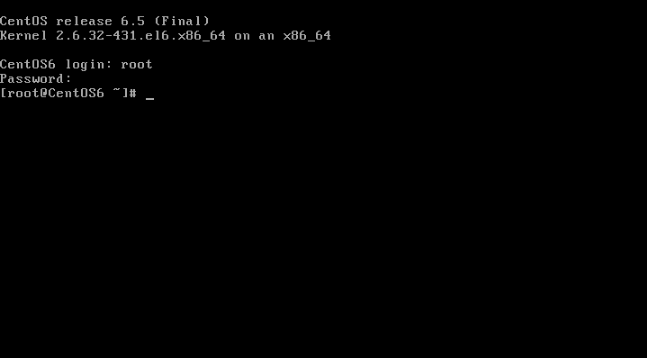
Screen from installing CentOS 6.5
After starting the instance, automatically starts classic welcome offer from the installation media. Before starting the installation, it´s necessary to connect an empty volume created in step 3. See following.
5. CONNECT THE CLEAN VOLUME FROM STEP 3 TO THE INSTANCE:
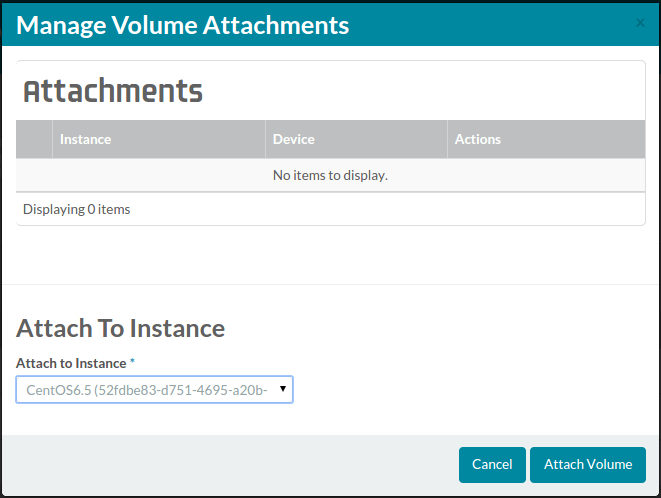
Storage – Volumes – More – Edit Attachments
Attached to CentOS 6.5 on/dev/vdb.
OpenStack dashboard indicate the successful connection and path to the disk.
6. INSTALL THE SYSTEM ON THE CLEAN VOLUME.
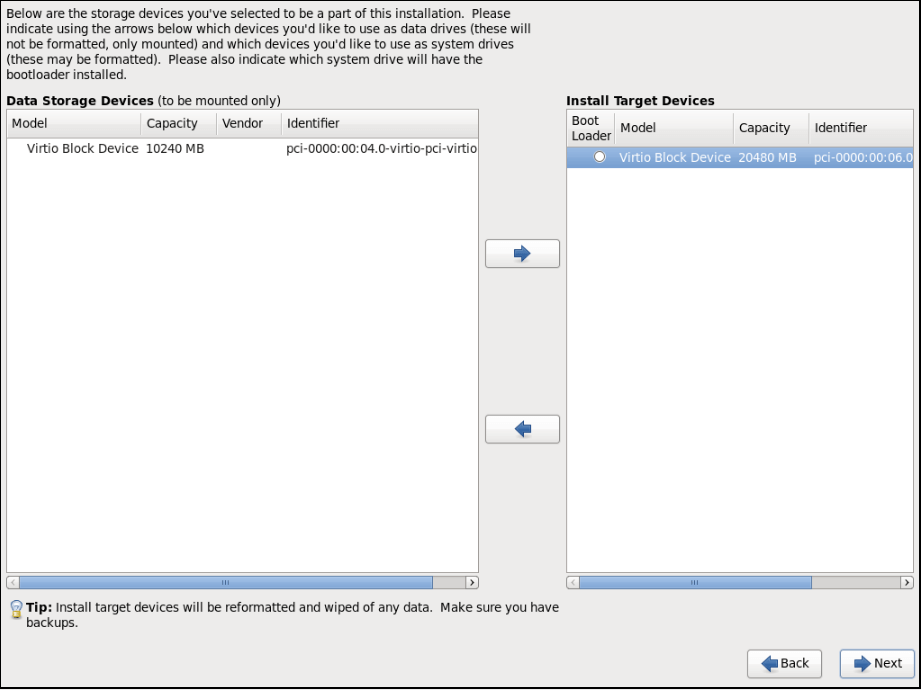
Selecting a disk
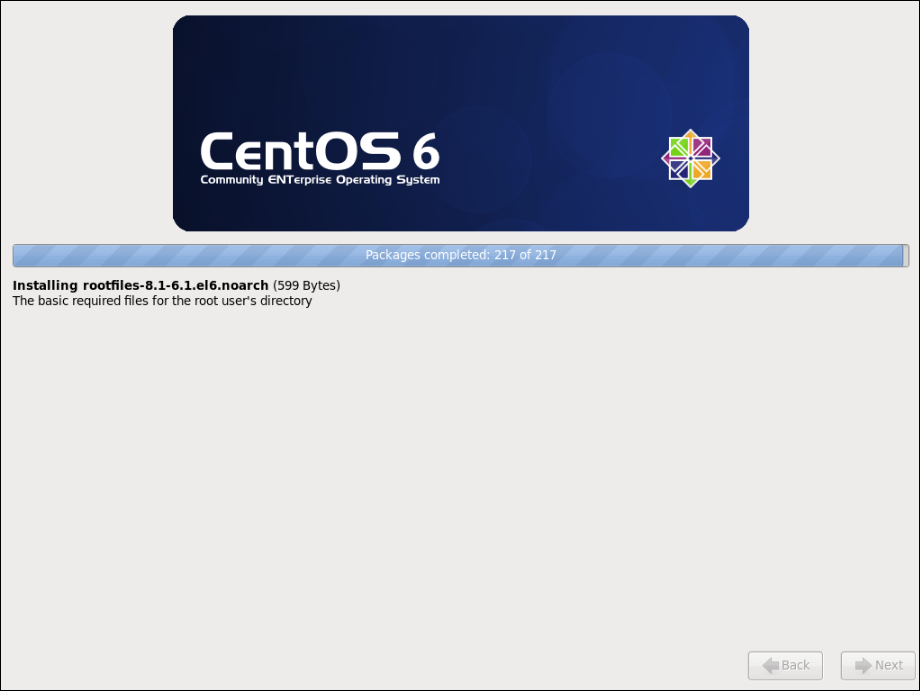
Installation progress
7. TERM THE INSTANCE AND CREATE A NEW ONW AS THE BOOT FROM VOLUME OF INSTALLED SYSTEM:
After the end of installation, it´s possible to term instance and run the other one from created volume.
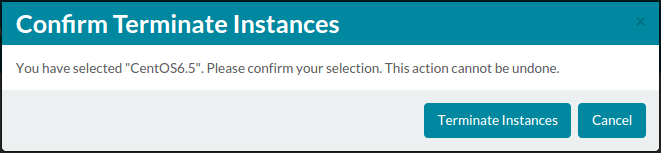
Compute – Instances – More – Terminate Instance
Create a new instance as a boot from volume of the installed system with selection of volume, on which we installed the system.
Compute – Instances – Launch Instance
After the start of instance it´s possible to connect into the console of the new installed system from the original ISO disk.
Connection of console
8. SNAPSHOT FROM THE CLEAN SYSTEM:
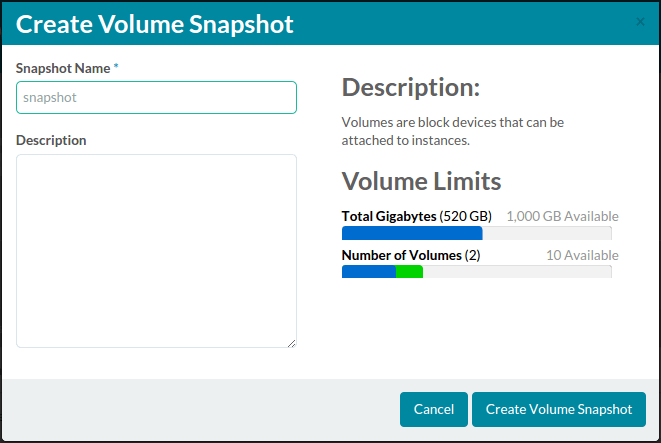
Storage – Volumes (selection of system disk) – More – Create Snapshot
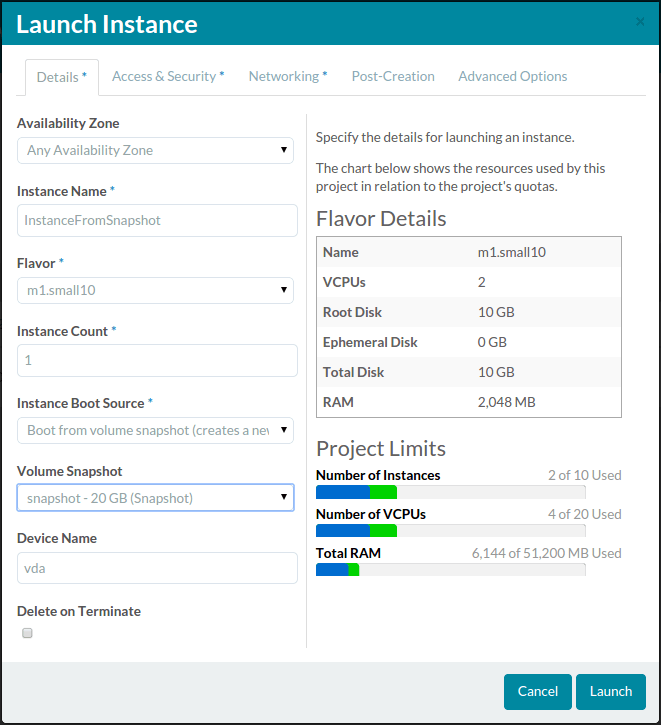
Start of instance from created snapshot:
We choose: Instance Boot Source – Boot from volume snapshot
Volume Snapshot – choose the snapshot created by us
After the running instance, it´s created completely new volume with the same size as the original, from which the snapshot was created.
Vlastimil Mikes
Tcp cloud engineer

