
Mirantis OpenStack Express 2.0 - Attaching and Using Volumes
This is the fourth in a series of short tutorials showing how to perform common cloud operations tasks in Mirantis OpenStack Express 2.0 – Mirantis’ “Private Cloud as a Service”
In our last tutorial, we learned how to create a block storage volume. Now, we’ll attach it to an instance, configure it for use, and explore more volume operations.
Basic Ops Tutorials
Mirantis OpenStack Express 2.0 -- Mirantis' "Private Cloud as a Service" -- is the fastest way to get your hands on a fully-functional, optimally-configured, private OpenStack cloud, running on hosted bare metal and able to scale on demand. This series of short tutorials shows how to perform common cloud operations tasks in MOX 2.0, and offers links to documentation and learning resources. Pro tip: though aimed at Mirantis OpenStack Express, many of the techniques discussed here will also work on a private OpenStack cloud deployed using Mirantis OpenStack.
Tutorials:
- Adding New Custom Boot Images
- Launching a VM from a Boot Image
- Creating a Block Storage Volume
- Attaching and Using Volumes
Step by Step
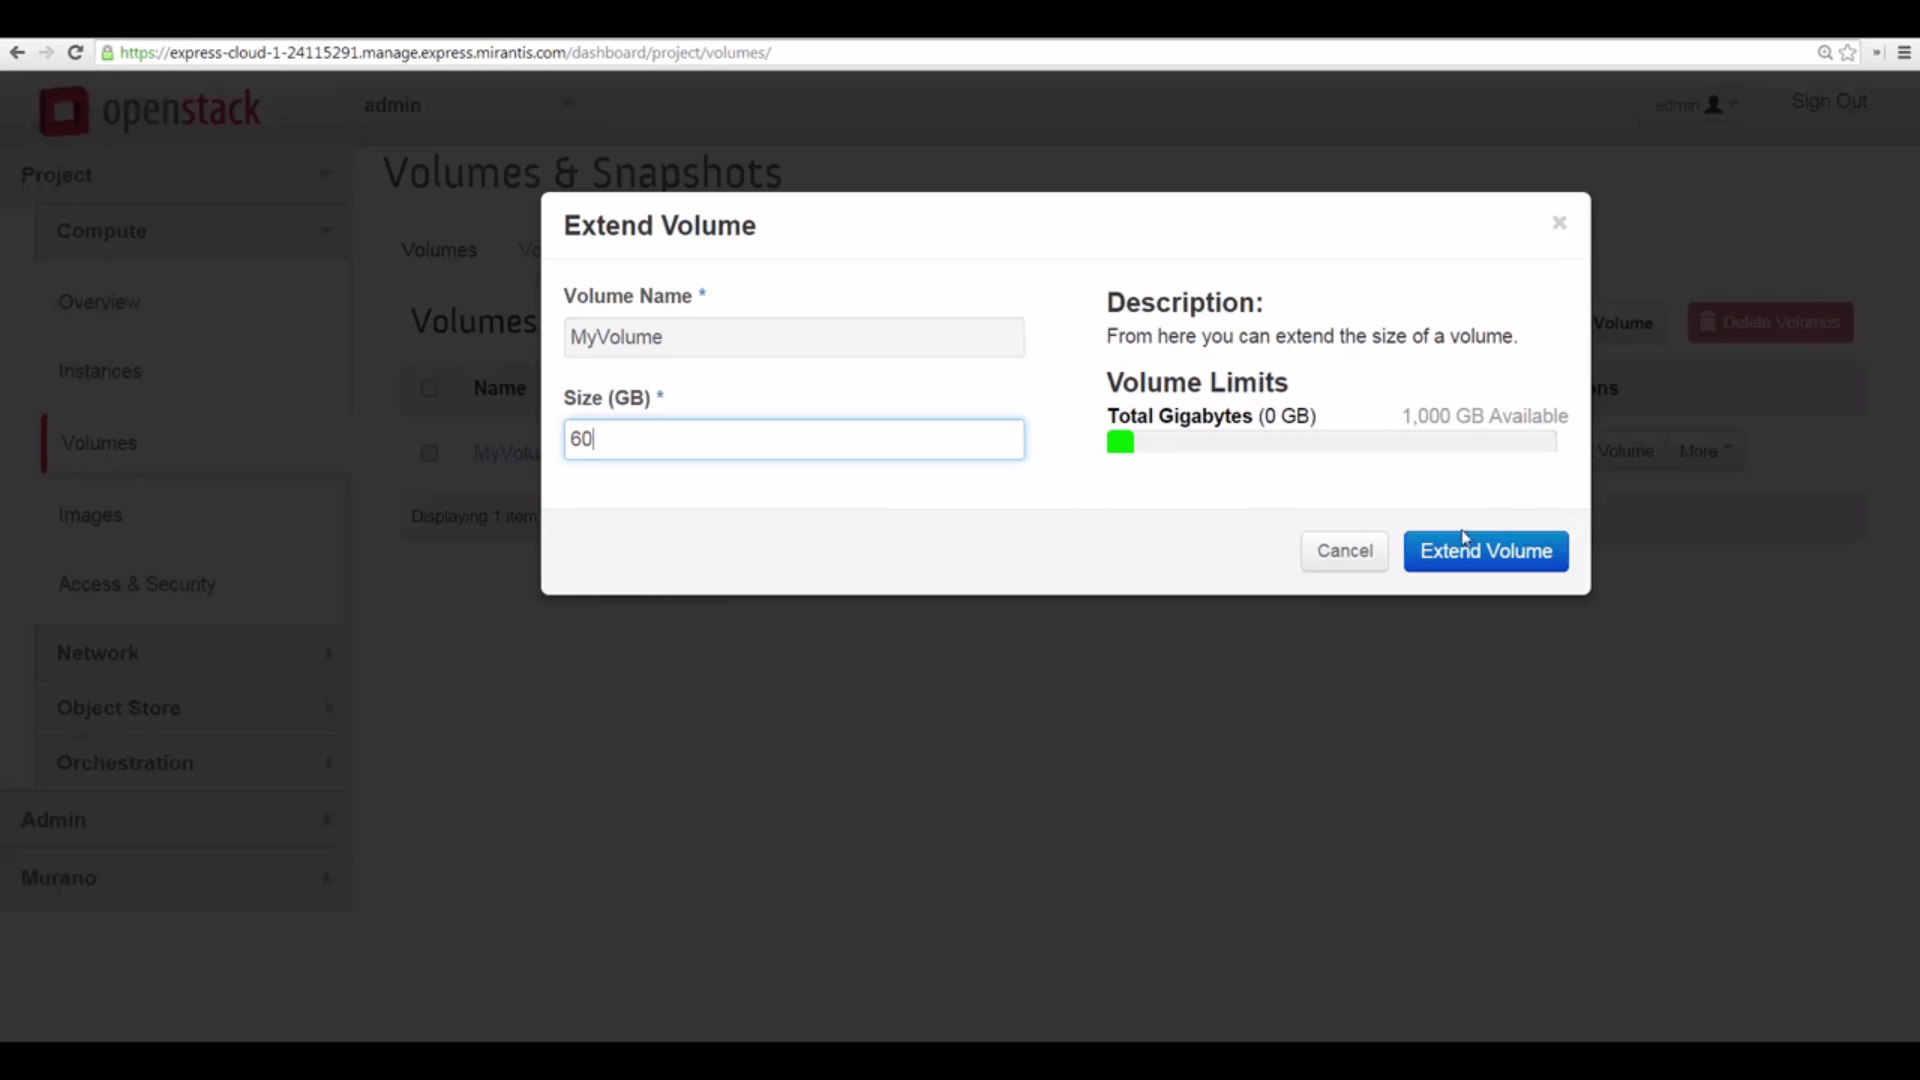
To begin: volumes can be extended, non destructively — though if you do so, you may need to resize or modify partitions to use the extra space.
Let’s take the 50GB volume we created last time, and turn it into a 60GB volume. From Mirantis OpenStack Express Horizon’s Volumes & Snapshots pane, pop down the More menu and select Extend Volume. We’ll enter 60GB here -- as you can see, Mirantis OpenStack Express keeps track of your storage quotas, and displays and updates them during all operations of this kind.
Next, we’ll attach this volume to our running Cirros VM instance. Pick Edit Attachments from the More dropdown menu, and select a running instance to attach the volume.

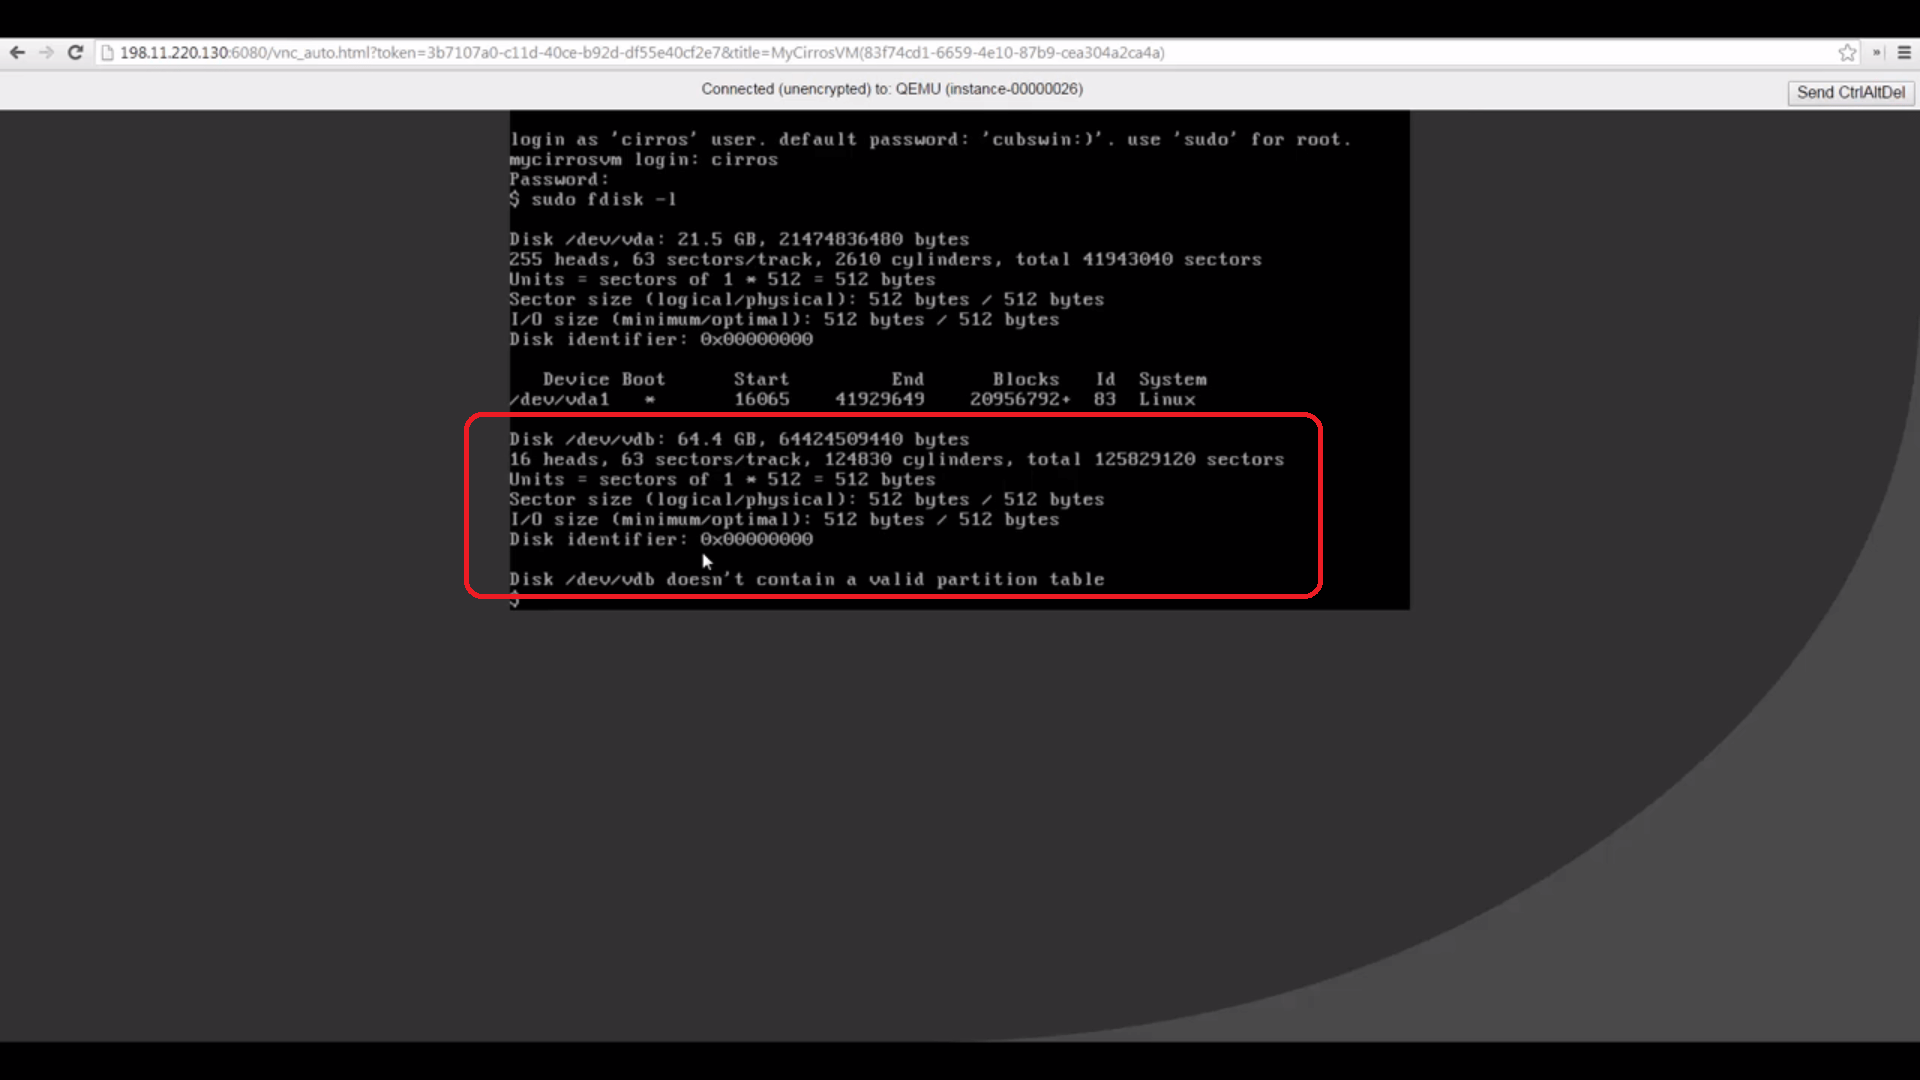
Heading over to the Instances pane, we’ll log into our instance using the built-in VNC console and issue a ‘sudo fdisk -l’ command to review attached storage in detail. As you can see, the new volume is visible to the instance, identified as /dev/vdb.
Since our volume is empty, let’s set it up as generic storage in the usual way. First, we’ll use ‘sudo fdisk /dev/vdb’ to create a partition table with one primary partition, using all the space.
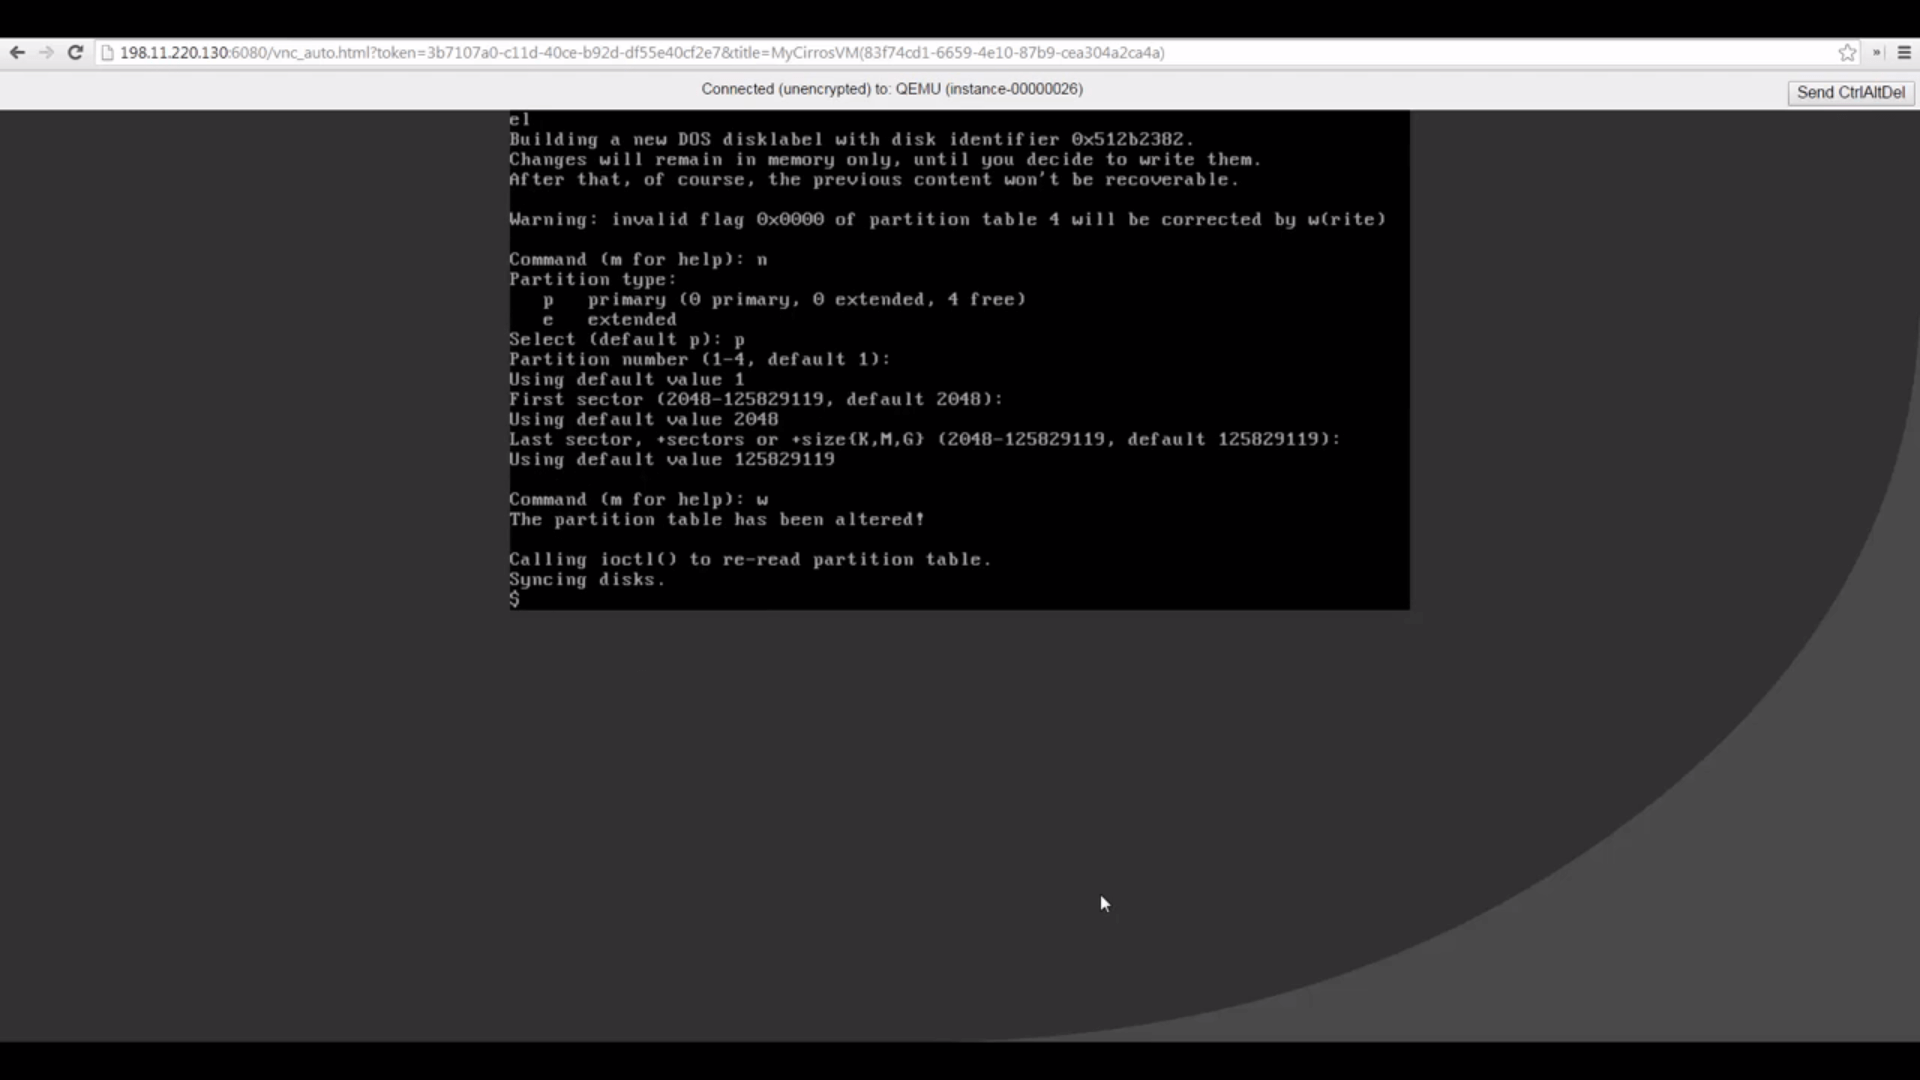
Now we’ll perform further operations on this partition, called ‘/dev/vdb1.’
First, we’ll make an ext3 file system.

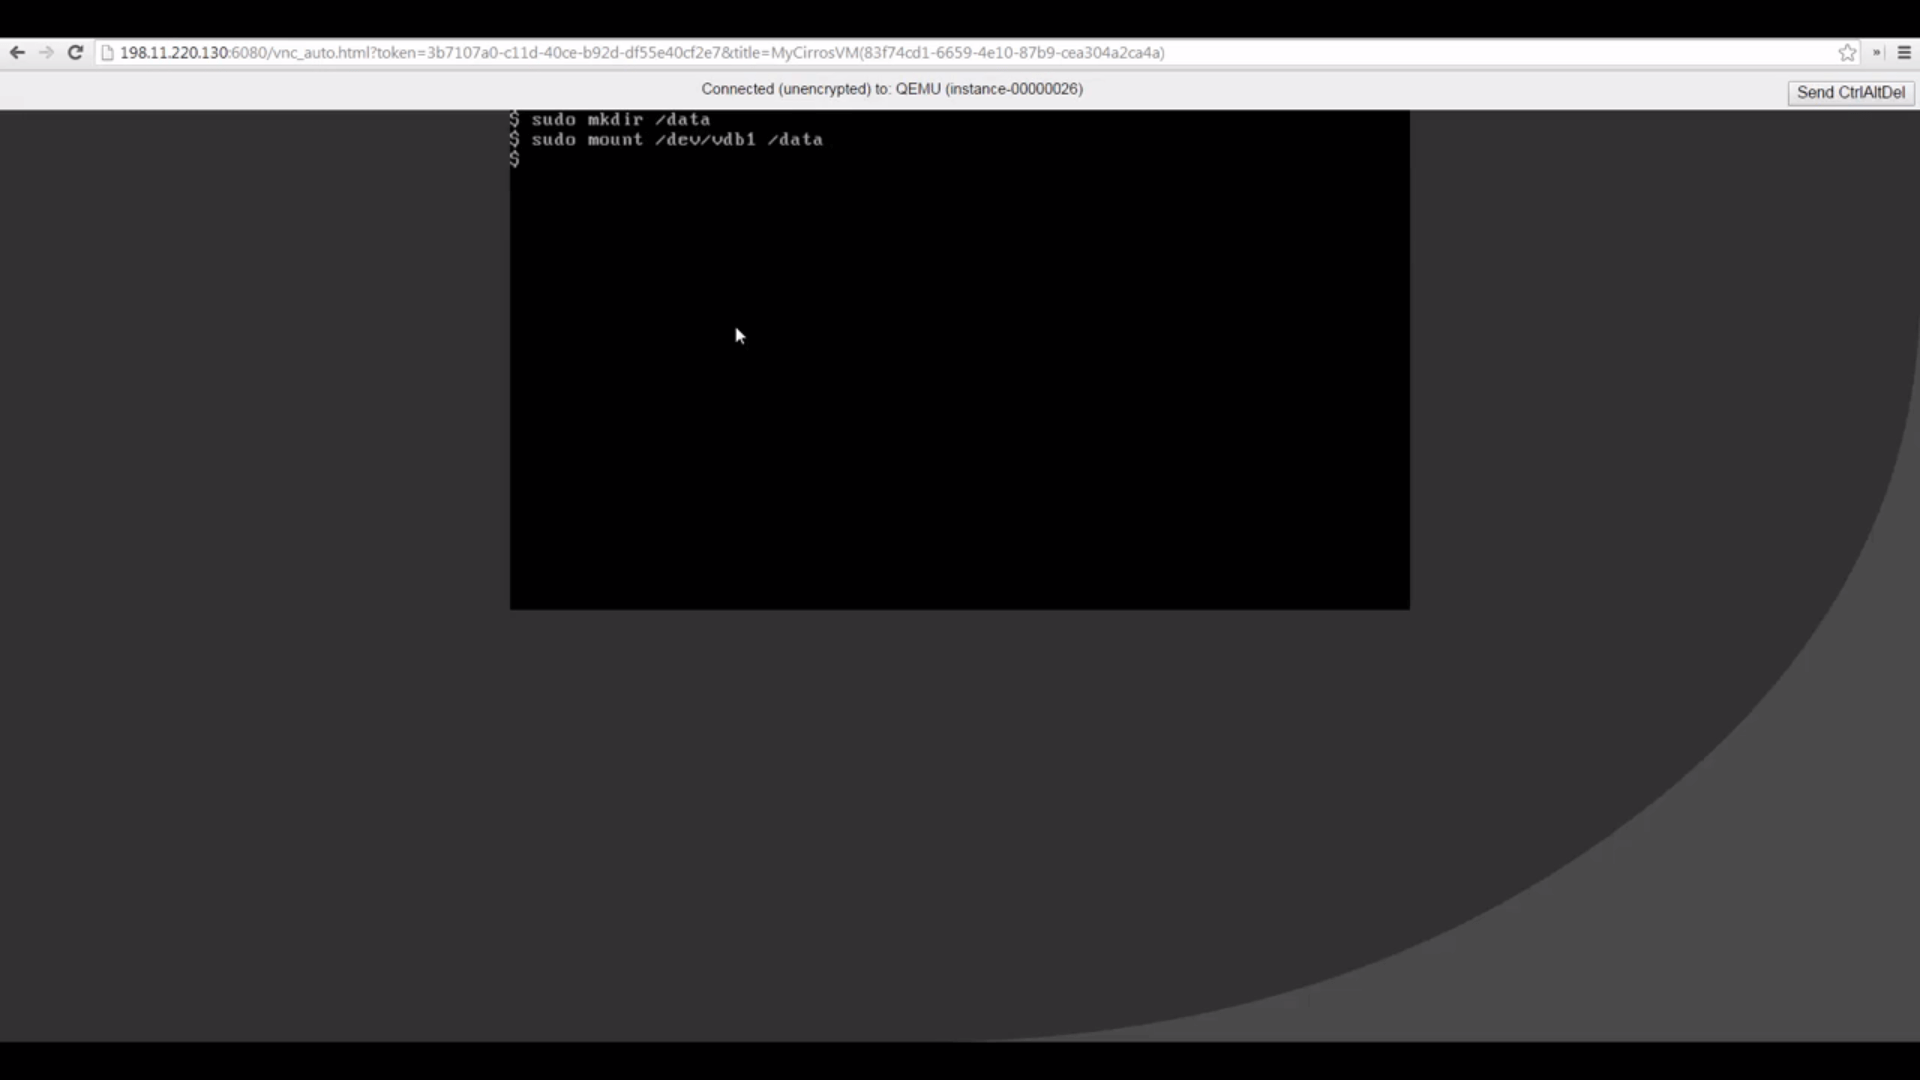
Then we’ll create a mount point called '/data' And mount ‘/dev/vdb1’ to it. At this point, the volume’s storage is accessible to Linux.
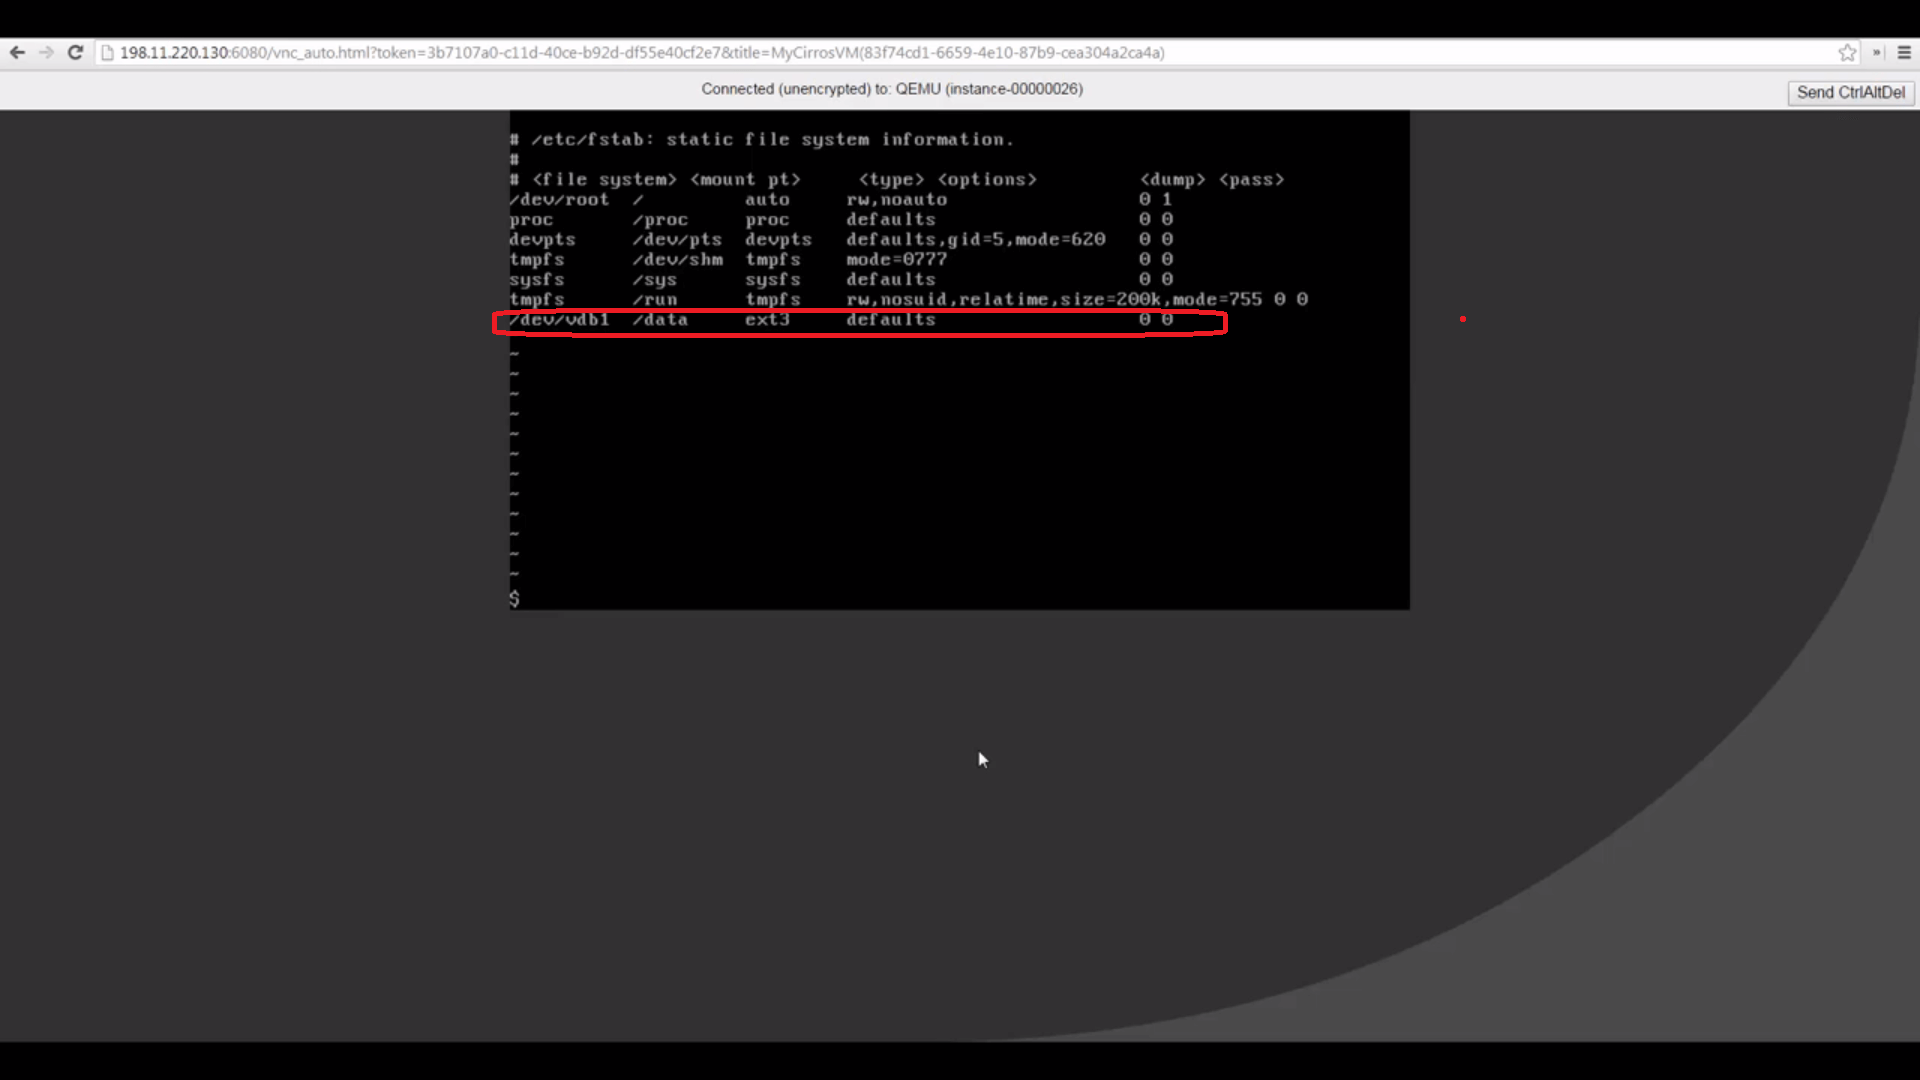
We’ll also modify /etc/fstab to insure that our instance remounts the volume on restarts.
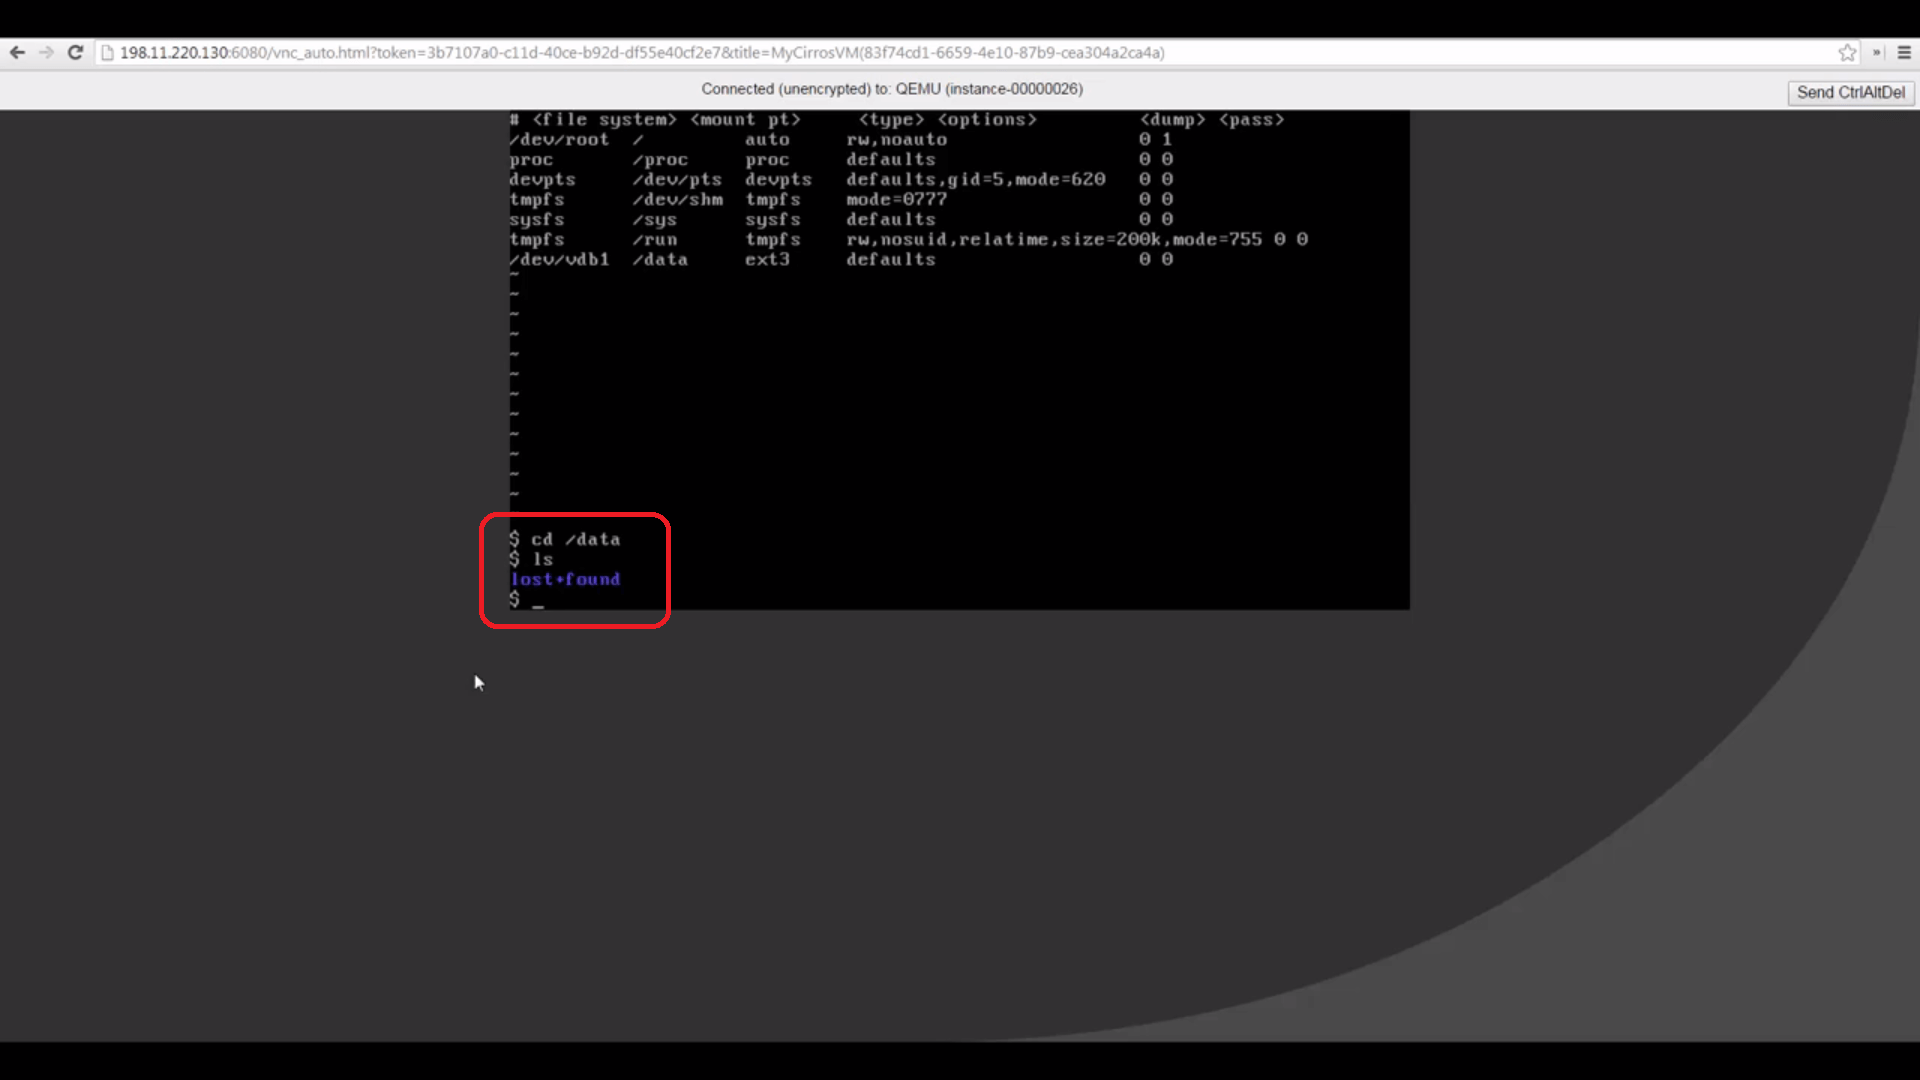
Trivially, we can now reboot our instance, log in, and see that we still have access to our volume and can read files stored on it.

Snapshots
Now that we’ve built a volume and configured a server to attach to it, we can use snapshots to leverage our work, knowing that a volume is not destroyed when an attached instance is terminated.
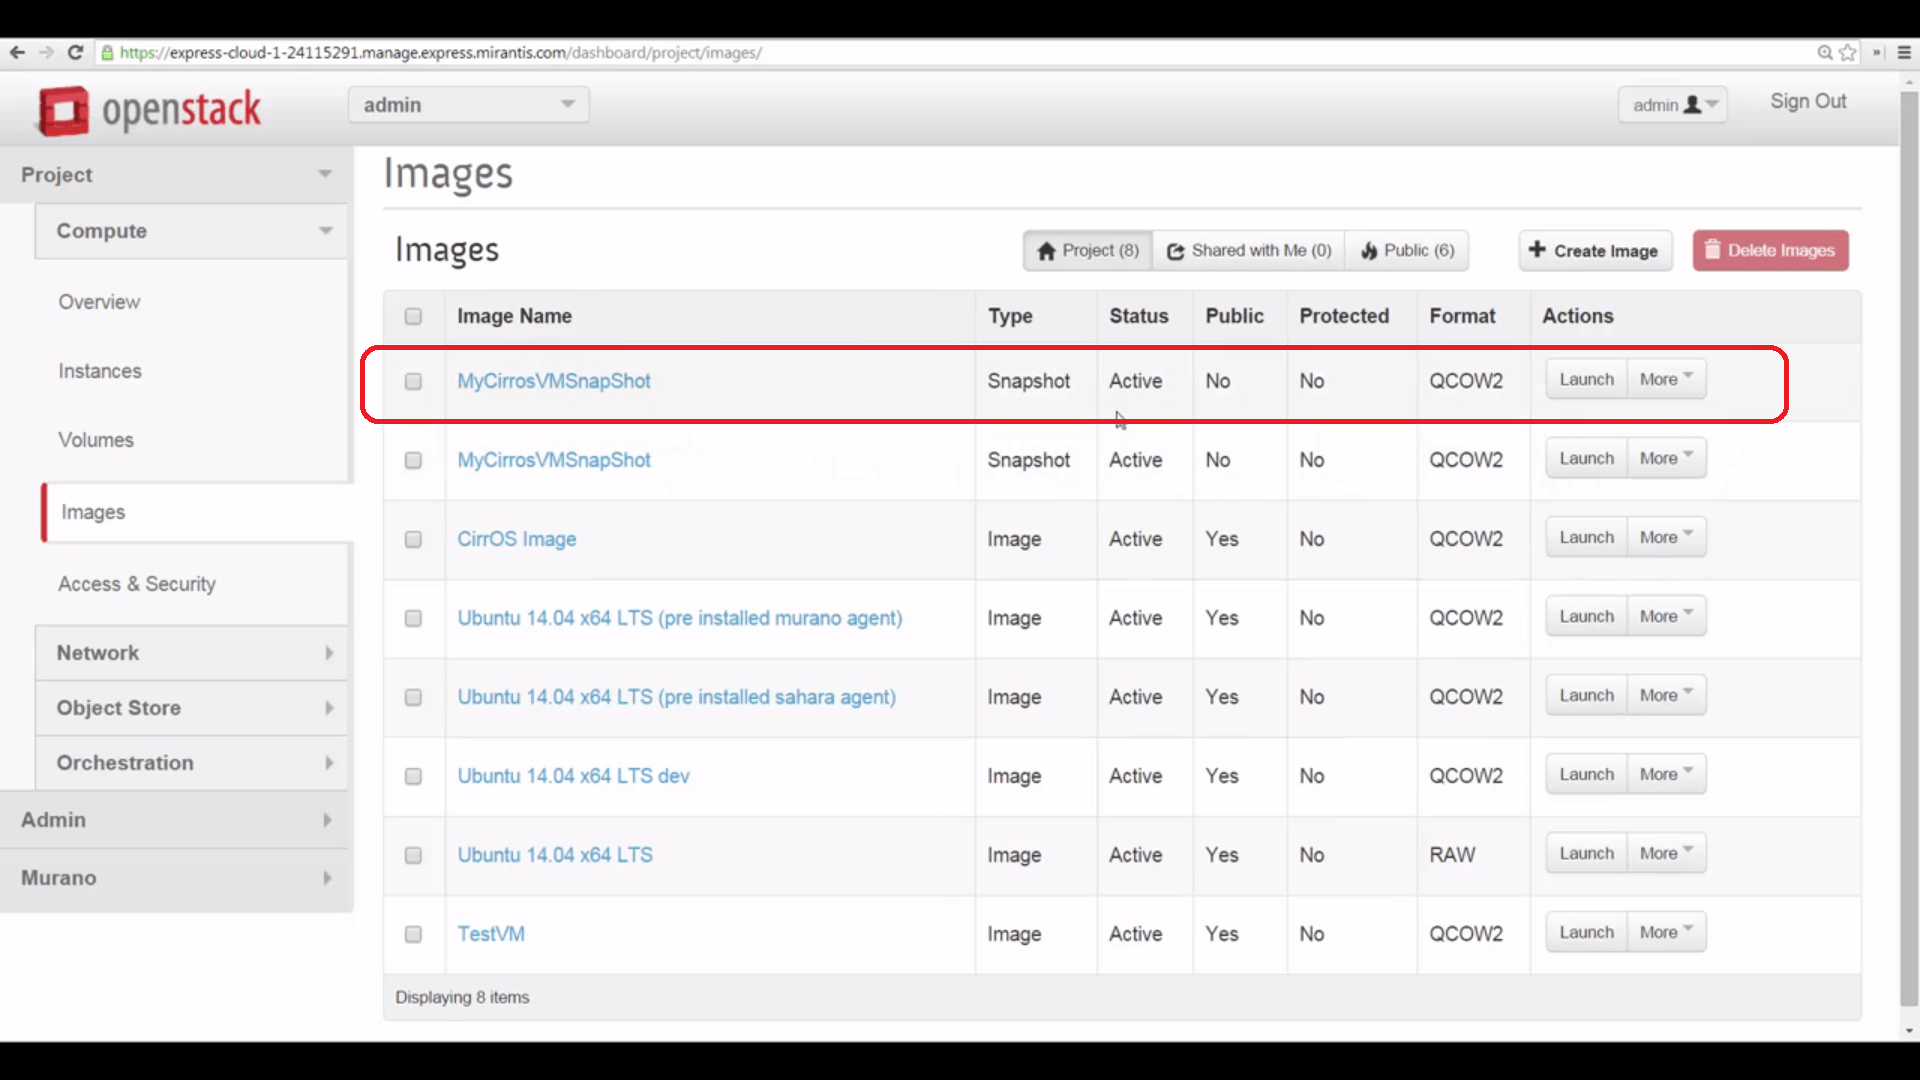
Let’s start by creating a snapshot of our Cirros VM instance. The Create Snapshot button raises a dialog that lets us name our snapshot, which is saved to the Images repository.

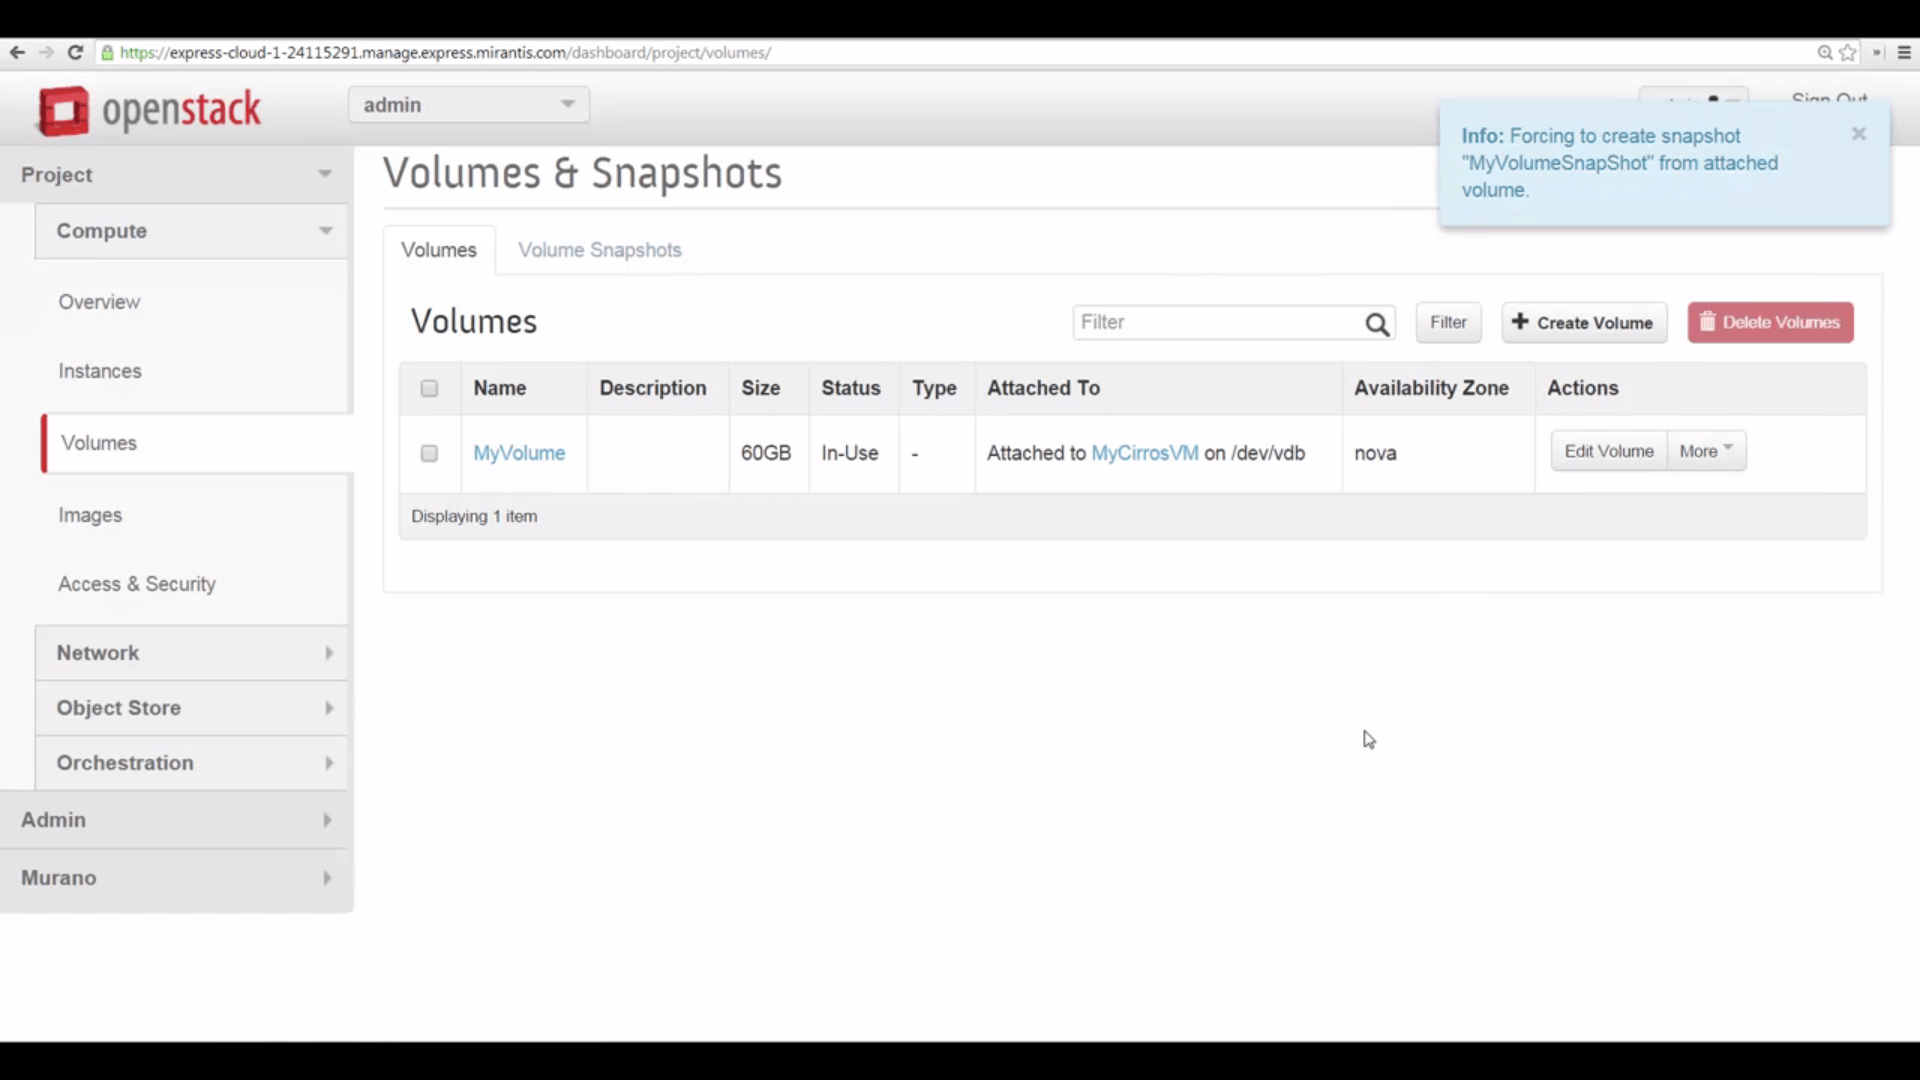
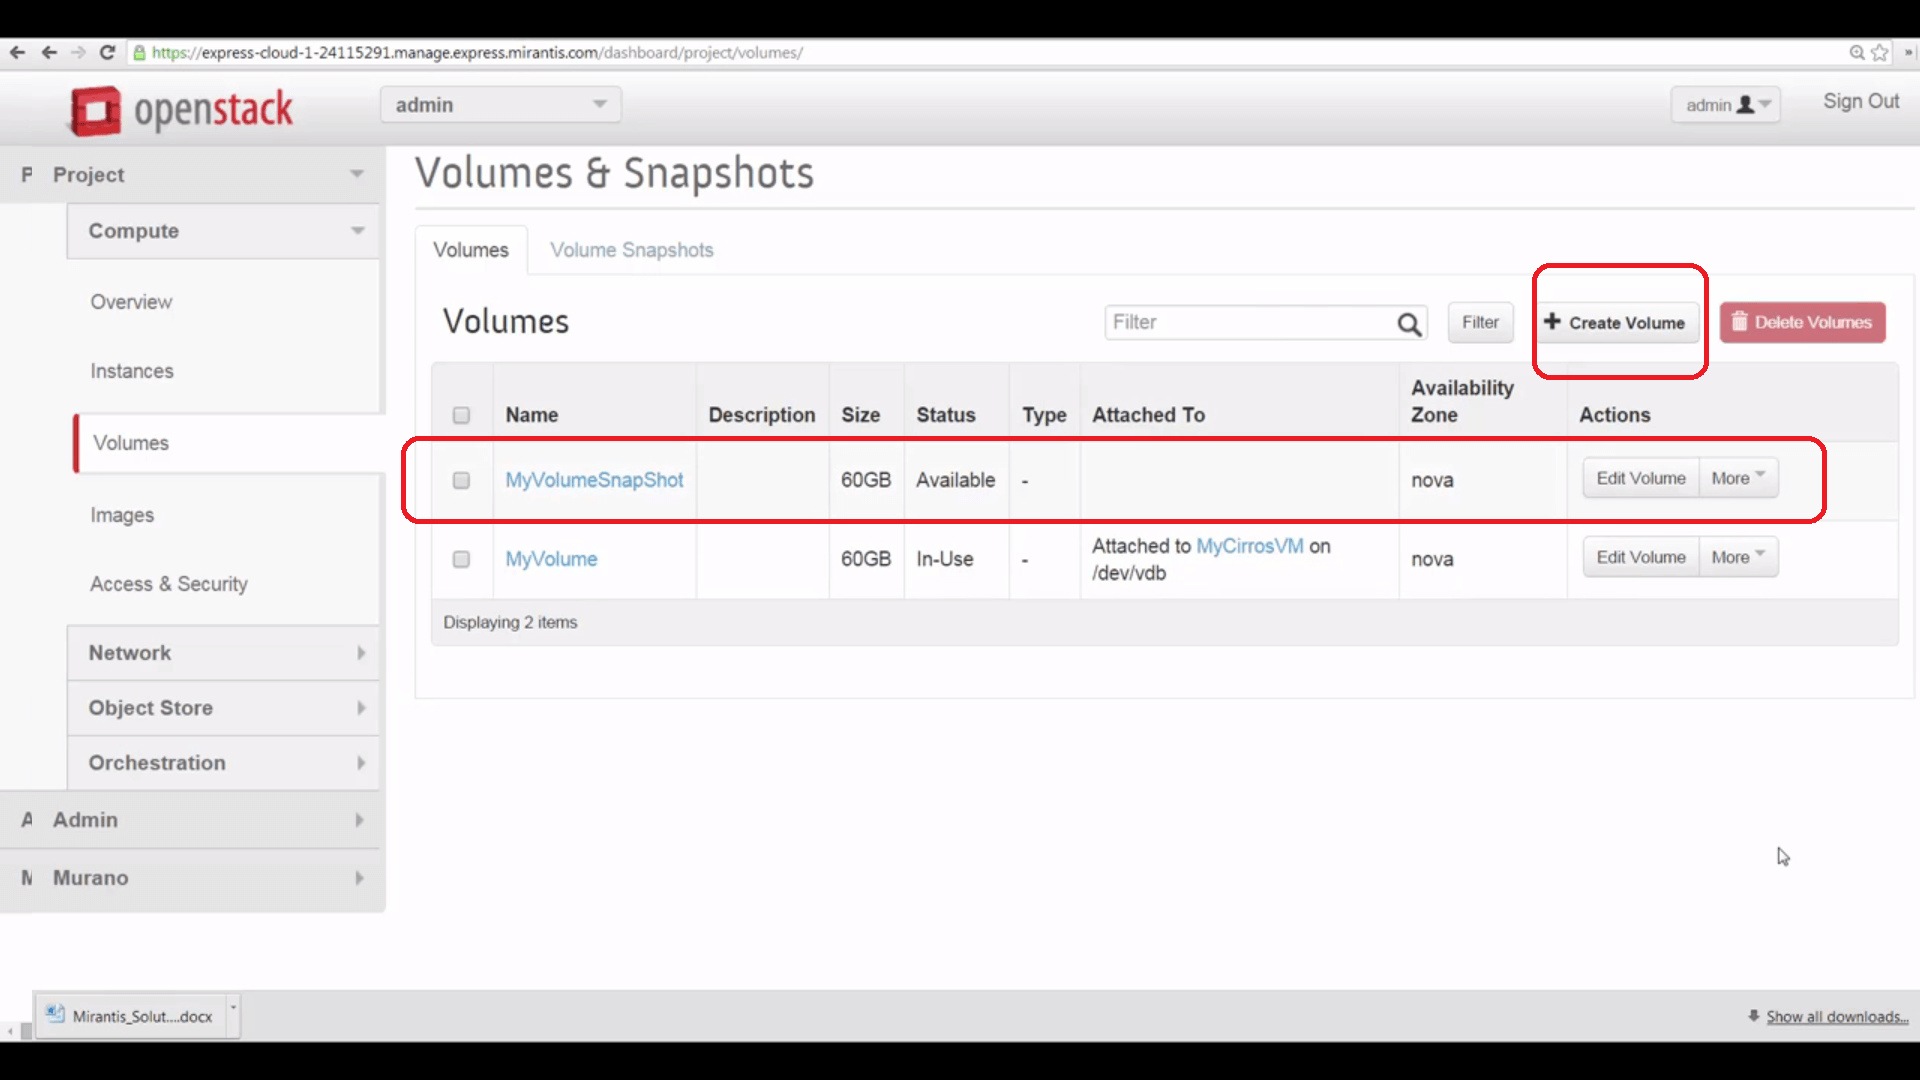
Now let’s snapshot our volume. In this case, Create Snapshot is an option in the More menu. The named snapshot is saved in the Volume Snapshots tab of the Volumes & Snapshots pane.

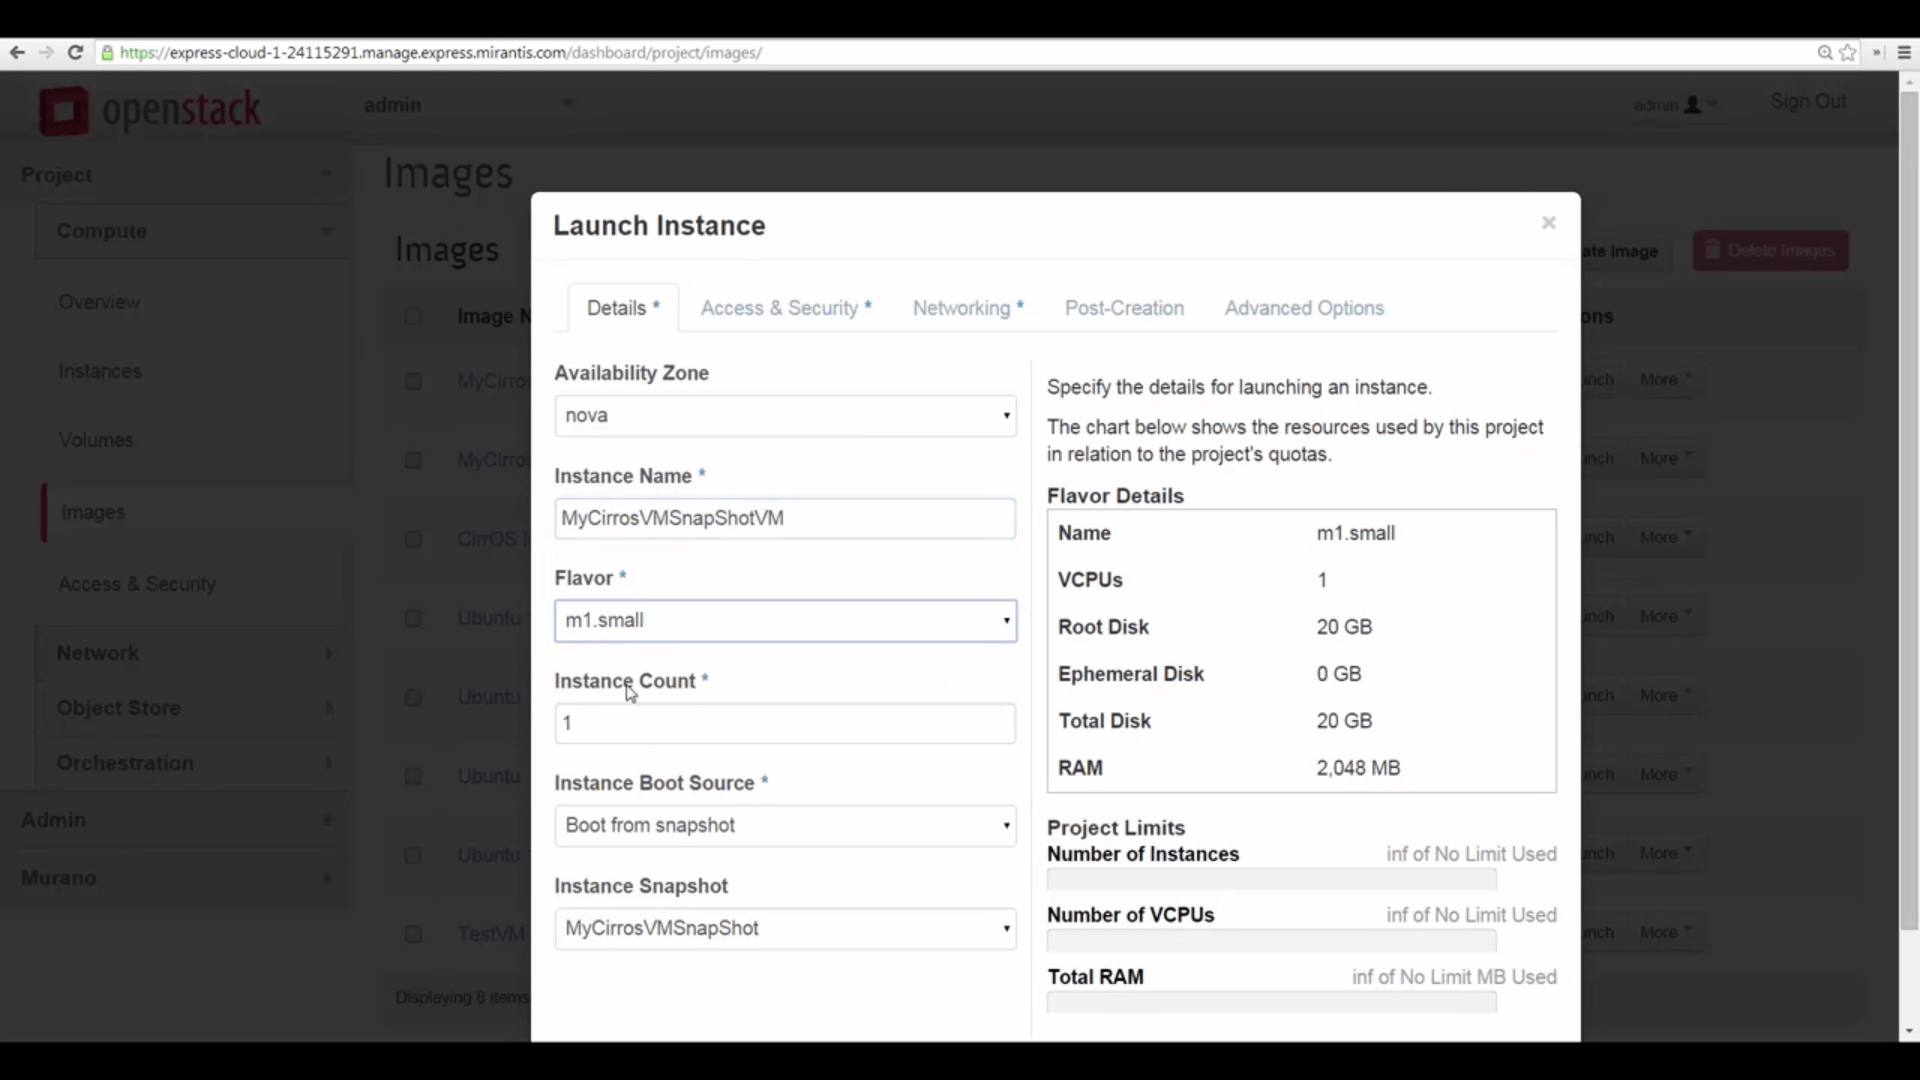
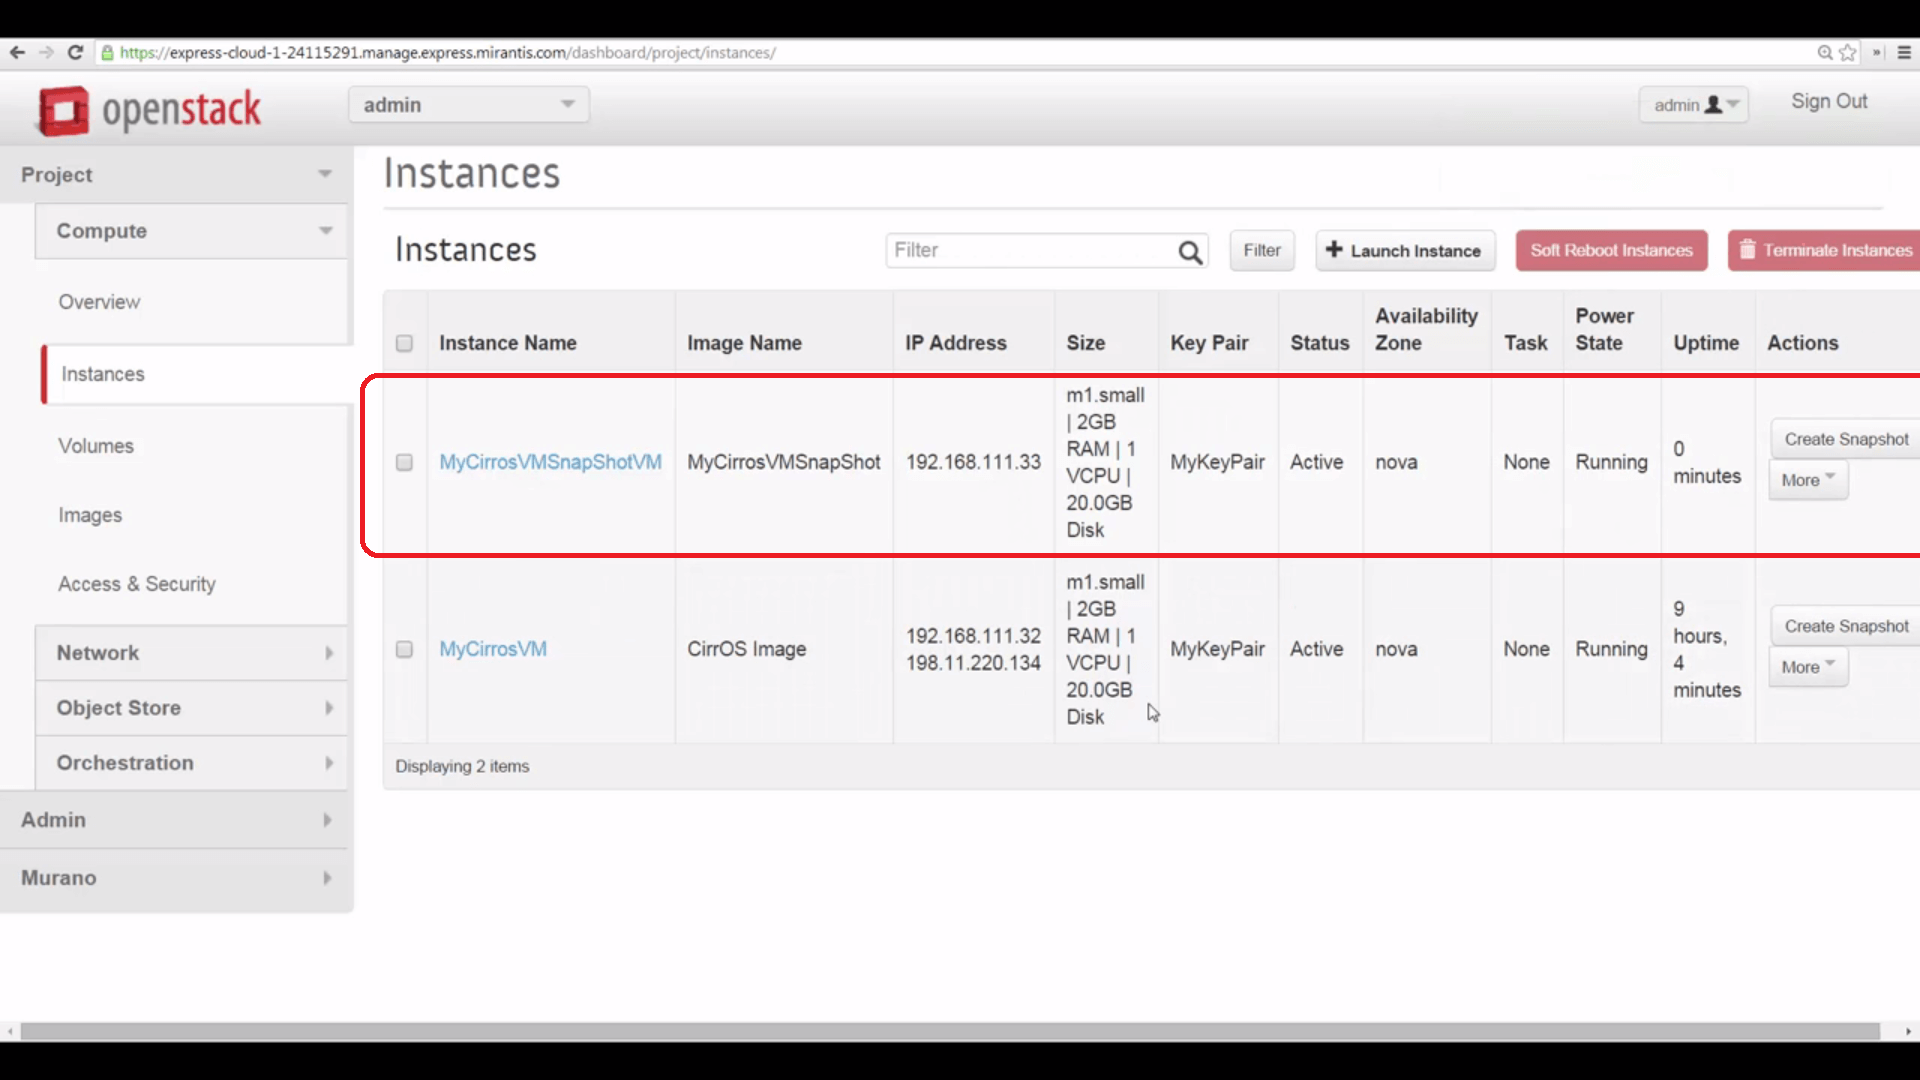
Now, let’s launch our instance snapshot. Once that’s spawned, we’ll attach our volume snapshot to it.

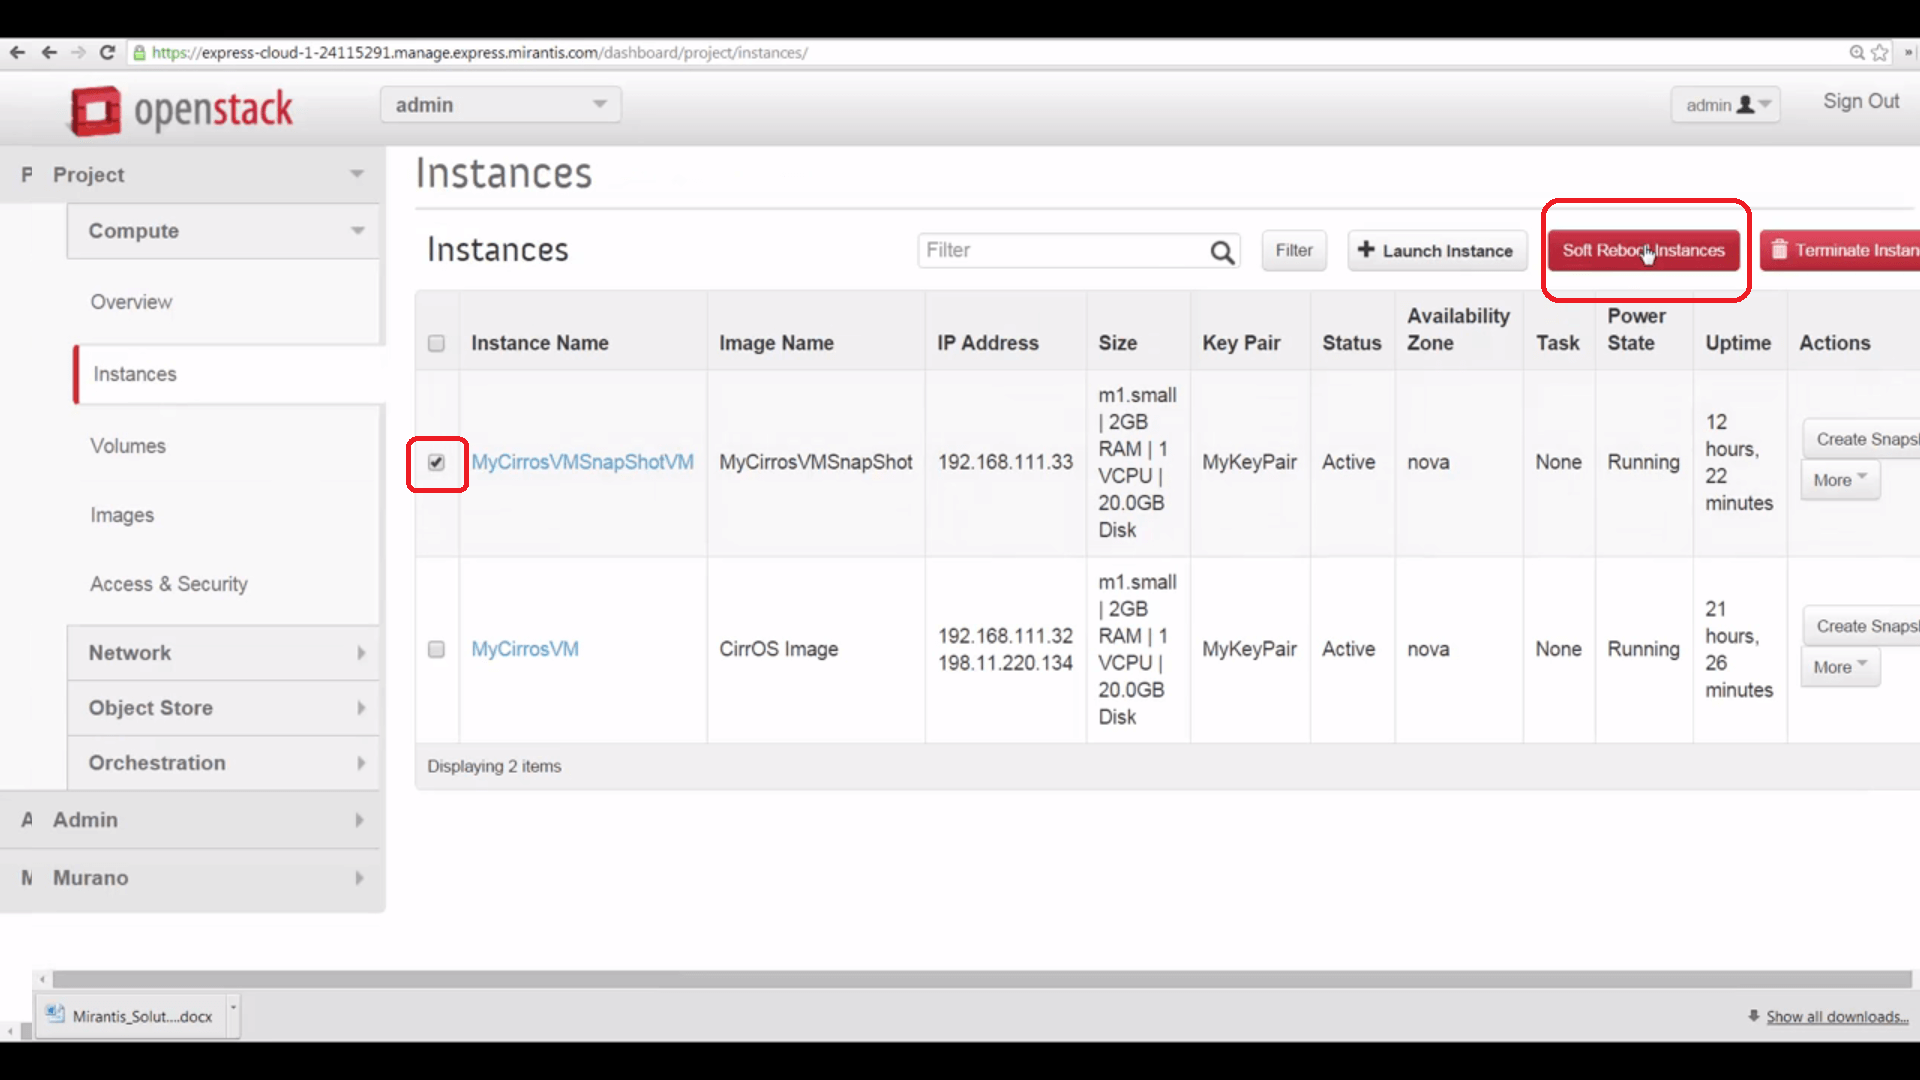
Soft-rebooting the snapshot instance will execute the mount instruction in /etc/fstab.
And when we visit our snapshot instance in the console, we can see that we have access to the snapshot volume and the data it contained when the snapshot was taken.

Now that we’ve experimented with basic features, our next tutorial will explore how to create platform model ‘flavors.’
Resources:
- Mirantis OpenStack Express 2.0 Documentation
- Mirantis OpenStack Express Operations Guide
- OpenStack Documentation: Create and Manage Volumes
Check out Express for yourself at https://express.mirantis.com.


