
Mirantis OpenStack Express — Running OpenStack from the Command Line
This is the ninth in a series of short tutorials showing how to perform common cloud operations tasks in Mirantis OpenStack Express 2.0 — Mirantis’ “Private Cloud as a Service”
In our last tutorial, we learned how to log into our Mirantis OpenStack Express cloud's Controller Node, so we can issue commands via the OpenStack CLI. Now, we’re going to do something practical with our new-found CLI capabilities: define and launch a VM with a specific image, VM flavor, network connection and SSH key, and pass in a script for execution post-boot that installs Apache for us, along with a custom index file for testing. Thanks to Mirantis Product Architect, Christopher Aedo, for inspiration and code-snippets.
Basic Ops Tutorials
Mirantis OpenStack Express — Mirantis' "Private Cloud as a Service" — is the fastest way to get your hands on a fully-functional, optimally-configured, private OpenStack cloud, running on hosted bare metal and able to scale on demand. This series of short tutorials shows how to perform common cloud operations tasks in MOX, and offers links to documentation and learning resources. Though aimed at Mirantis OpenStack Express, many of the techniques discussed here will also work on a private OpenStack cloud deployed using Mirantis OpenStack.
Tutorials:
- Adding New Custom Boot Images
- Launching a VM from a Boot Image
- Creating a Block Storage Volume
- Attaching and Using Volumes
- Creating new VM Flavors
- Setting Up a project
- Murano in a Minute
- Mirantis OpenStack Express VPN-as-a-Service
- Running OpenStack from the Command Line
- Automating VM Launch and Apache Installation
Step by Step
To start, log into your cloud's Controller node (following the instructions in our prior post and issue the command source openrc to authenticate.
Now we can begin to gather the information and prepare the resources we need to use the nova boot command to launch and install Apache on our VM.
First, we’ll get the image ID for an appropriate image, using the command glance image-list. We’ll grab the ID for the Ubuntu 14.04 x64 LTS dev image that's available by default in Mirantis OpenStack Express.
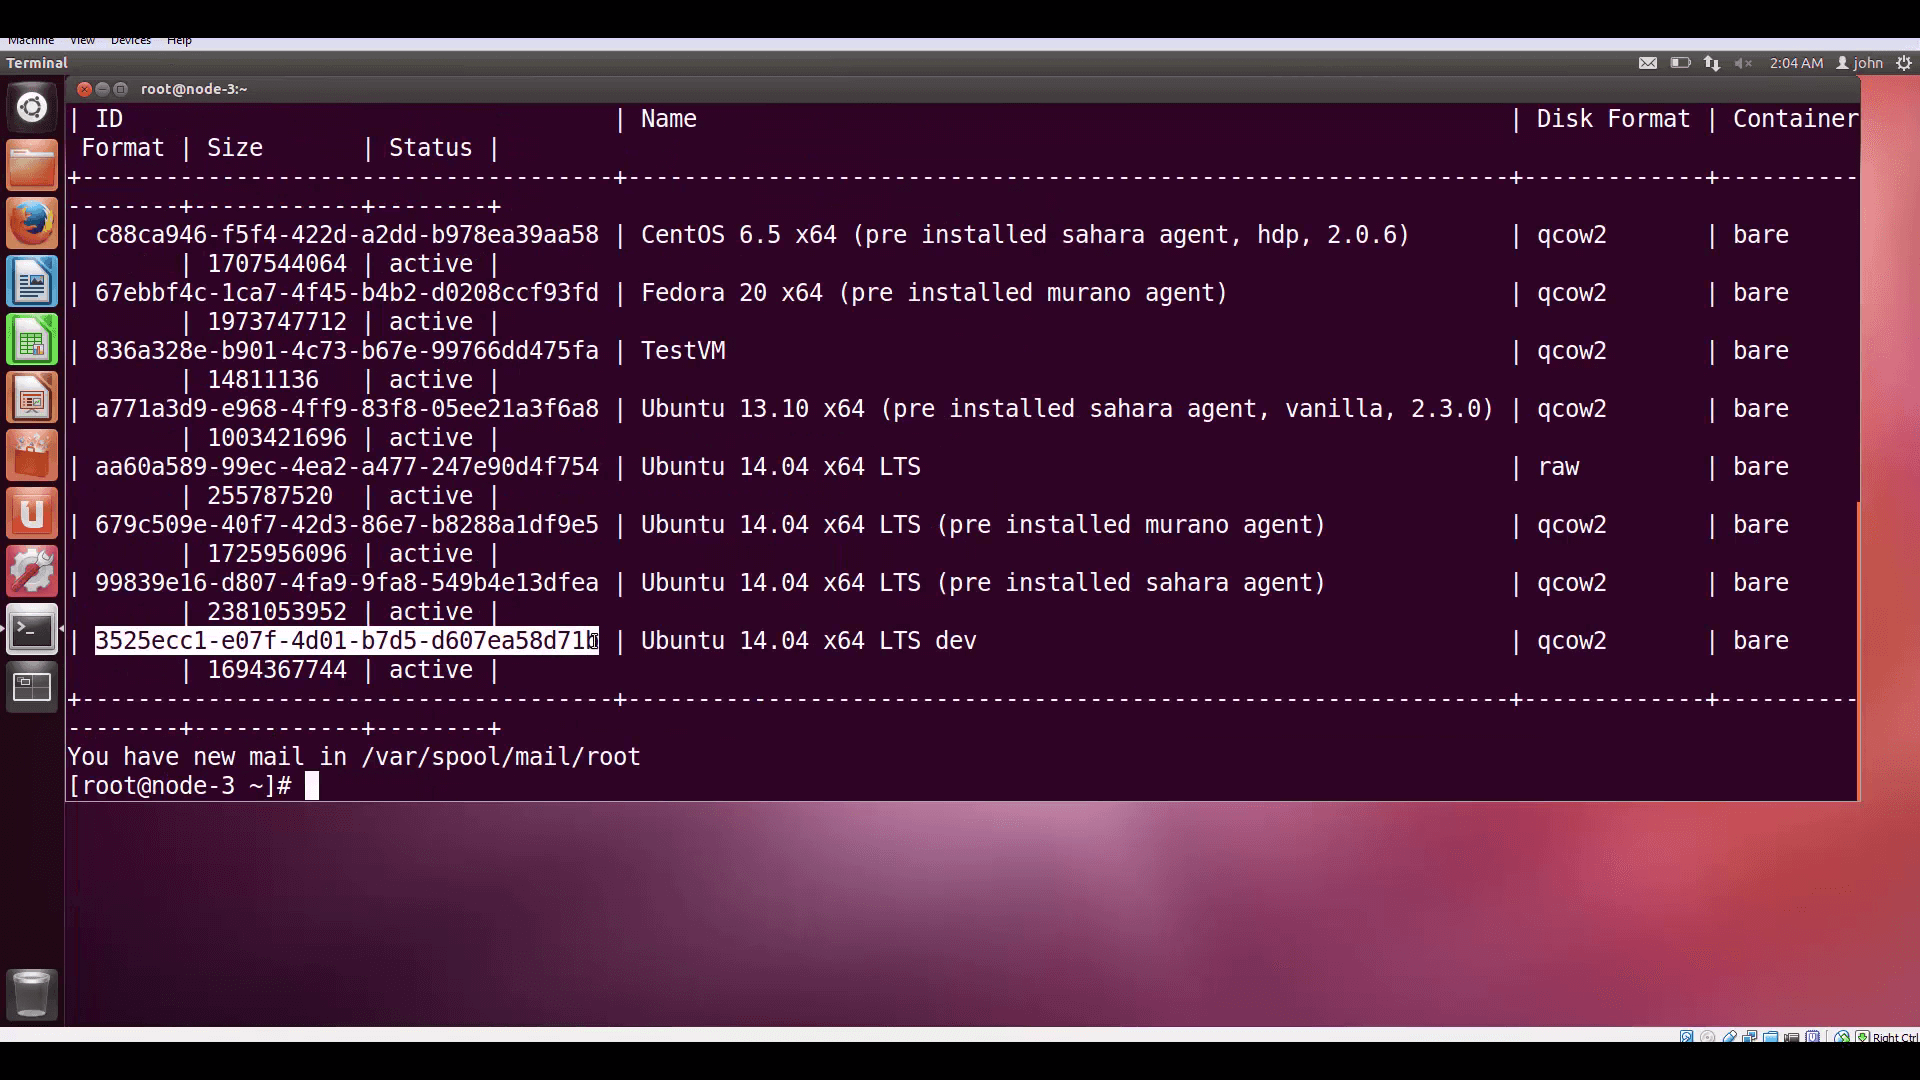
glance image-list lists the images we have available. We'll use the Ubuntu 14.04 LTS dev image, so we'll need its ID.Then we’ll set up the following script in the root of our Controller node, using vi, calling the script install-apache.sh:
 #!/bin/bash
 /usr/bin/apt-get -qy update
 /usr/bin/apt-get -qy install apache2
 echo "<h1>Hello world!</h1>" > /var/www/html/index2.html
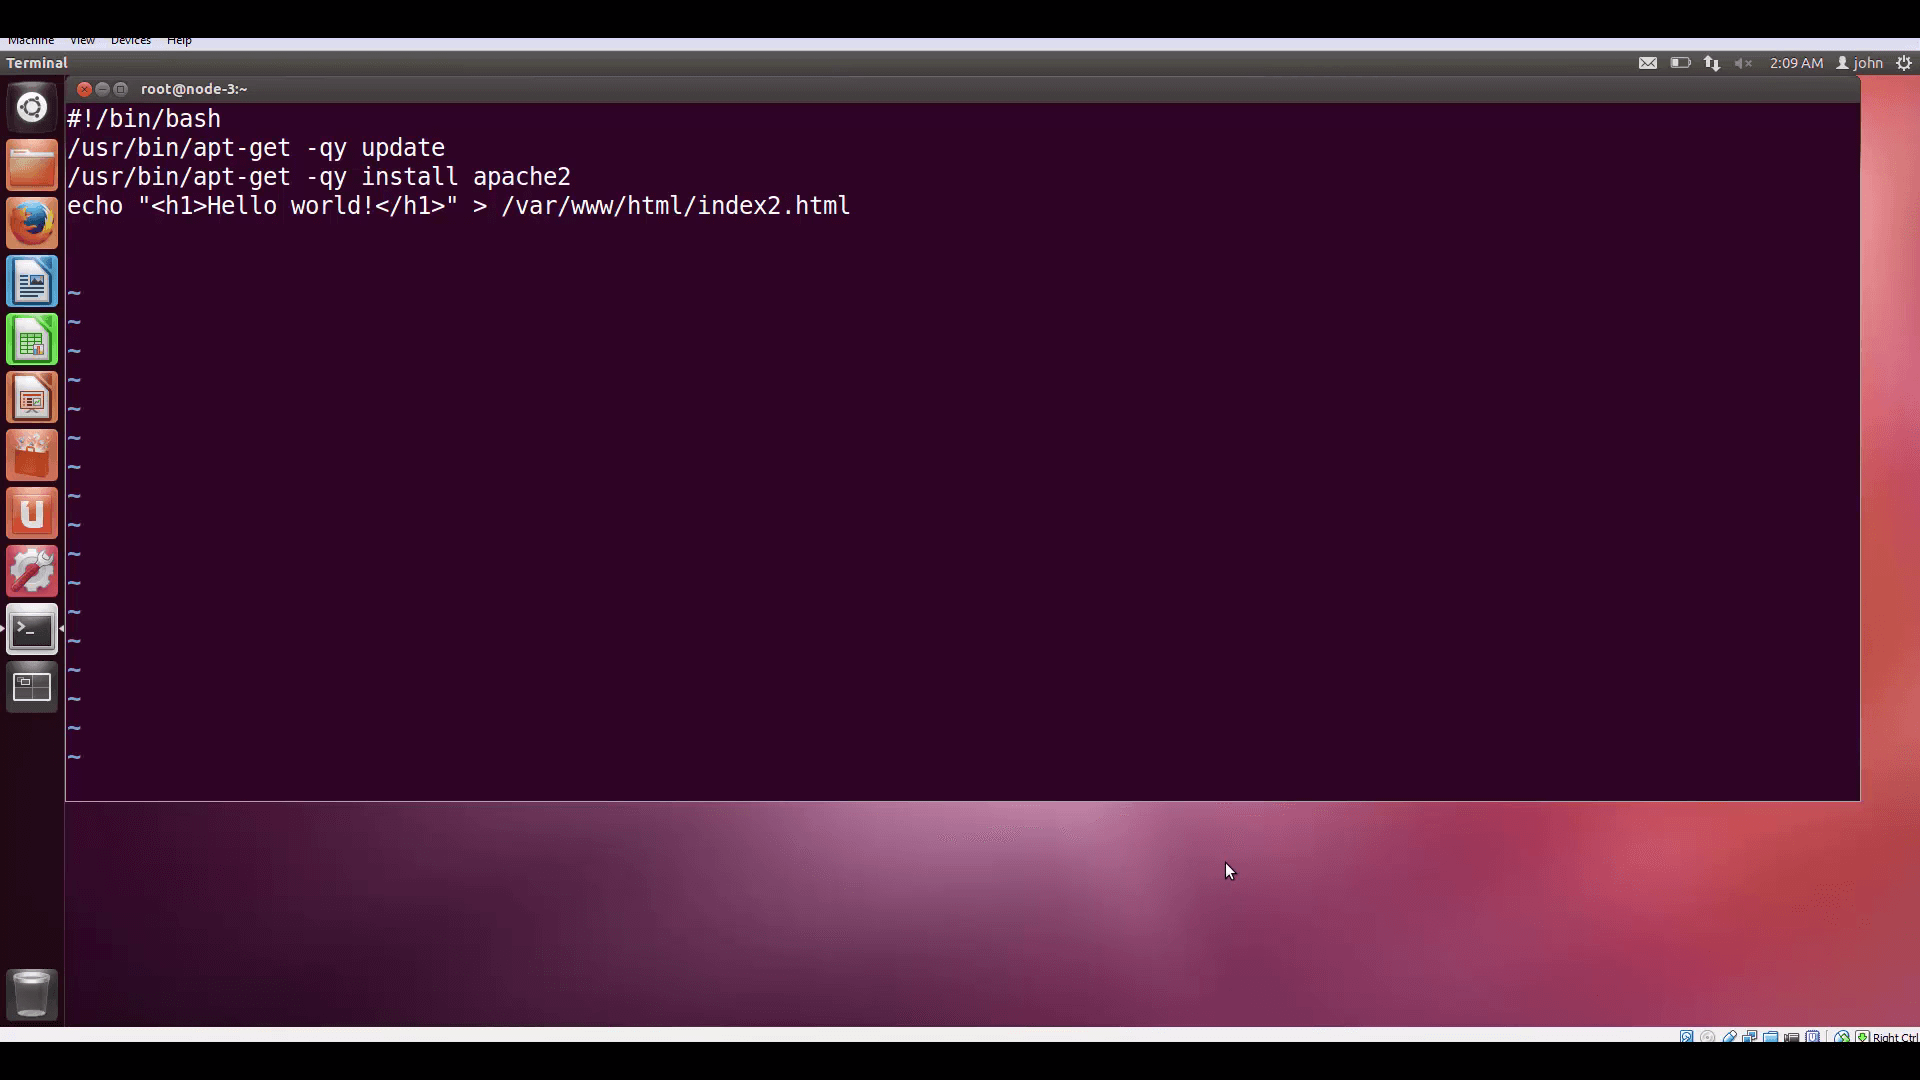
As you can see, this is the script we want to execute post-boot, to run update on our VM, install Apache2, and create an index.html file. The reason we call that file index2 is that we don’t want to conflict with the default index.html Apache installs.
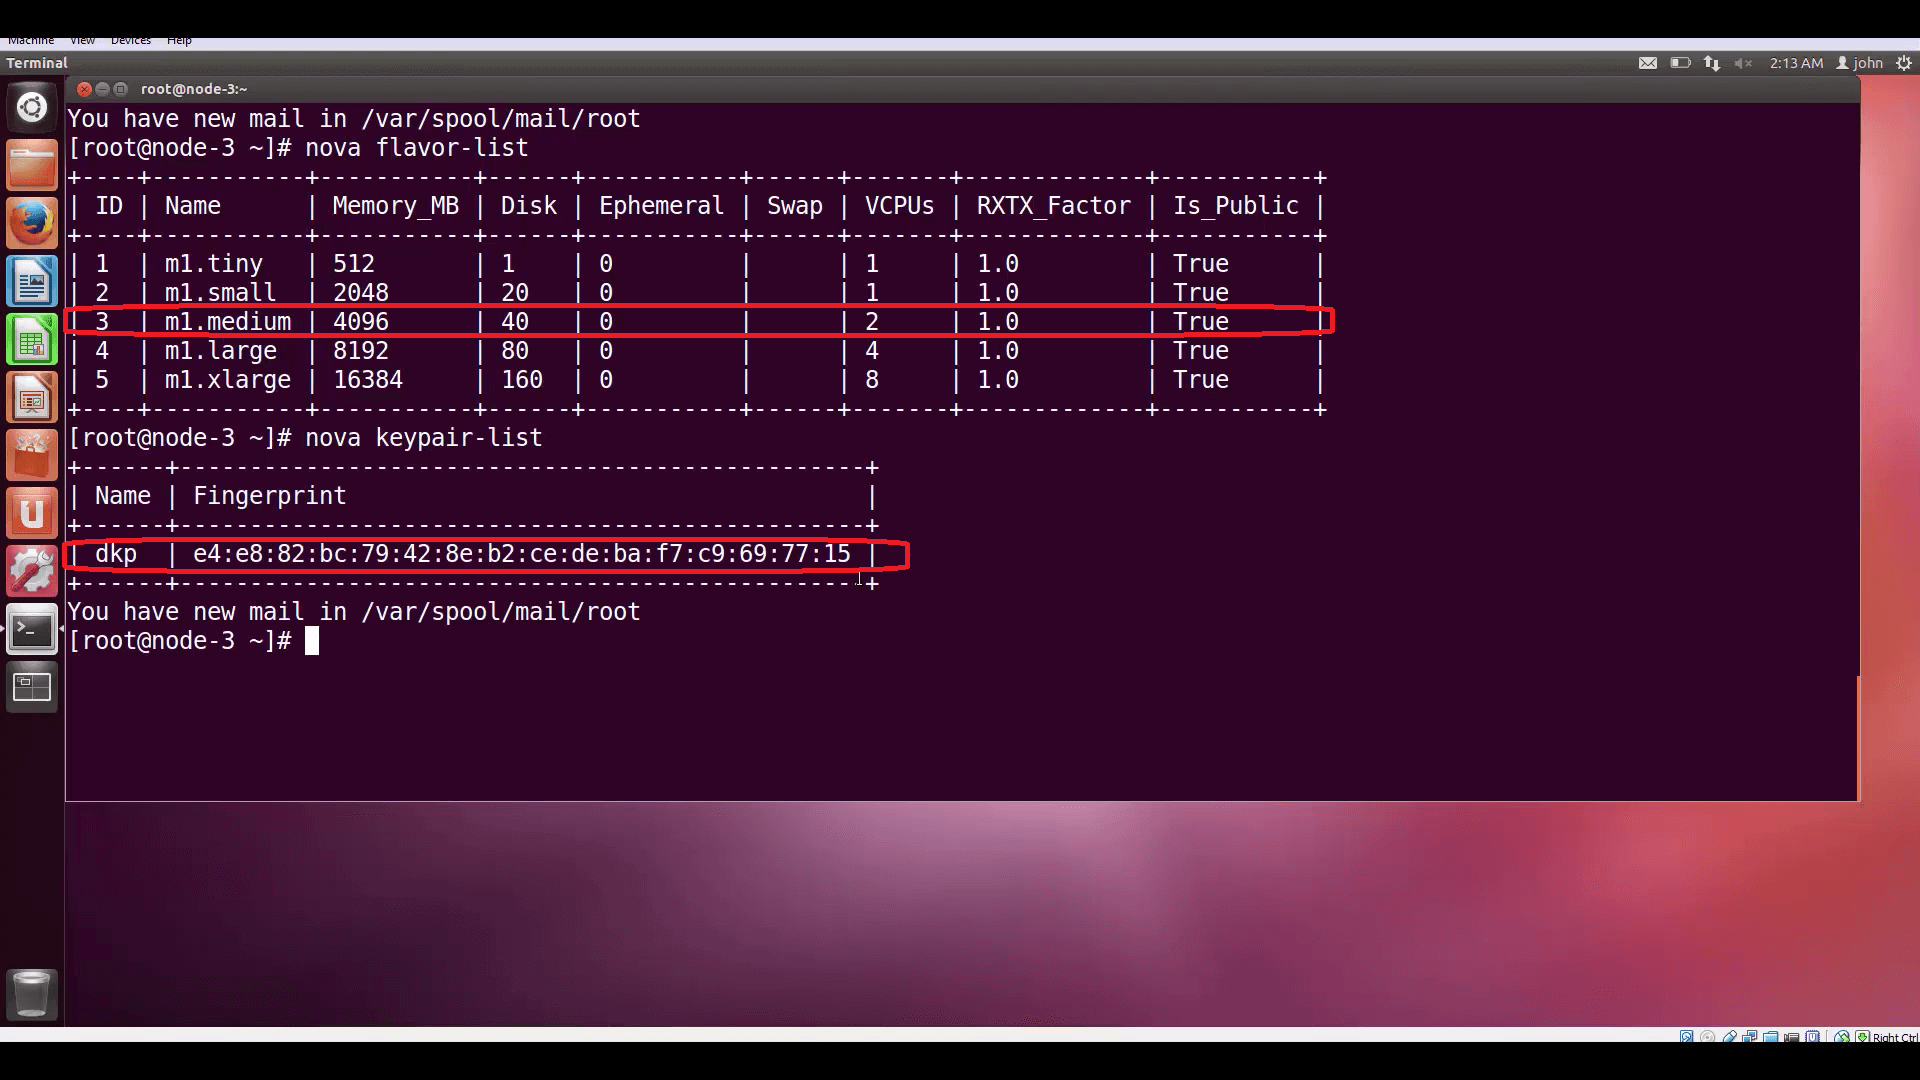
Now we can check out the VM flavors available to us by entering nova flavor-list. We’ll pick the medium flavor for our instance, which is index 3.
We can also remind ourselves of the keypairs we have available by executing nova keypair-list. We'll need the name of a key to launch our instance.
We'll find IDs for the networks we have available by executing nova network-list. We’ll attach this VM to the toplevel internal network, net04. Later, we’ll go to Horizon to give it a floating IP to make it accessible from the internet.
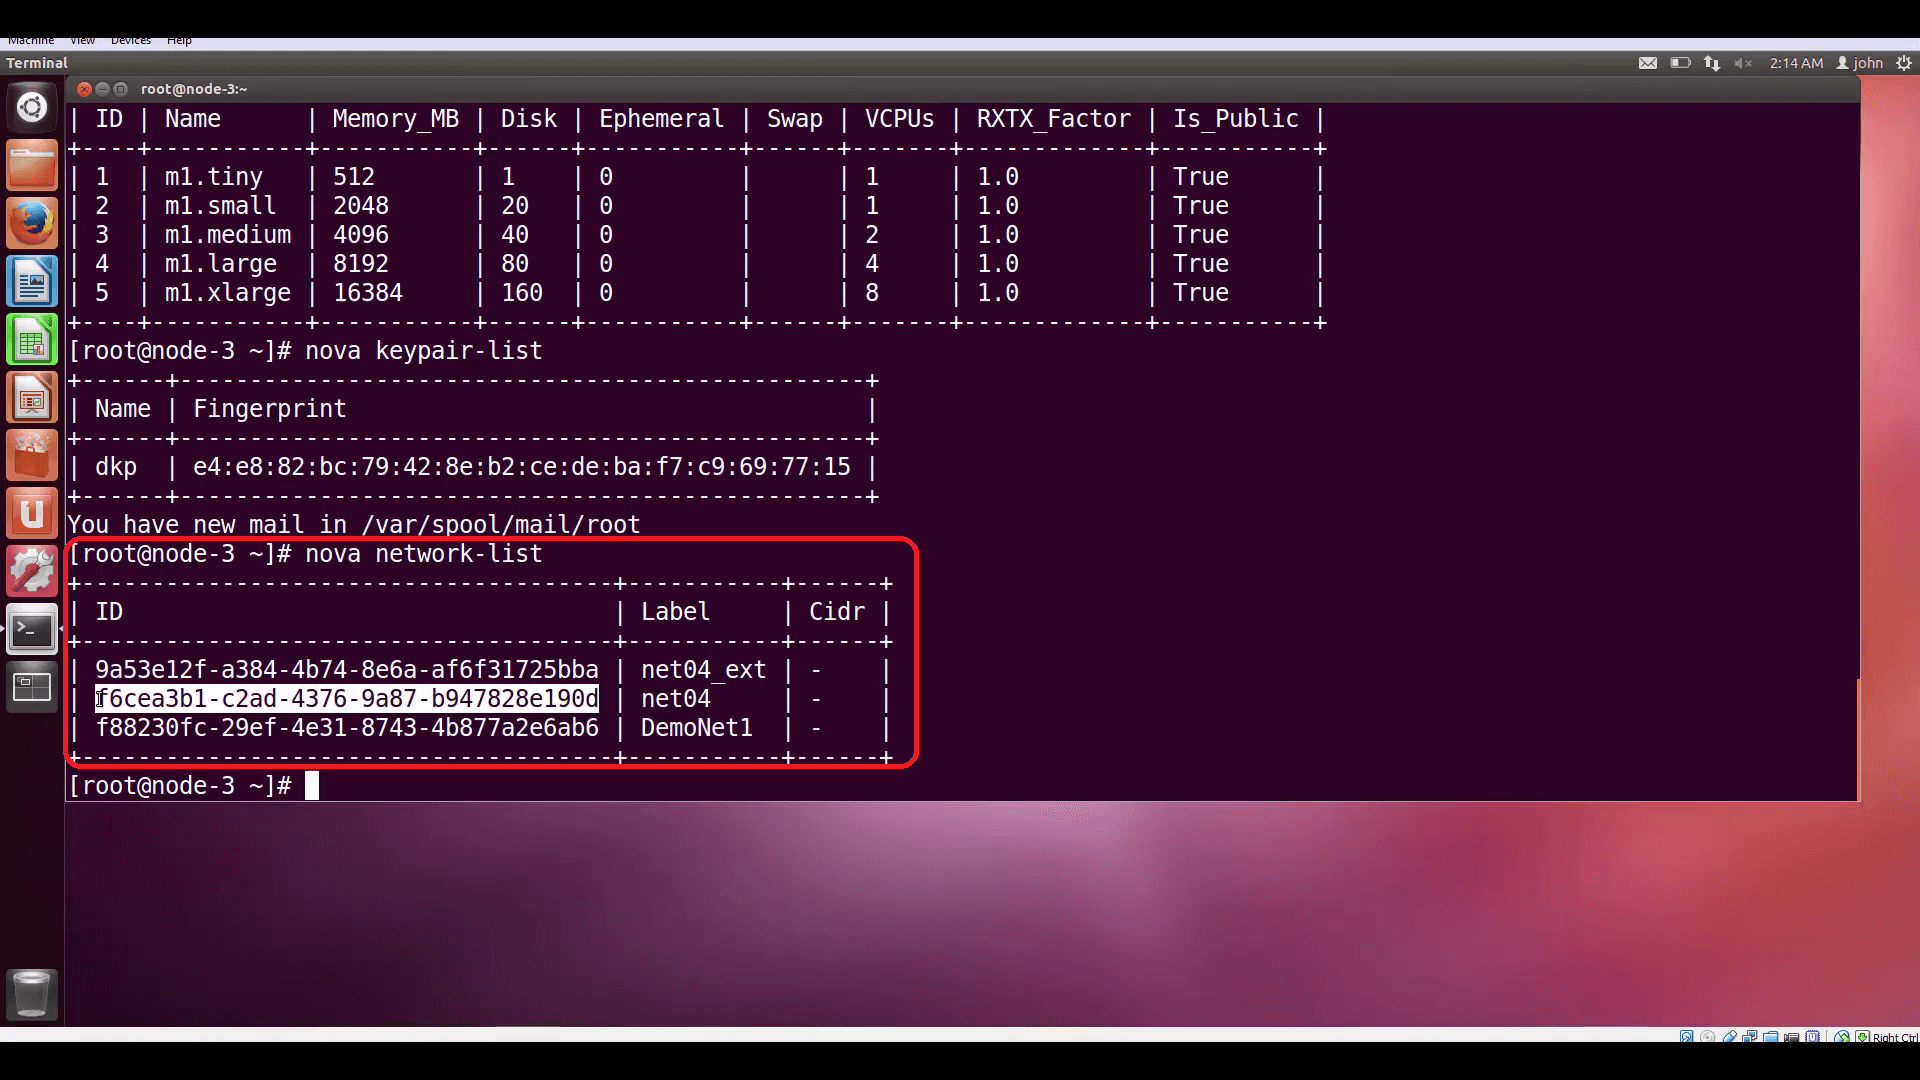
nova network-list to find IDs for available networks, and attach our instance to the net04 internal network.Finally, we'll take all the information we've assembled and include it as arguments to the nova boot command, which will launch our instance and install Apache. Note the way arguments are referenced: argument flags and data types are consistent throughout the OpenStack CLI.

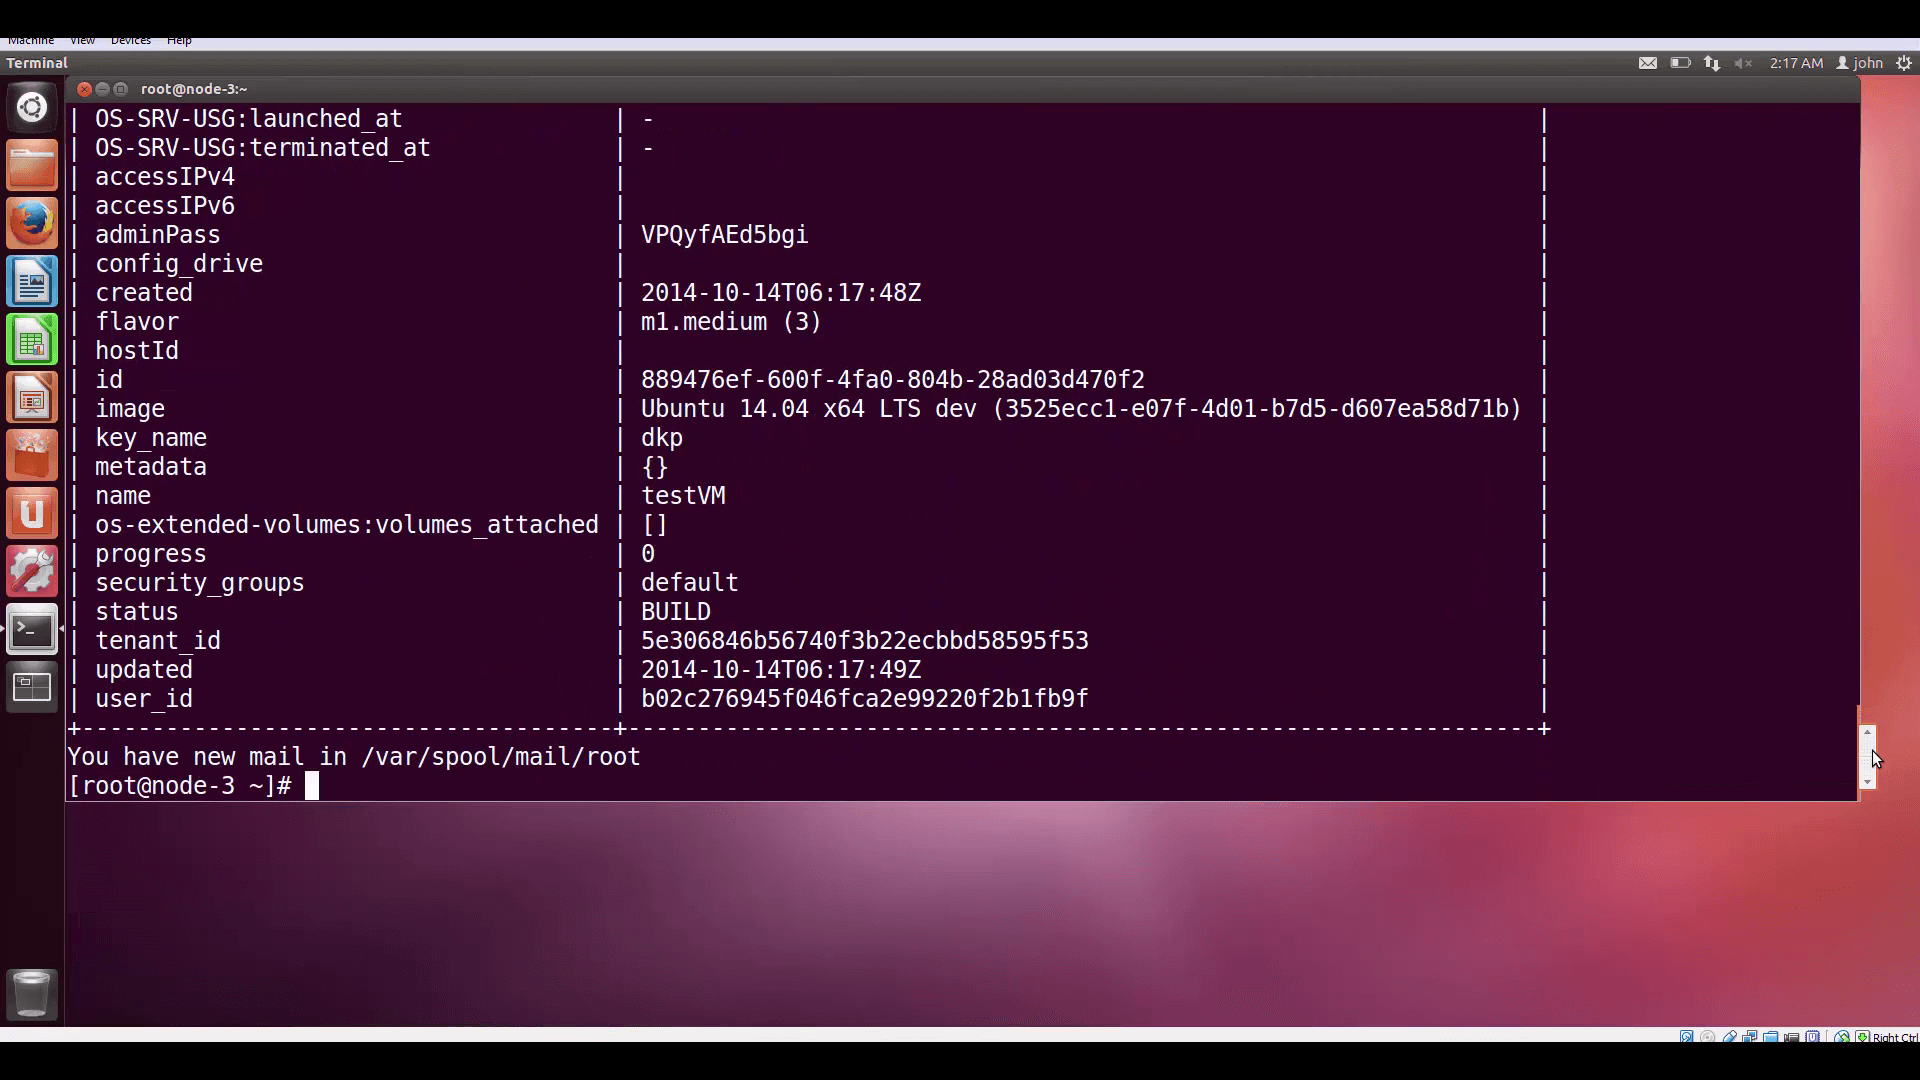
nova boot will be used to launch our instance. Note the way arguments are referenced: argument flags and data types are consistent throughout the OpenStack CLI.Nova compute gives us back a table of VM parameters and status info.
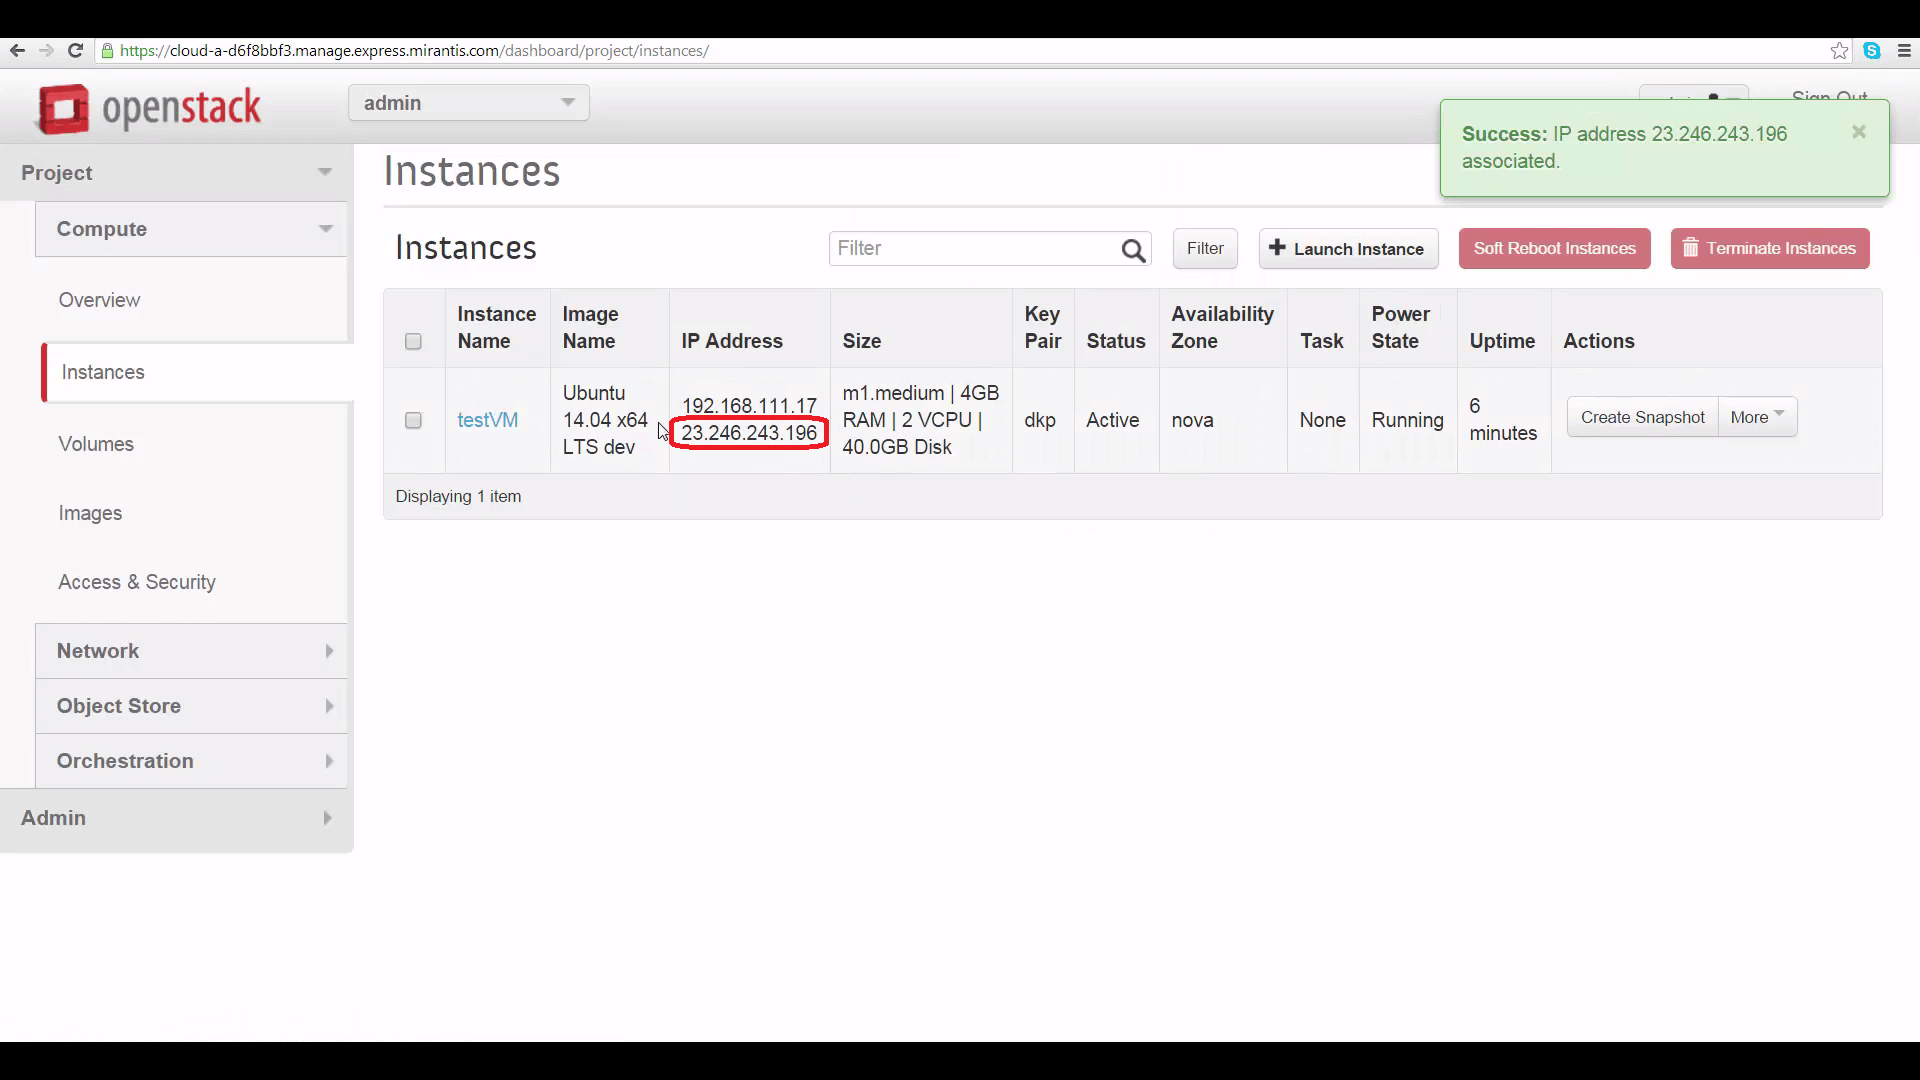
Now let’s go to Horizon for this cloud, and look at the instance list. There’s our new VM. Let’s give it a floating IP by popping down the More menu and associating one of the floating IPs we have available (I only have two assigned to this demo cloud).
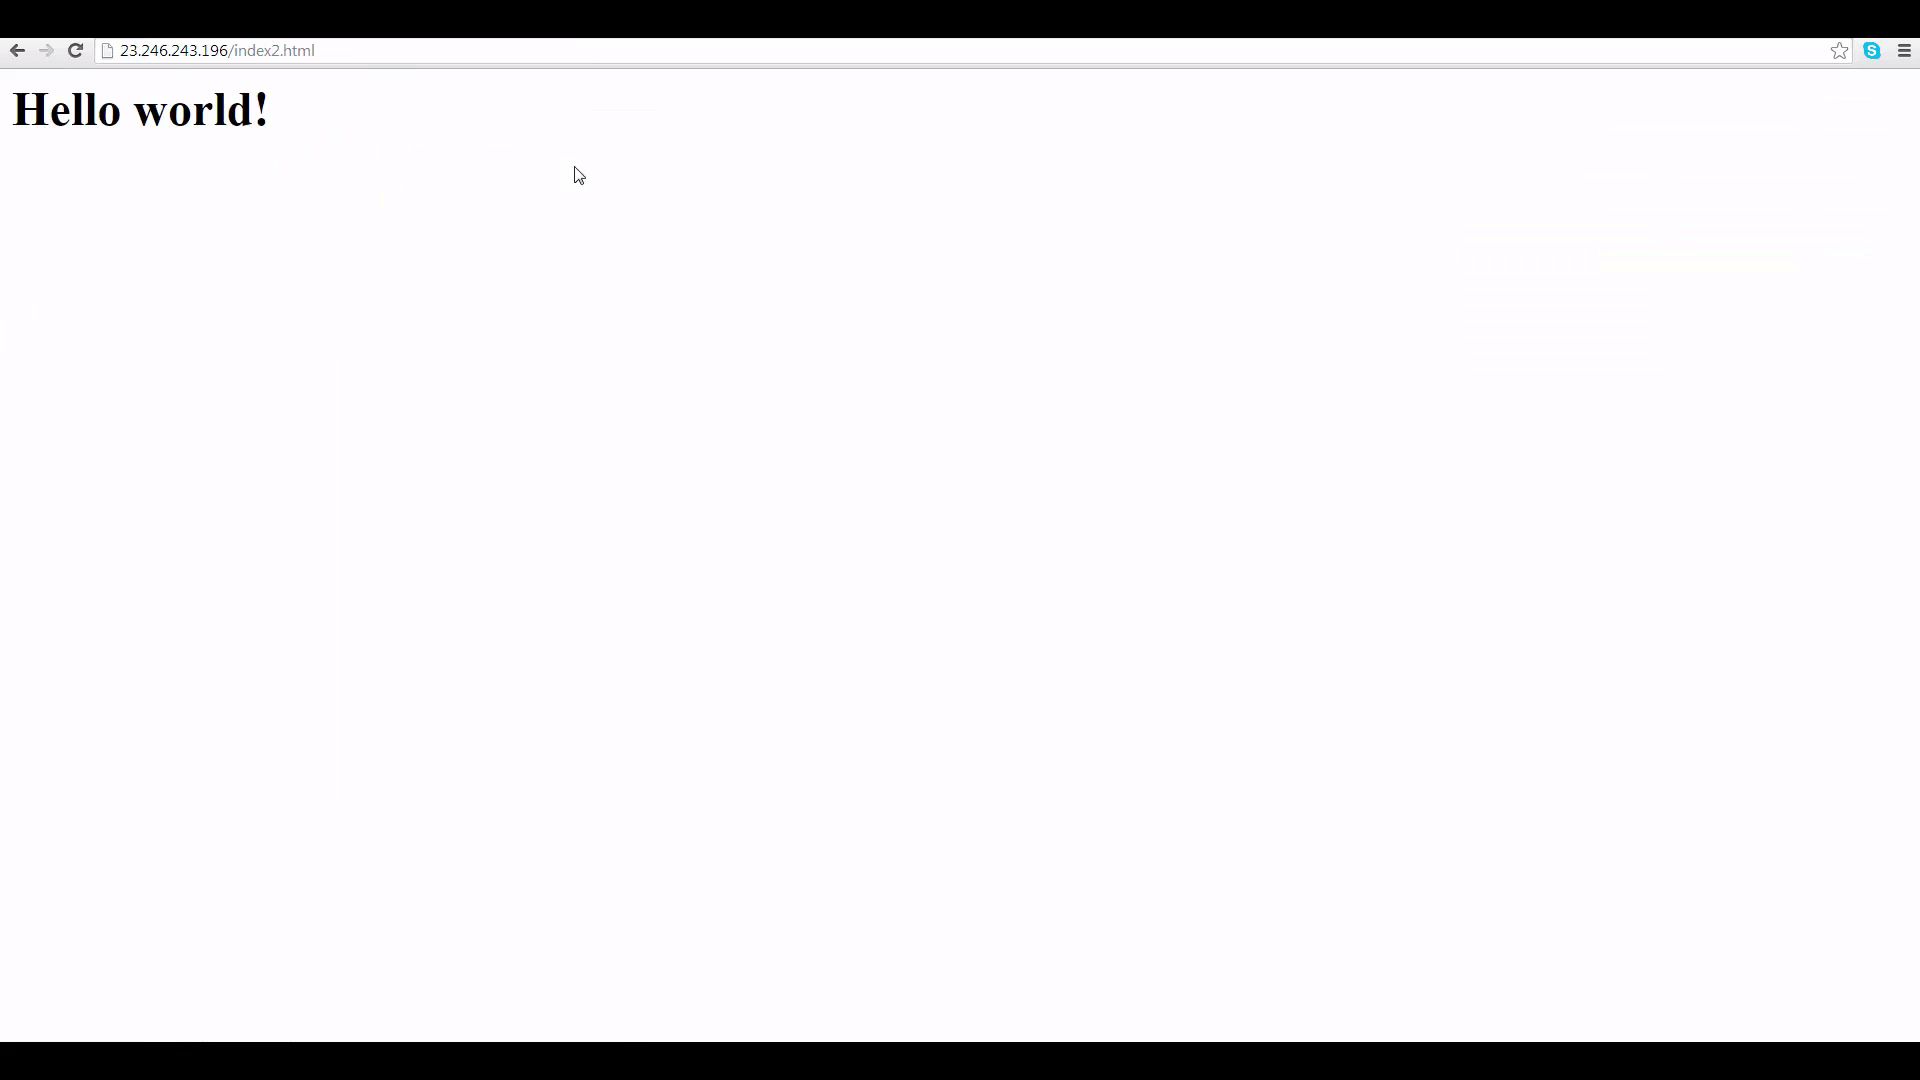
And now, let’s browse to that IP address and filename, and see if Apache is working. It is!
This is just the beginning. In future tutorials, we’ll be digging much deeper into OpenStack command-line functions. Stay tuned!
Resources:
This is the eighth in a series of short tutorials showing how to perform common cloud operations tasks in Mirantis OpenStack Express 2.0 — Mirantis’ “Private Cloud as a Service”
In our last tutorial, we began exploring Mirantis OpenStack Express’s VPN-as-a-Service feature — an important capability for creating linked and hybrid clouds. Now, we’re going to start peeking under the hood, and learn how to find our way to the OpenStack command line for your Mirantis OpenStack Express cloud or project/tenant.
Basic Ops Tutorials
Mirantis OpenStack Express — Mirantis' "Private Cloud as a Service" — is the fastest way to get your hands on a fully-functional, optimally-configured, private OpenStack cloud, running on hosted bare metal and able to scale on demand. This series of short tutorials shows how to perform common cloud operations tasks in MOX, and offers links to documentation and learning resources. Though aimed at Mirantis OpenStack Express, many of the techniques discussed here will also work on a private OpenStack cloud deployed using Mirantis OpenStack.
Tutorials:
- Adding New Custom Boot Images
- Launching a VM from a Boot Image
- Creating a Block Storage Volume
- Attaching and Using Volumes
- Creating new VM Flavors
- Setting Up a project
- Murano in a Minute
- Mirantis OpenStack Express VPN-as-a-Service
- Running OpenStack from the Command Line
- Automating VM Launch and Apache Installation
Why the Command Line?
Why access your Mirantis OpenStack Express cloud from the command line? One reason is to exploit the hundreds of powerful commands not available through Horizon. (There are hundreds of commands in the complete OpenStack Command-Line Reference.)
Just as important, accessing OpenStack from the command line, and ultimately via its REST APIs, gives you the power to automate operations. This can save you time, and opens the door to applications like continuous-integration/continuous-delivery (CI/CD).
That’s why Mirantis OpenStack Express gives you full root access to your private OpenStack environments — something most cloud-as-a-services don’t do.
Step by Step
The fastest way to get to your cloud’s command line is by leapfrogging: SSH into your Fuel Master Node, then use its authentication to log directly into your controller node as root.
Three preparatory steps are required:
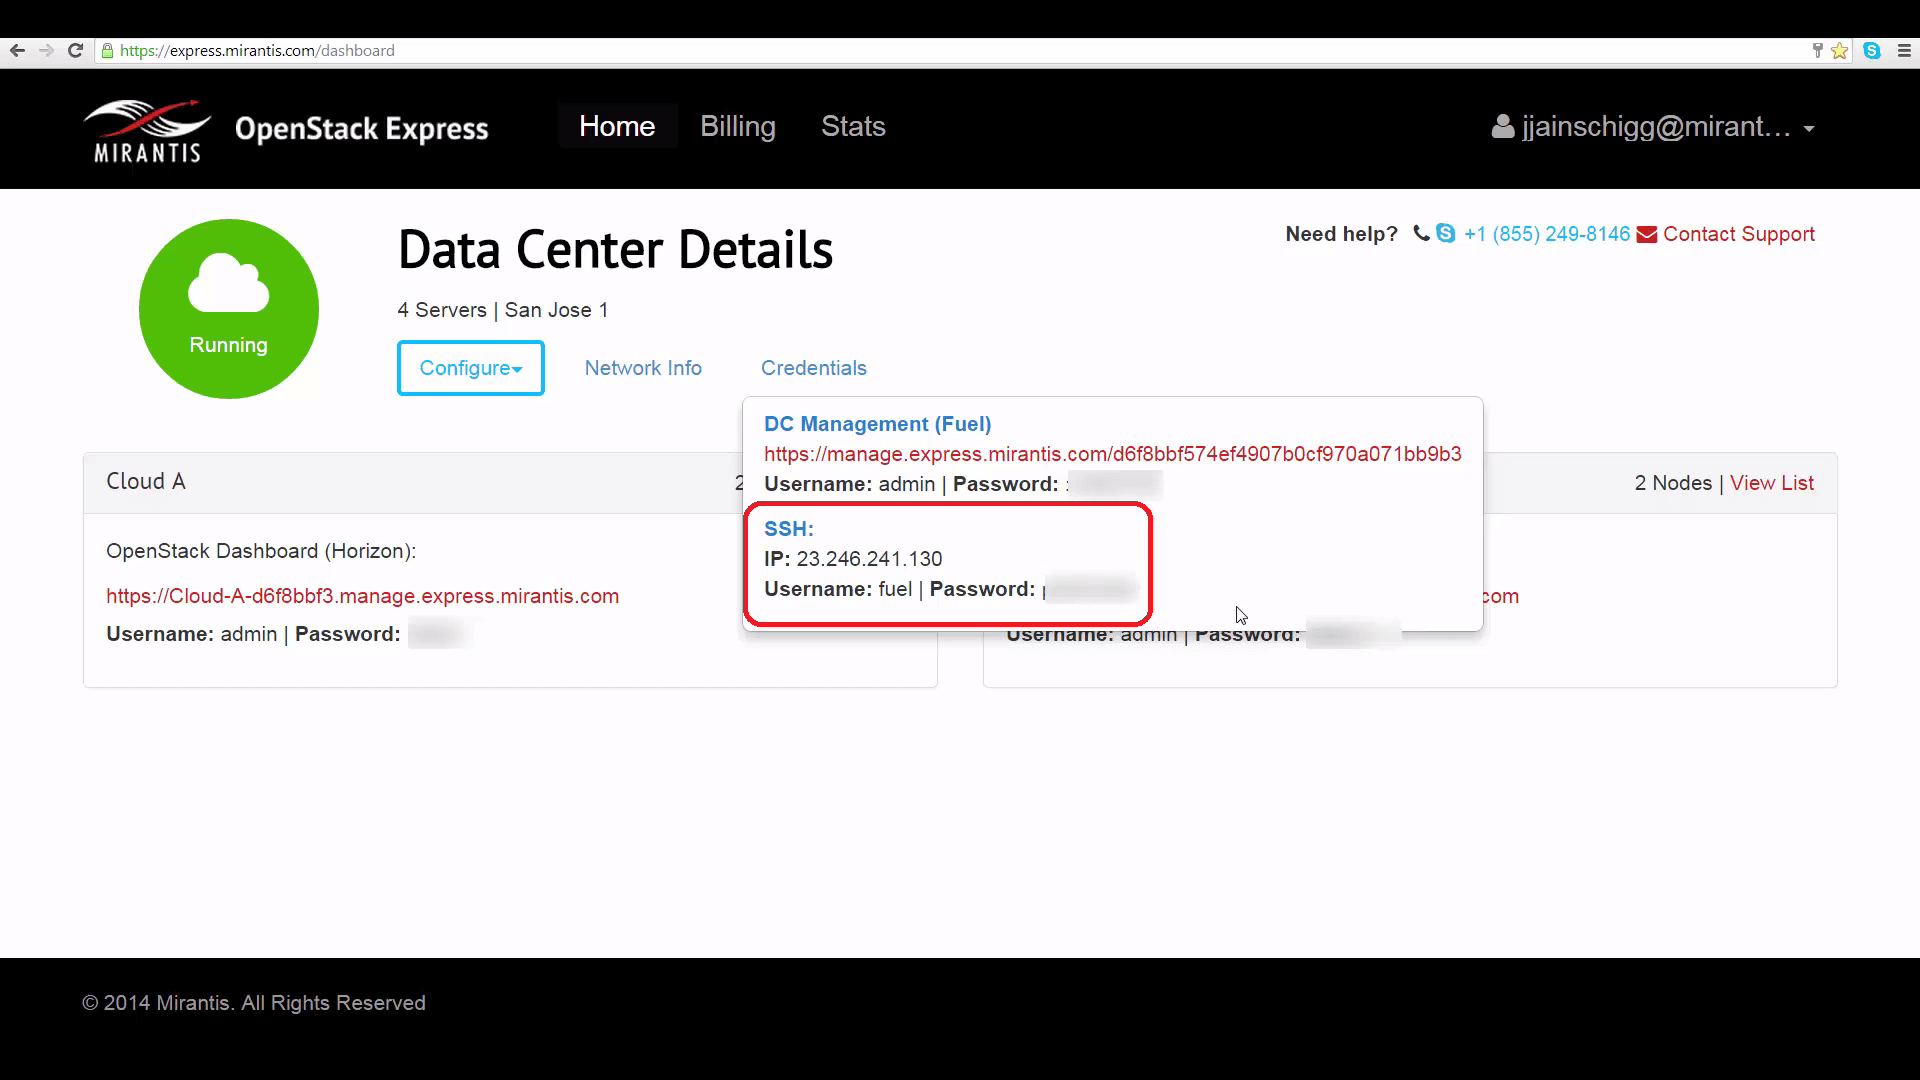
First, get the IP address of the Fuel server, plus credentials, from the Mirantis OpenStack Express Dashboard:
From your MOX dashboard, click the Credentials link. At the bottom of the popup, you’ll see an IP address for the Fuel Master Node, plus login details, for SSH’ing into your Fuel server.
Next, use Fuel to find the fully-qualified internal domain name (FQDN) of the controller node of the cloud you want to access:
- On the same popup, right above the SSH IP, you’ll see a link to Fuel, along with login details. Click the link, and if necessary, supply the username and password.
- At the Fuel homepage, click the icon corresponding to the cloud you want to access.
- Under the Nodes tab, find the Controller node, and click the gear icon to the right. This pops up a summary dialog of this node’s characteristics.
- Find the FQDN of the Controller node: on my cloud, this is ‘node-3.’

Finally, from Horizon, get the OpenStack remote control or RC script you’ll use to authenticate to the OpenStack API:
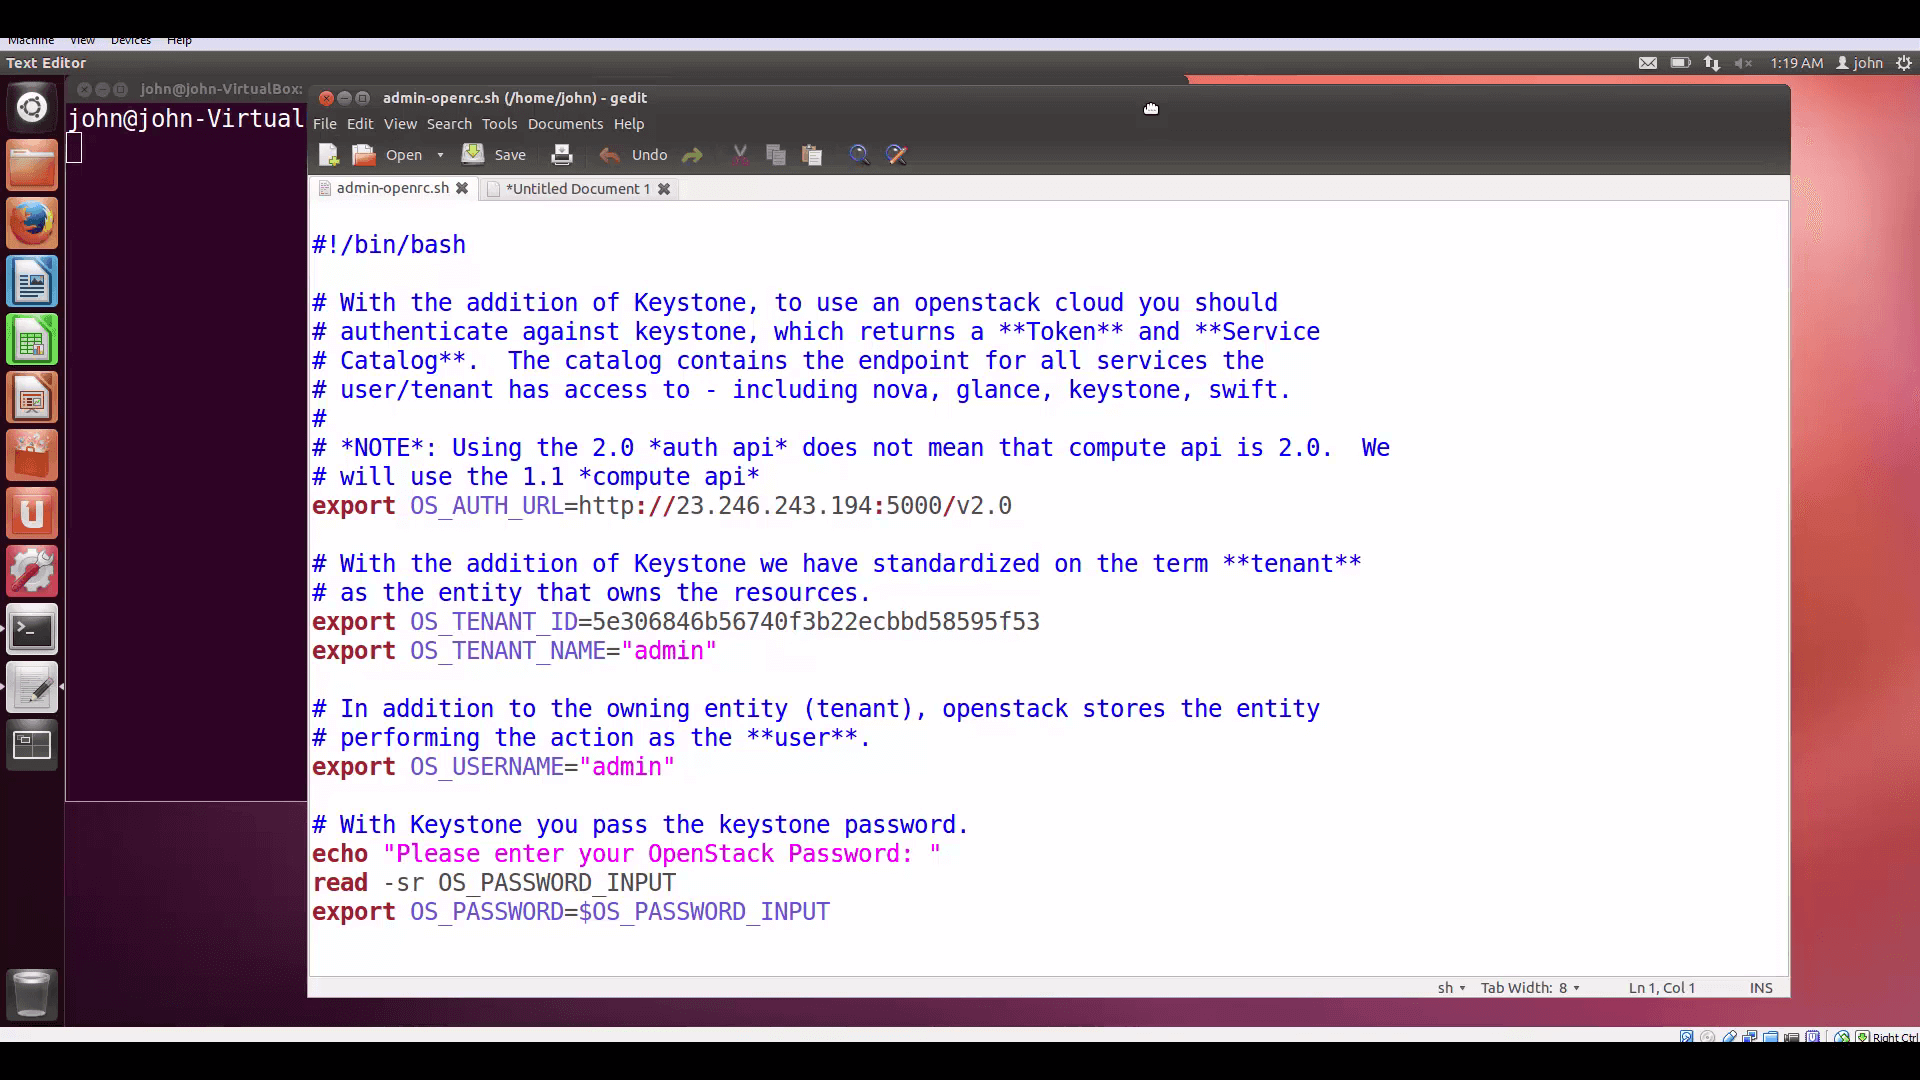
Get the script by going to our cloud’s Horizon interface, clicking Project, Access & Security, clicking the API Access tab, and clicking the button on the upper right, marked Download OpenStack RC File. The toplevel RC file is called admin-openrc.sh.

Here’s what it looks like (see below). In fact, this step is optional, since an identical openrc script is automatically saved for you in the root directory of your Controller node by Fuel. But we’re going through the process anyway, so you can see how it works in other spins of OpenStack you may encounter, and later, if you want to authenticate in the context of tenant projects.
The next steps involve leapfrogging via SCP and SSH from your desktop to the Fuel server, and then from the Fuel server to your cloud’s Controller node, as root.
Using the IP address, login (fuel) and password we retrieved from the Credentials popup, we start by SCPing the RC file to the Fuel server’s current working directory.
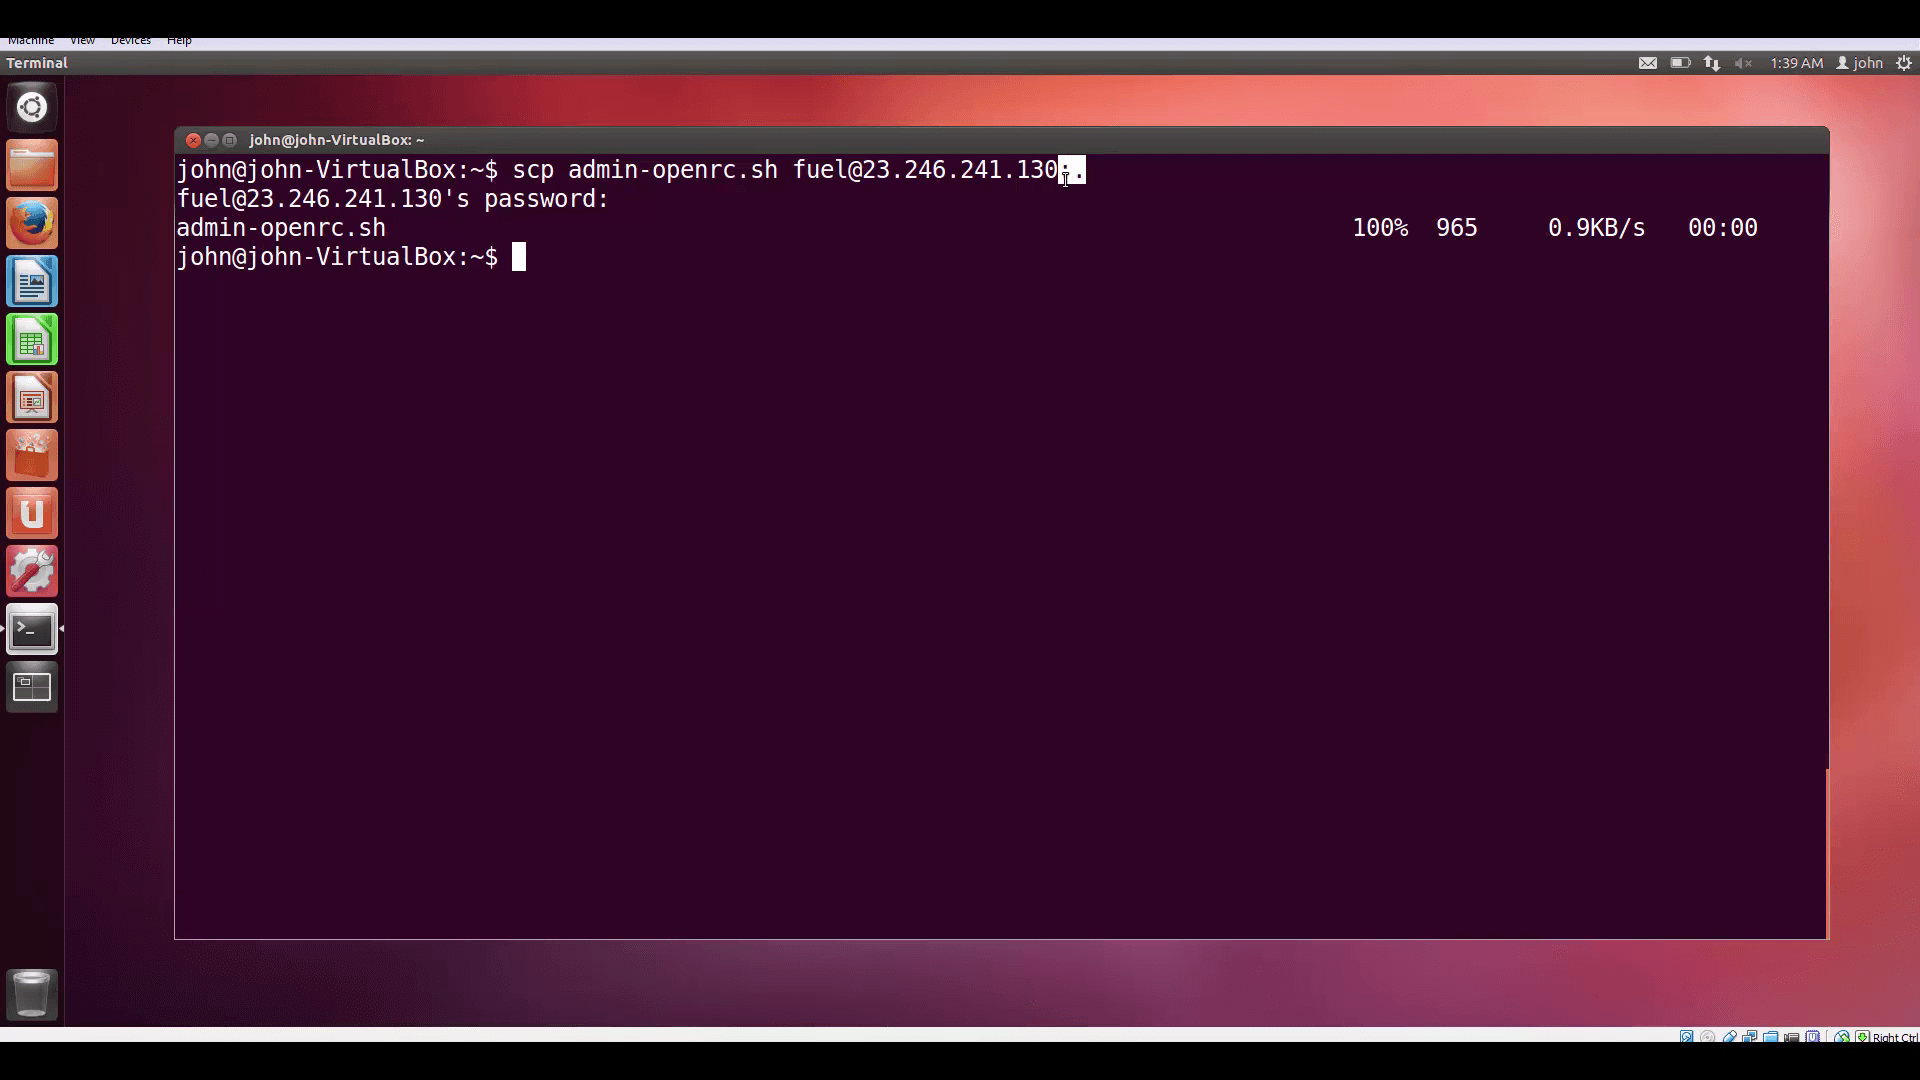
Note the addition of ‘:.’ to the end of the IP address to denote the CWD. You’ll need to provide the fuel account’s password.
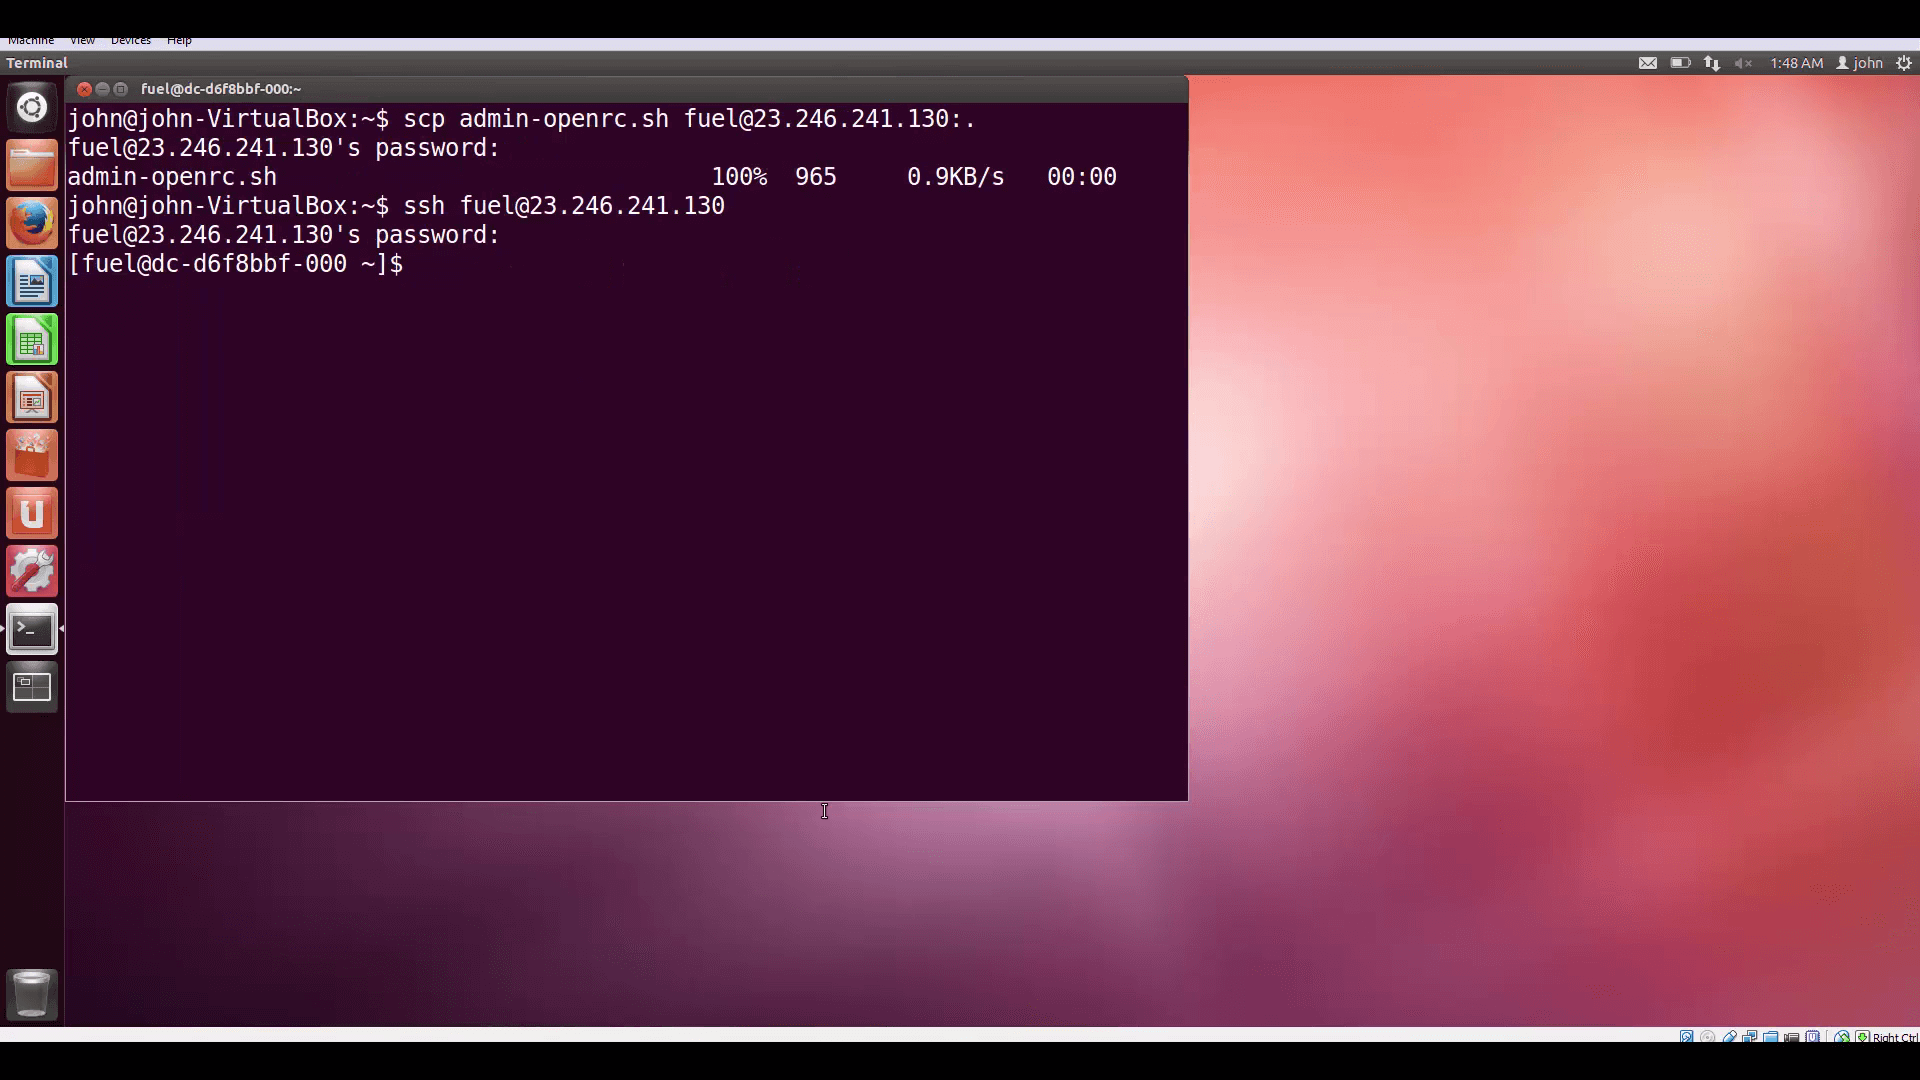
Then we SSH to the same place, again supplying the fuel account’s password.
Now for our second leapfrog jump. First, we SCP the RC file to the CWD of the root account on the Controller server.
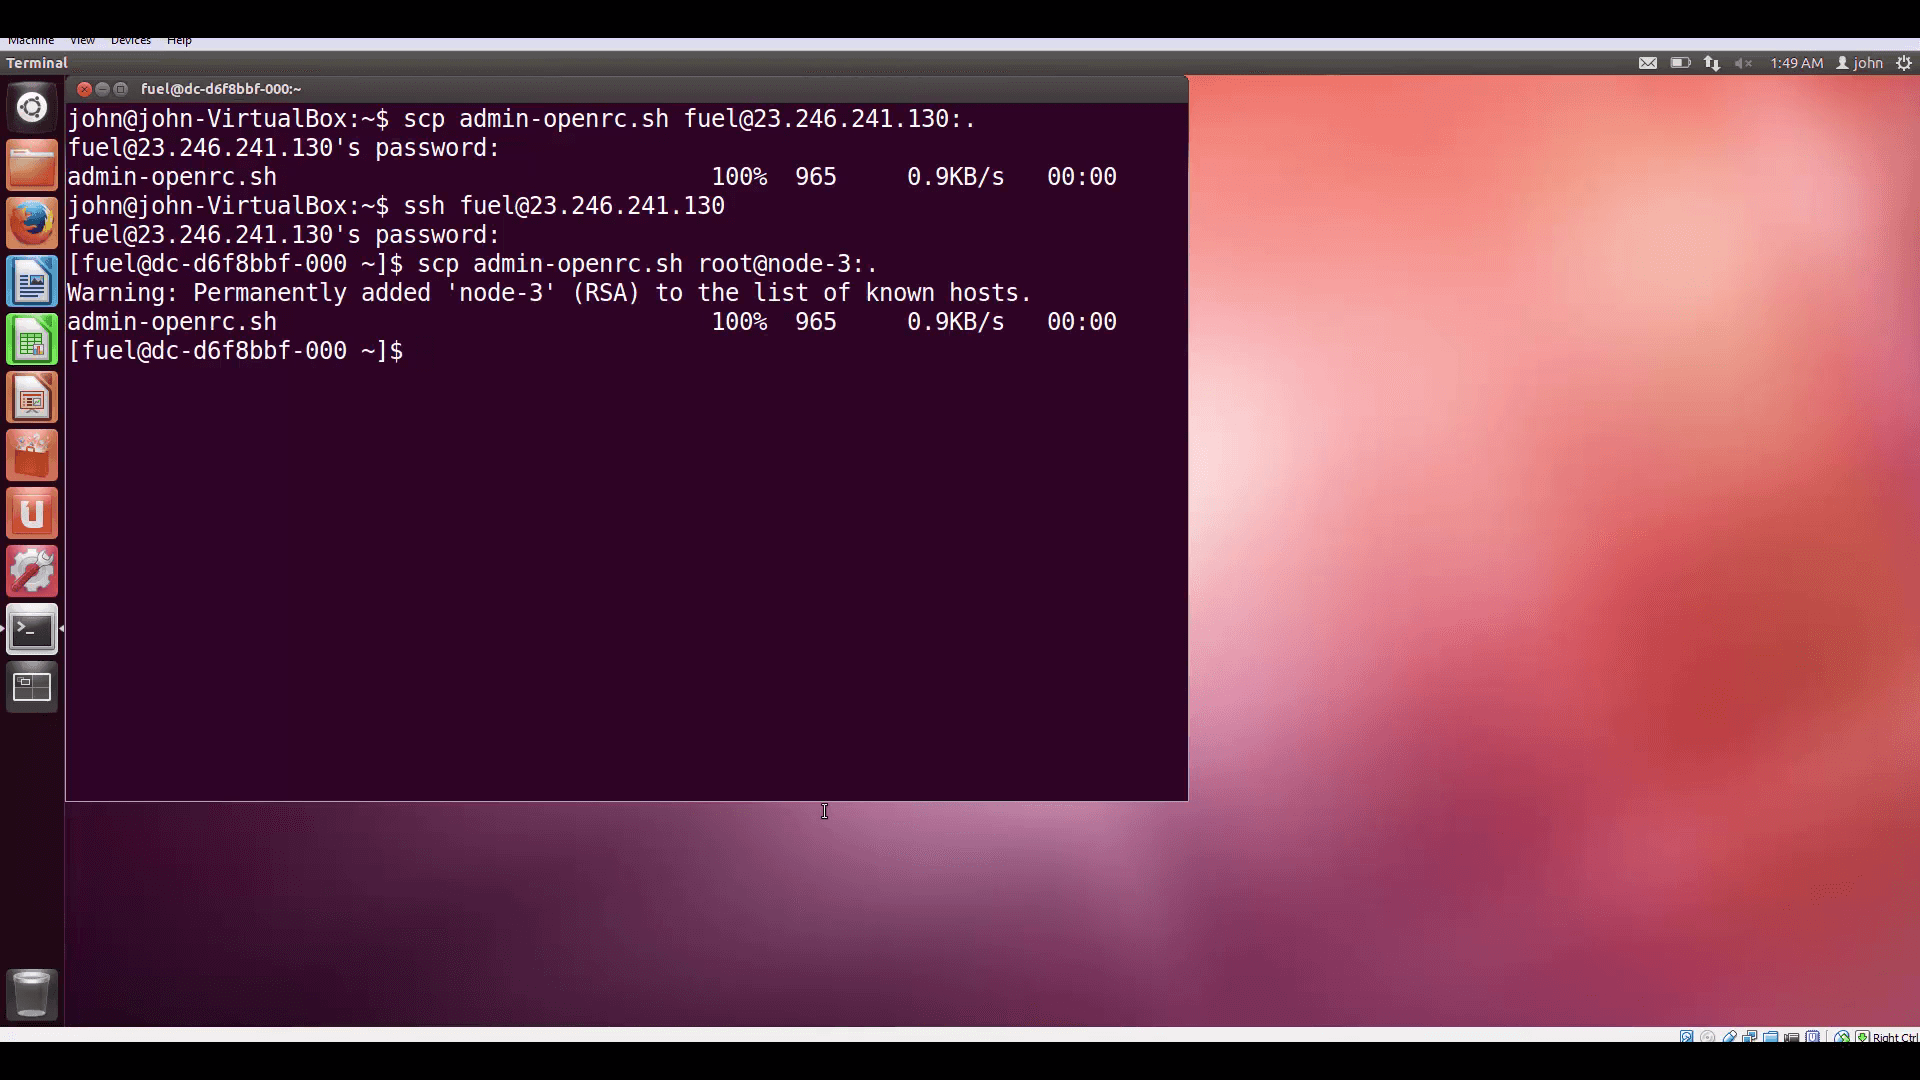
Finally, SSH to the Controller server.
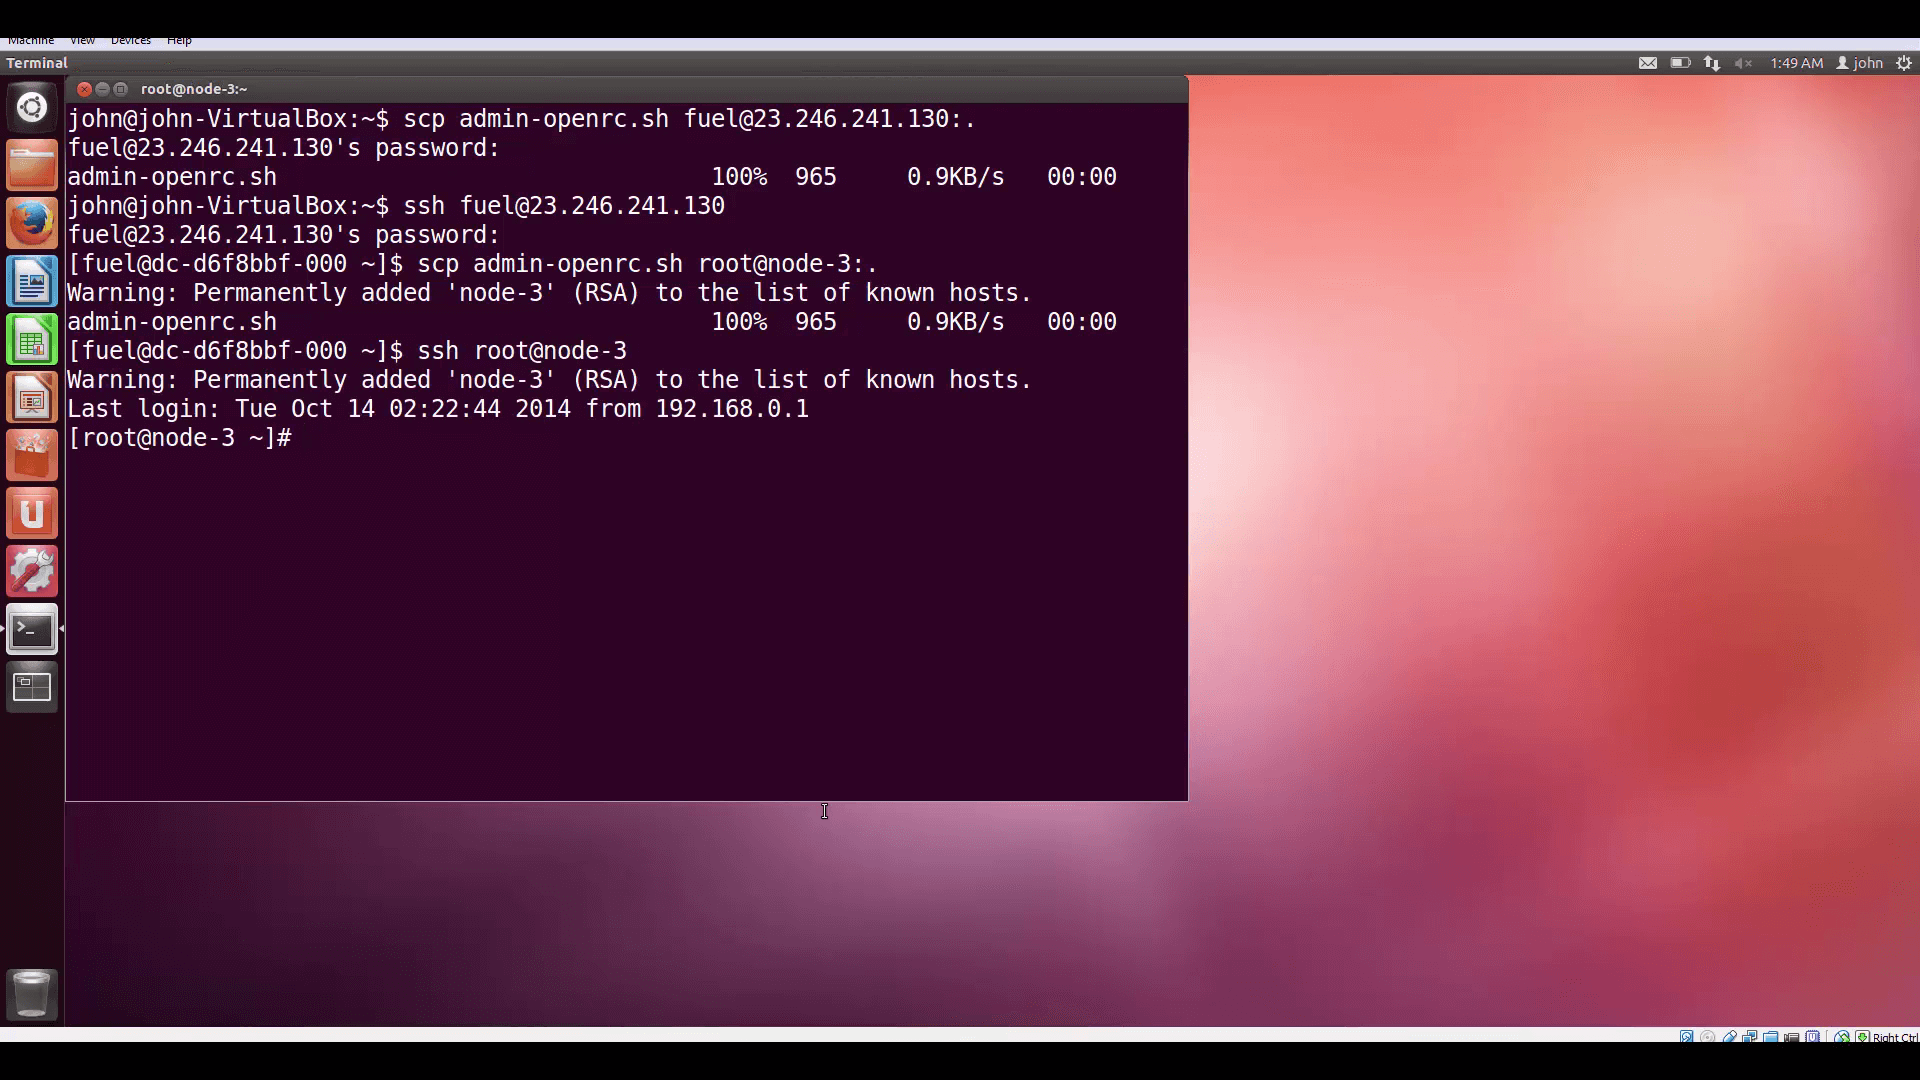
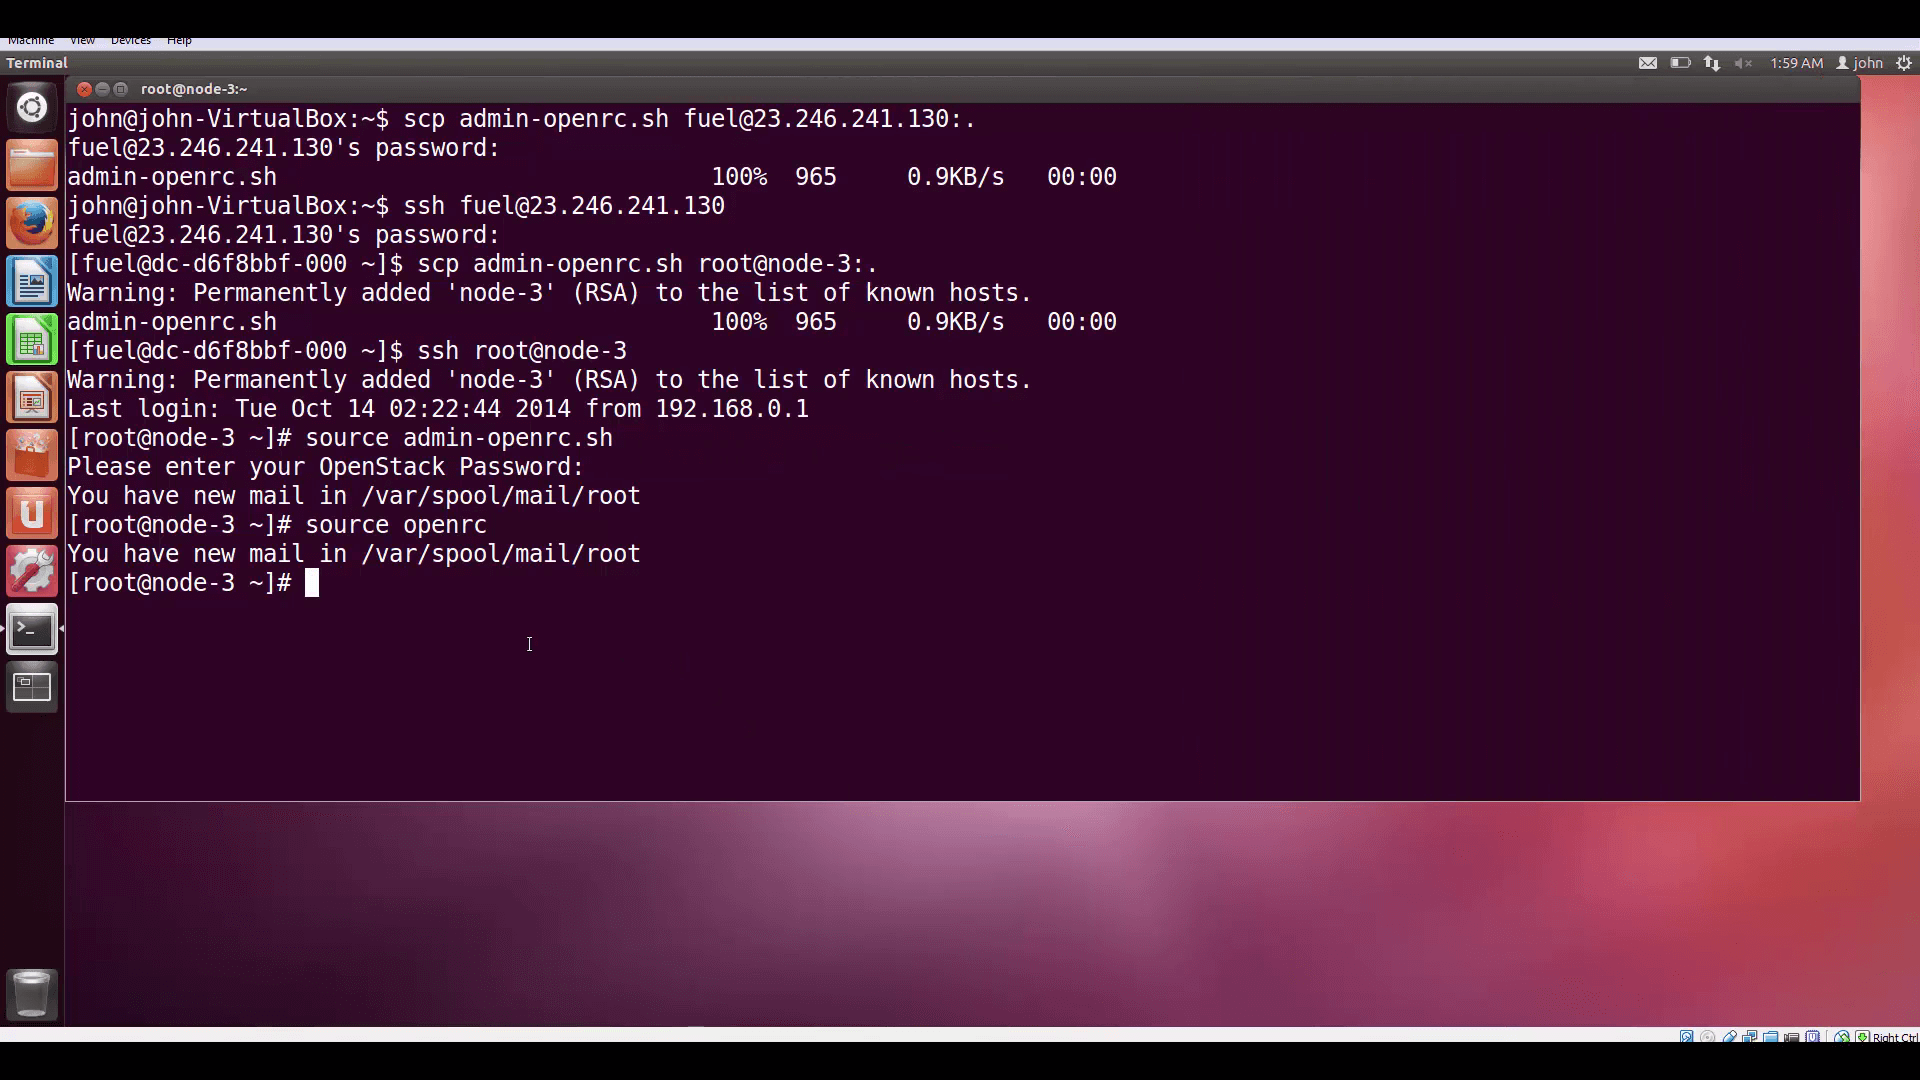
And you’re there! Now we can authenticate to OpenStack by sourcing our RC file. We could also have sourced the openrc file already in place, and avoided all the scp file transfers.
Now we can issue a test command to see if we’re hooked up. The command keystone tenant-list will produce a list of tenants (projects) currently active in our cloud.
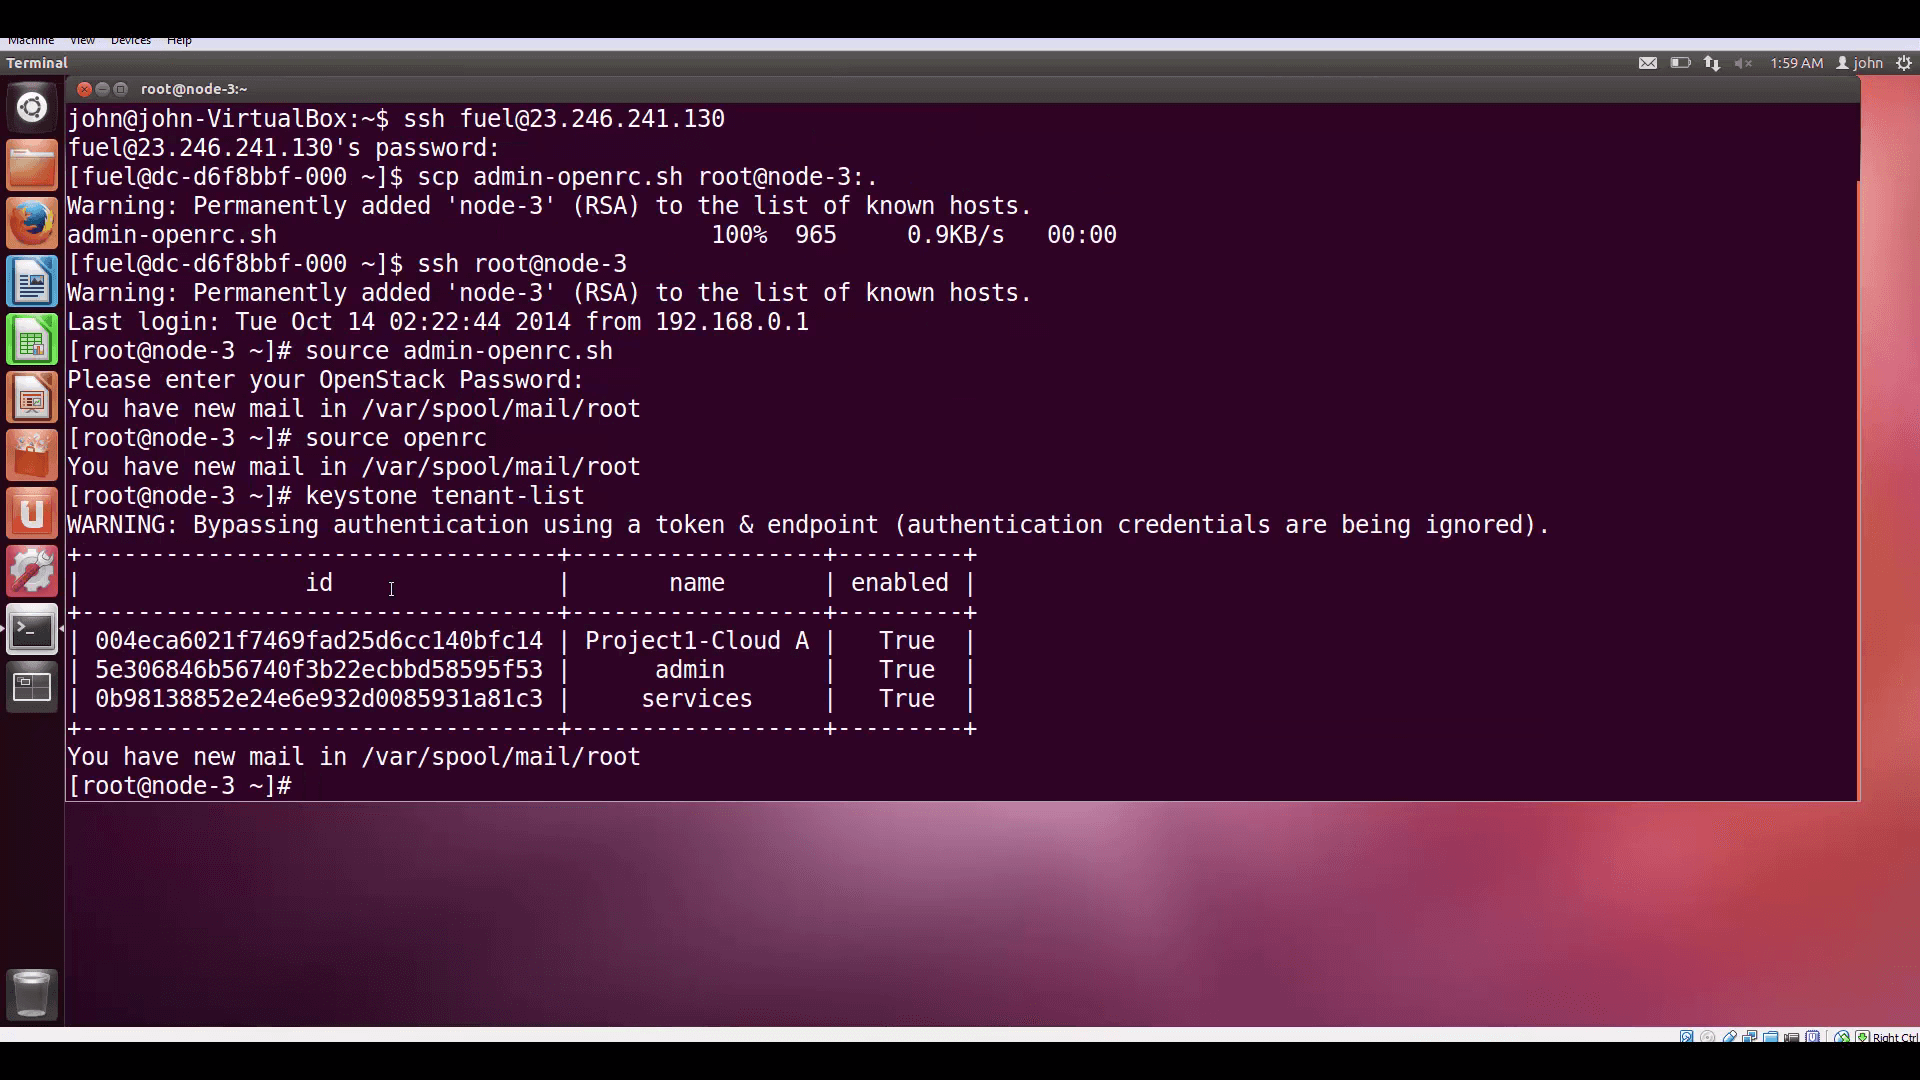
keystone tenant-list produces a list of projects (tenants) currently active in our cloud.Now go on to our next post in this series and learn how to put your newfound OpenStack CLI skills to work by defining and launching a VM, and installing Apache on it automatically.
Resources:
- Mirantis OpenStack Express 2.0 Documentation
- Mirantis OpenStack Express Operations Guide
- OpenStack Command-Line Reference
- Check out Express for yourself at https://express.mirantis.com.
- Mirantis OpenStack Express 2.0 Documentation
- Mirantis OpenStack Express Operations Guide
- OpenStack Command-Line Reference
Check out Express for yourself at https://express.mirantis.com.


