
Create and manage an OpenStack-based KaaS child cluster
Nick Chase - November 19, 2019

Once you've deployed your KaaS management cluster, you can begin creating actual Kubernetes child clusters. These clusters will use the same cloud provider type as the management cluster, so if you've deployed your management nodes on OpenStack, your child cluster will also run on OpenStack.
The general process looks like this:
Once you add machines to a cluster through the UI, KaaS automatically provisions them and adds them to the actual Kubernetes cluster, so you can also use these instructions for scaling up your KaaS child cluster.
What to try it out for yourself? Download the Mirantis KaaS public beta!
The general process looks like this:
- Create an empty cluster.
- Add machines to the cluster. As part of this process, Kubernetes gets deployed on the machines.
- Download the KUBECONFIG so that you can access the cluster.
Create a child cluster
We'll start by creating a child cluster based on OpenStack. The general process for using other cloud providers is similar.- The first thing we need to do is gather artifacts from the host cloud itself. Log into your OpenStack Horizon dashboard and click API Access -> Download OpenStack RC file --> OpenStack clouds.yaml file.

- Next we need the SSH key we'll use to access the host machines. If you haven't already got one, you can create a new one from the command line. Make note of the file in which you store it:
$ ssh-keygen -t rsa -b 4096 -C "you@example.com"
Generating public/private rsa key pair.
Enter file in which to save the key (/Users/nchase/.ssh/id_rsa): kaas
Enter passphrase (empty for no passphrase):
Enter same passphrase again:
Your identification has been saved in kaas.
Your public key has been saved in kaas.pub.
The key fingerprint is:
SHA256:DKSxJ6ChGJJwwBnUPd3kEAXxn4TmKpTTKObCd3vtAeo you@example.com
The key's randomart image is:
+---[RSA 4096]----+
|X=* o o=Bo       |
|=B o B .+..      |
|+   + + = .     |
|     o+oo o .    |
|   o = oS. o     |
|. o o o o        |
| o o + ...       |
|  o o o. ..      |
|     E. ..       |
+----[SHA256]-----+
- Now log in to the KaaS web UI using credentials for a user with either operator or writer permissions. Your administrator will have set this up ahead of time. (If you are the administrator, see the documentation for information on creating users.)
- Select the required namespace. Your administrator will have set this up ahead of time as well. (Again, if you are the administrator, see the documentation.)

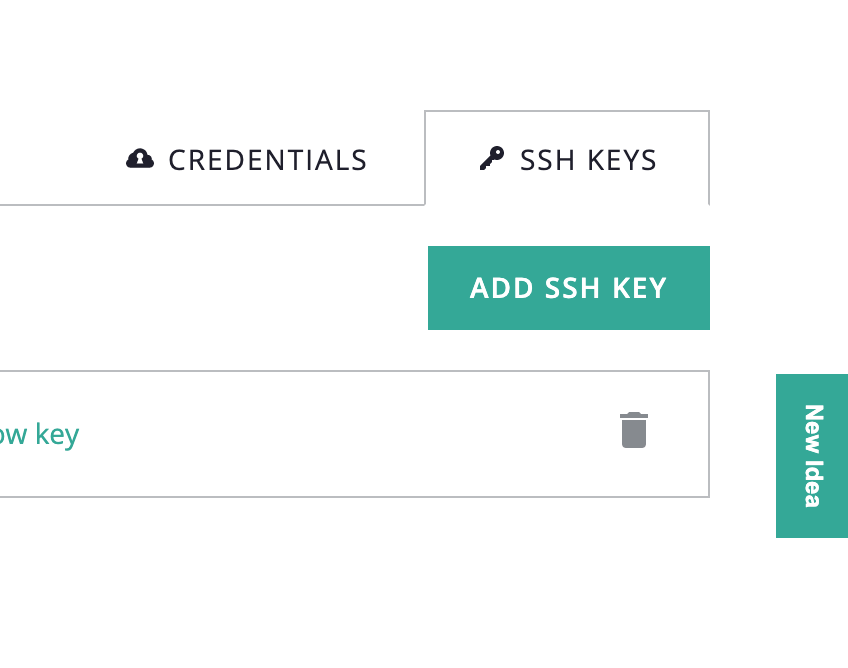
- On the upper right side of the namespace page, click SSH keys -> Add SSH Key..
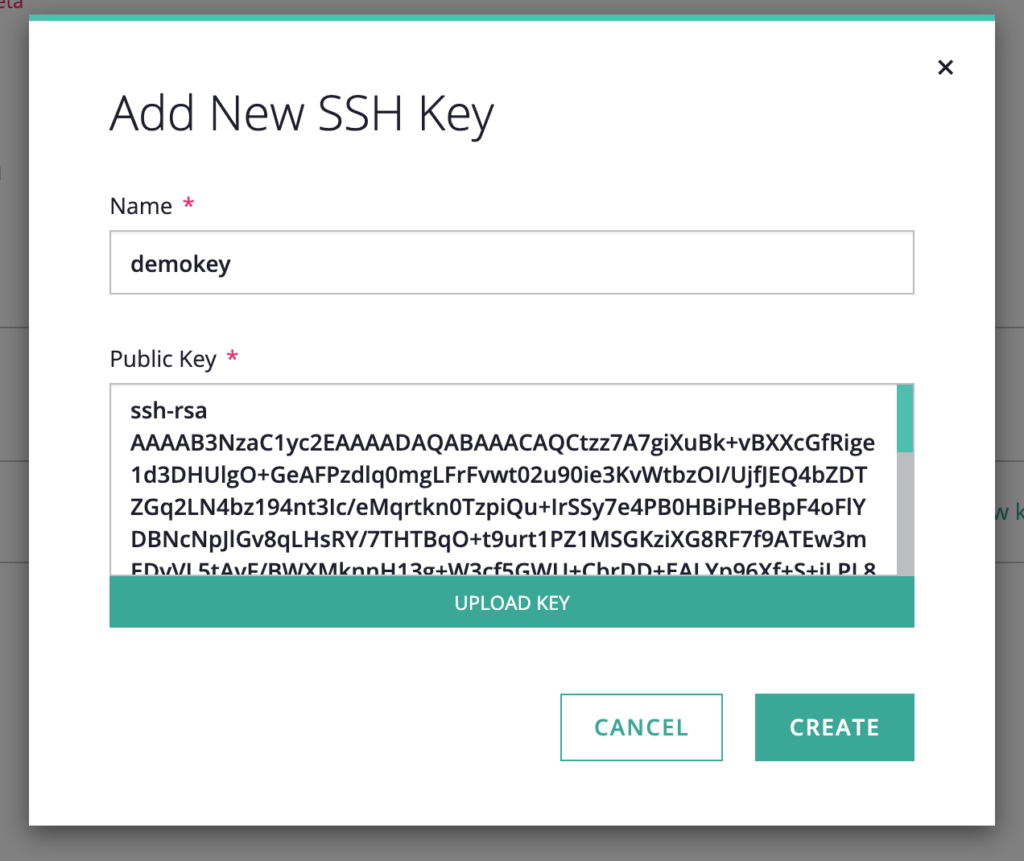
- Name your key and click Upload Key to upload the public key file. Make sure that you don't upload the private key; for example, we named our key kaas, so the public key file is kaas.pub.
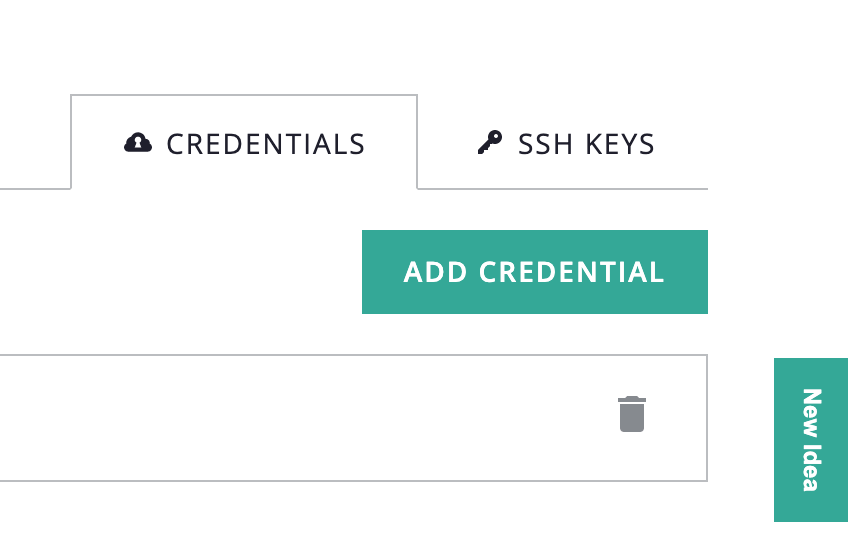
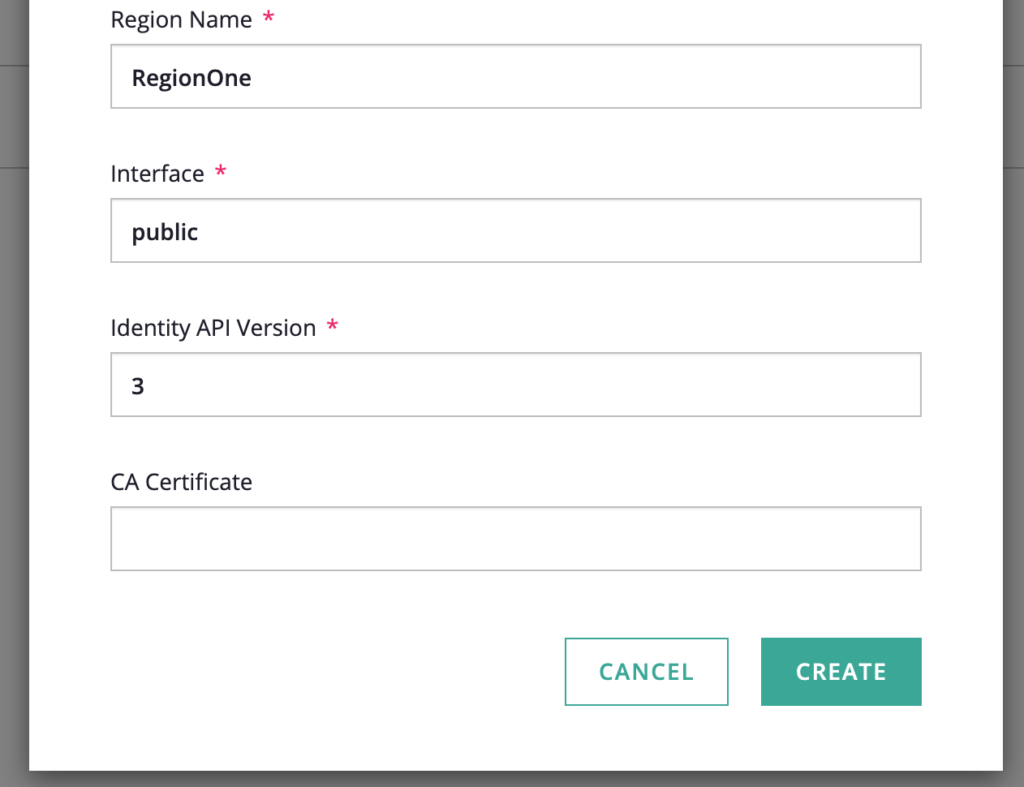
- On the upper right side of the namespace page, click Credentials -> Add Credential.
- You can add the cloud information manually, but it's typically much easier to click the upload clouds.yaml link and upload the file we created in step 1. Uploading the file will auto-populate all of the required fields except the Password, which you'll have to enter manually. This is the same password you used to log into Horizon.
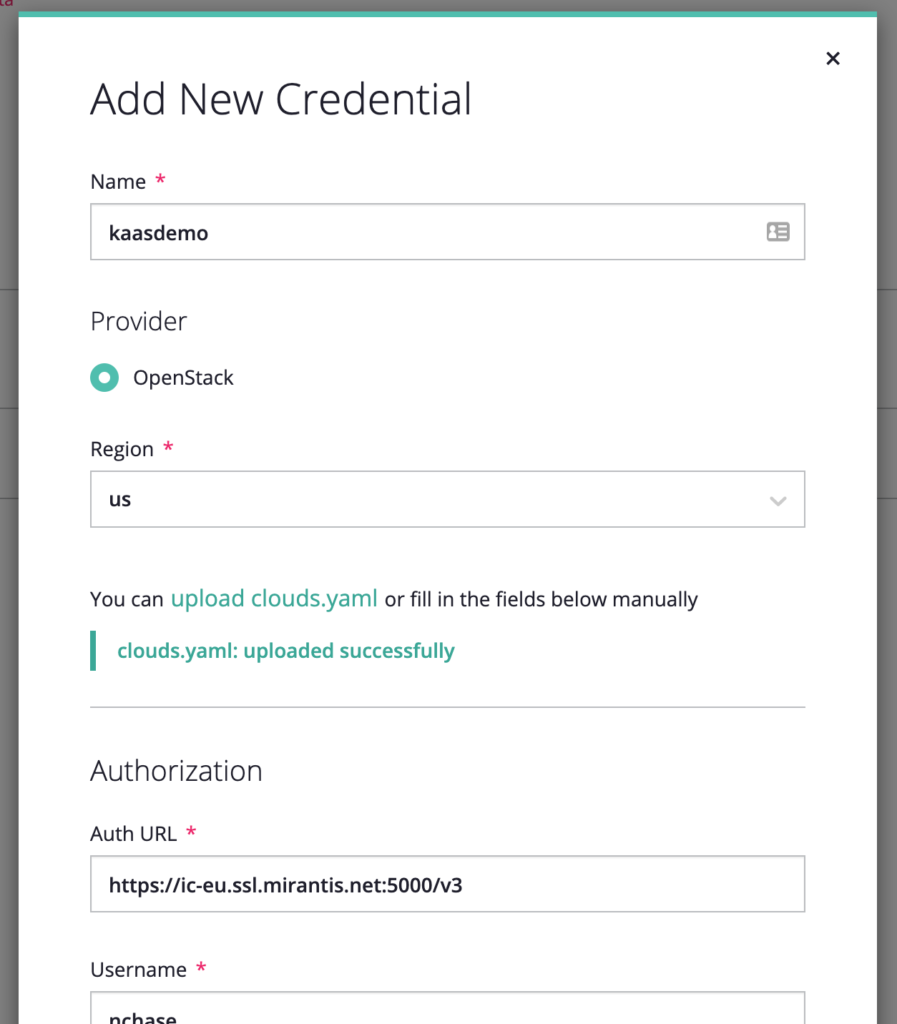
- Scroll down and click the Create button to finish creating the credential.
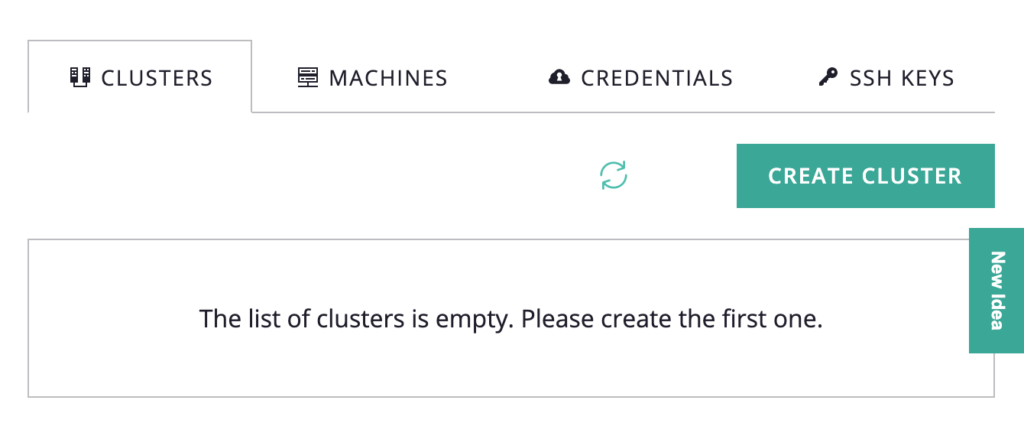
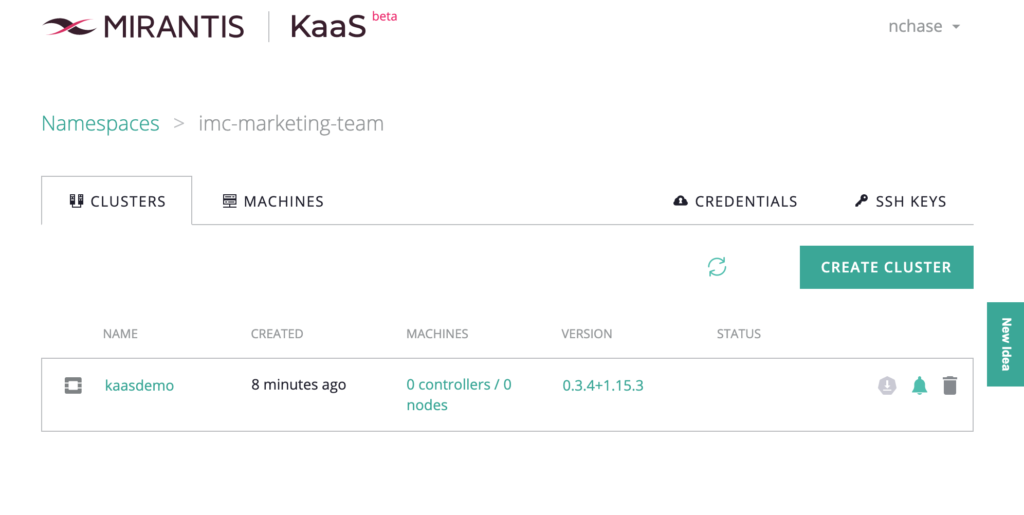
- Go back to the Clusters tab and click Create Cluster.
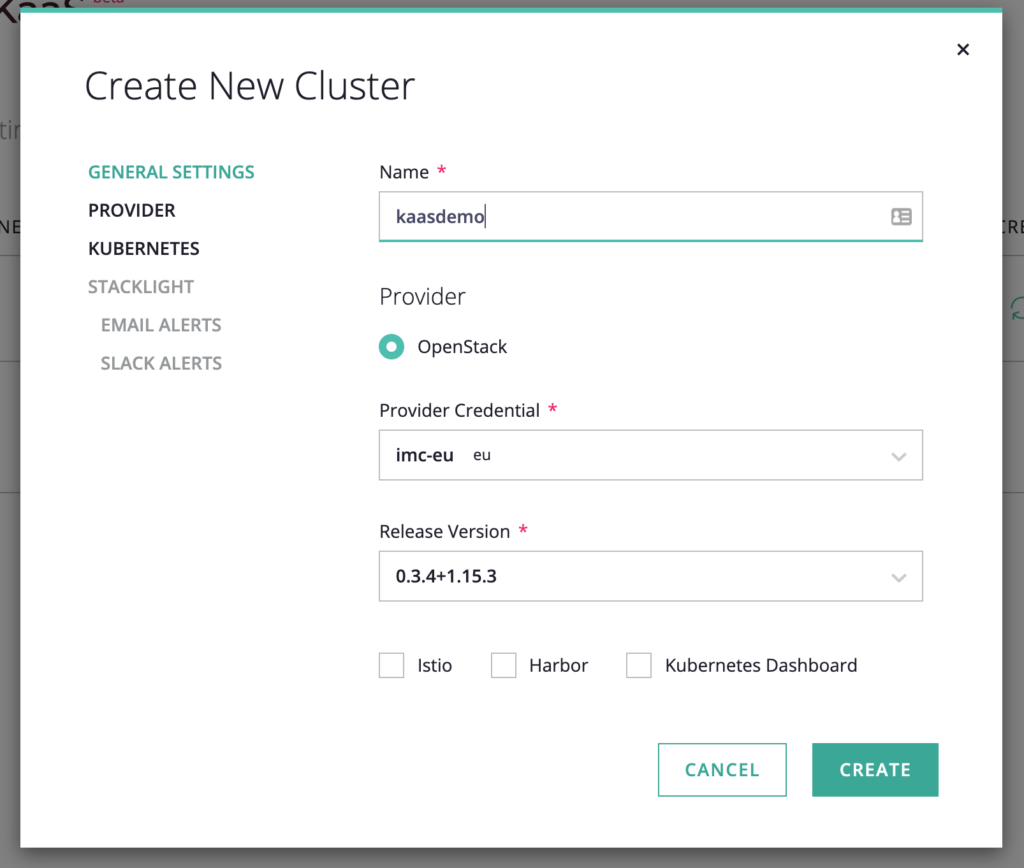
- Name your cluster and decide what features you want to enable. KaaS enables you to add create clusters with Istio service mesh, Harbor registries, and the Kubernetes dashboard by simply clicking checkboxes. You can also enable the StackLight Logging, Monitoring and Alerting option, as well as configuring alerts. For the moment, however, we're going to stick with a vanilla cluster -- just Kubernetes. At the time of this writing, the most current version of Kubernetes available is 1.15.3, but you have the option to choose Kubernetes 14.6. You always have the option to update your clusters, and as new versions are added to KaaS they will be made available in the UI.Click Create to create the empty cluster.
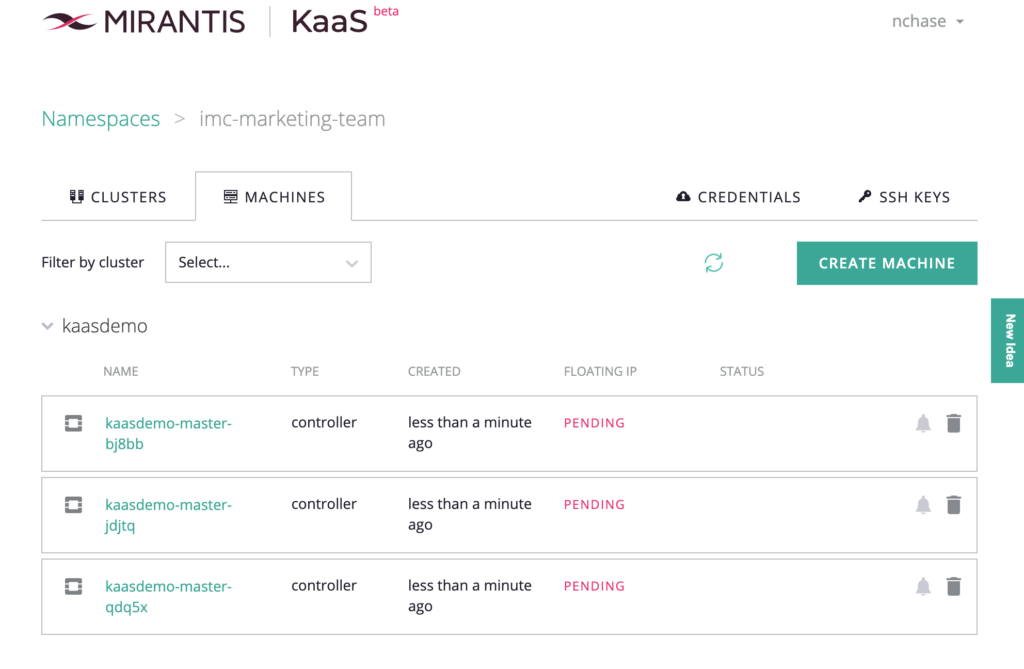
- Now you've got a cluster. When the PENDING status disappears, you can add actual capacity to it.


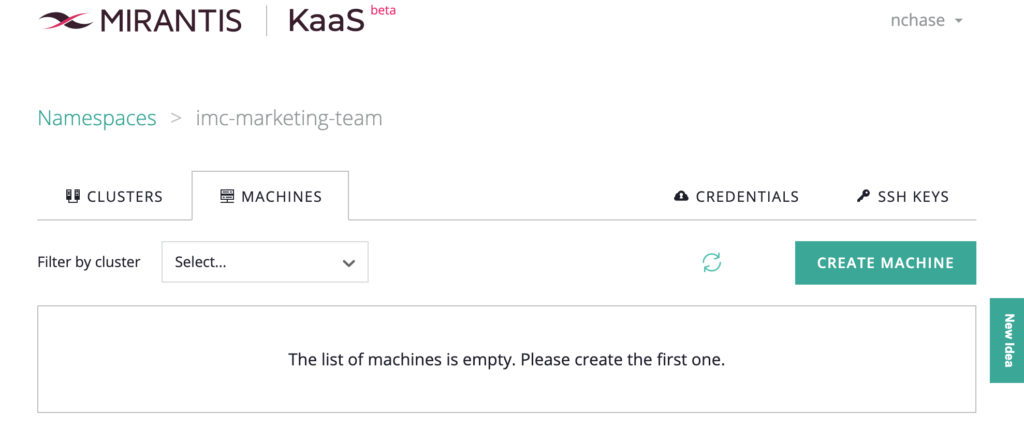
Add Machines to your KaaS cluster
Now that you have a cluster, you need to add machines on which the cluster will actually run. For a bare metal cluster, those machines will be actual servers, but for an OpenStack-based cluster, they will be OpenStack VMs. (Note that you don't create these VMs manually; KaaS will take care of it for you in the background.)Once you add machines to a cluster through the UI, KaaS automatically provisions them and adds them to the actual Kubernetes cluster, so you can also use these instructions for scaling up your KaaS child cluster.
- Choose the Machines tab, then click the Create Machine button.
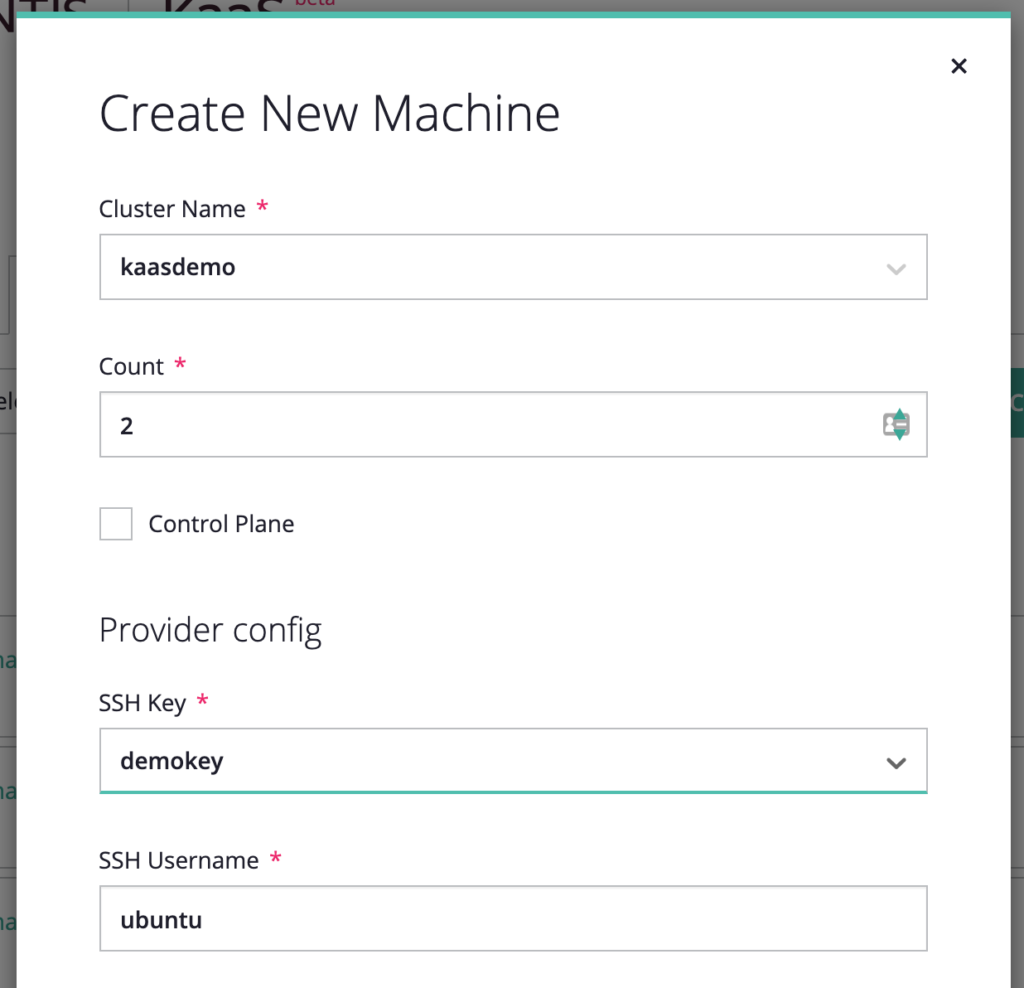
- Let's start by creating the control plane. Because we are deploying HA clusters by default, we want a minimum of 3 control plane nodes, so we'll specify 3 and click the Control Plane checkbox.
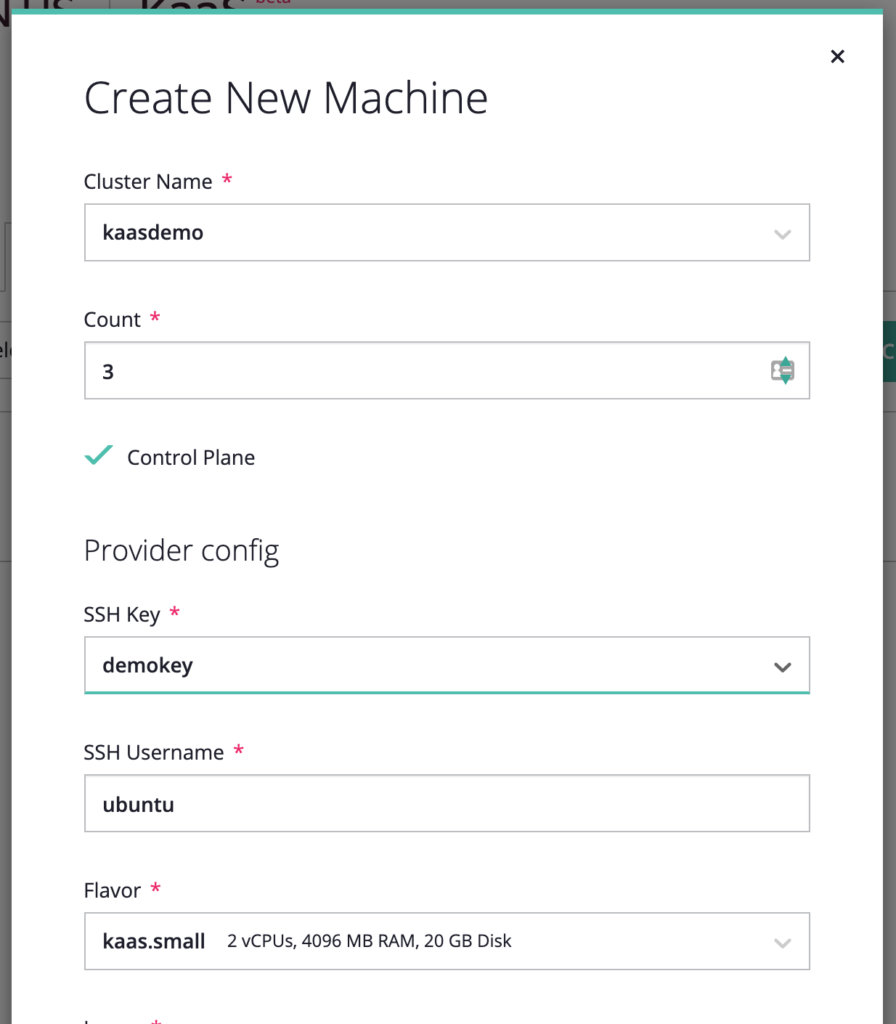
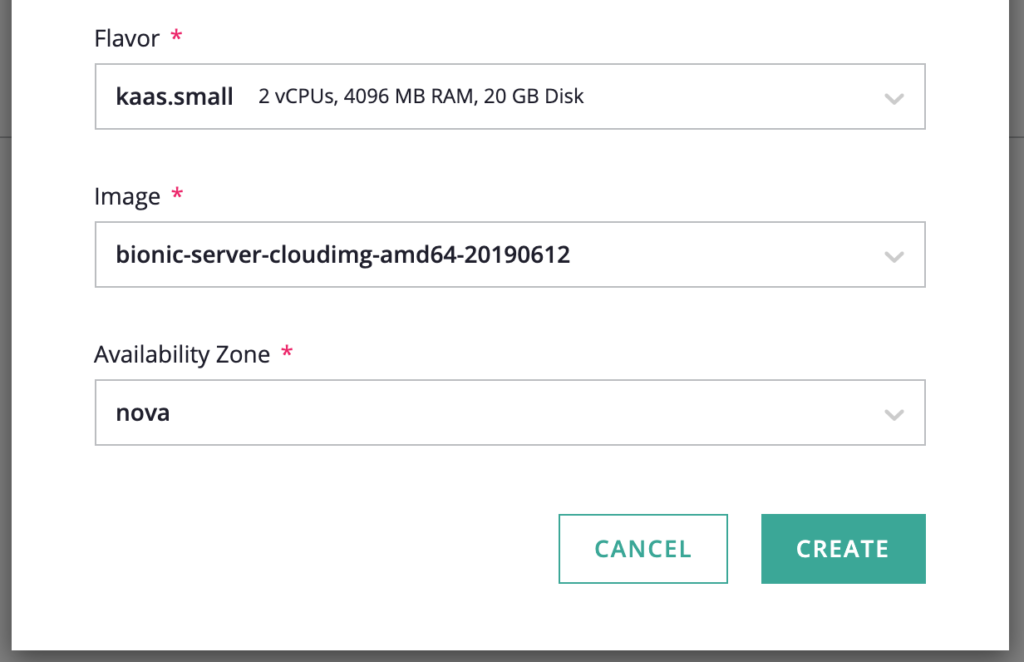 Select the SSH key we added earlier and designate a username to associate with it, such as ubuntu. In this case, the flavor and image are OpenStack parameters, as is the Availability Zone.Click Create to add the machines to the cluster.
 - KaaS will create the machines and assign them an IP address. You can watch this progress from the Machines tab.
- While we're waiting on these servers, we can go ahead and add two compute nodes, the minimum a KaaS cluster. The process is exactly the same, except that we don't check the Control Plane box. You might also decide to use larger machines, since they are actually going to be hosting your workloads.
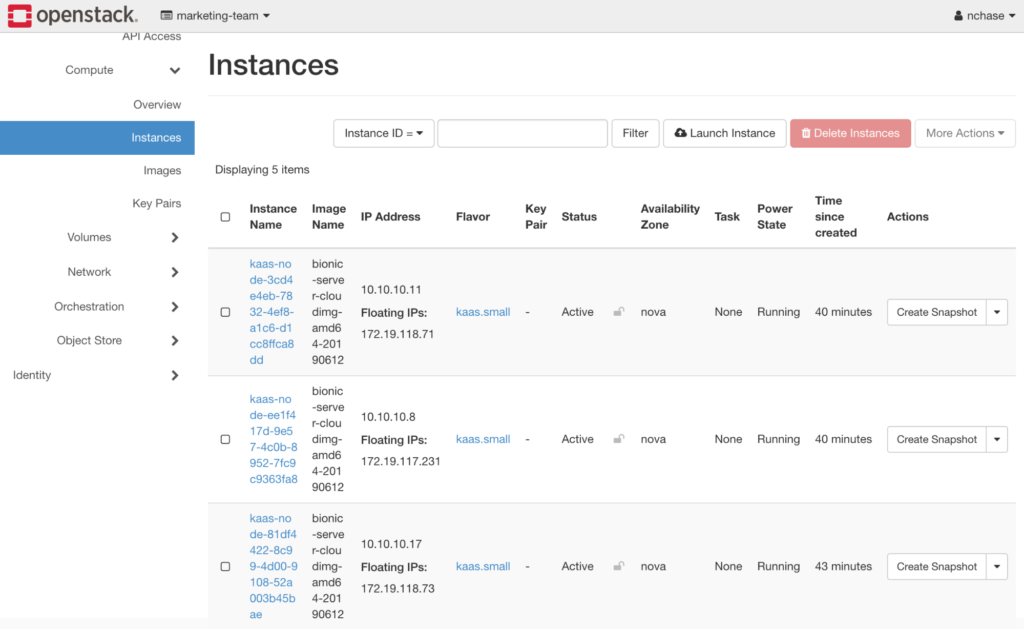
- It will take a few minutes, but the machines will cycle through deployment status of Pending, then Updating, and finally to Ready. If you check your OpenStack dashboard, you'll gradually see these machines come online.


Testing the deployed Kubernetes cluster
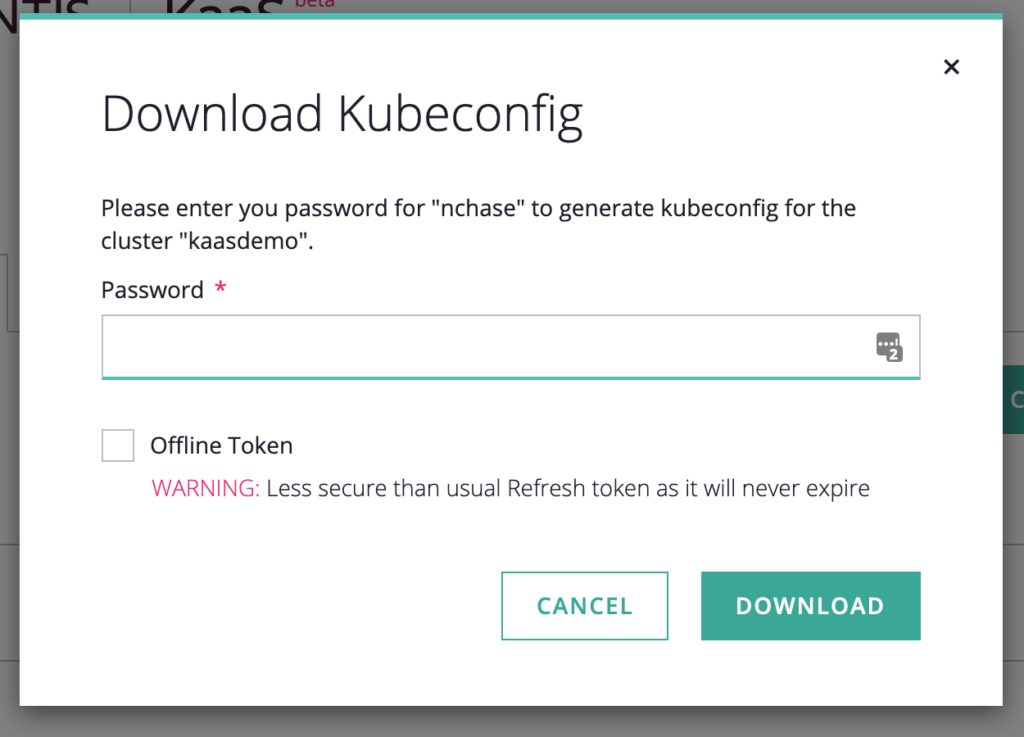
Once the machines in the cluster show a status of READY you can test it out.- Start by downloading the kubeconfig by going to the Clusters tab and clicking the arrow for the cluster you want to use.
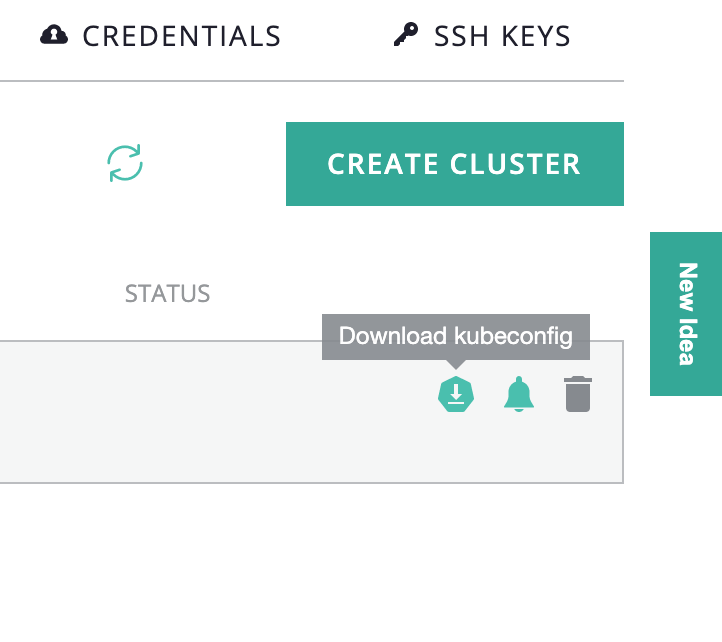
- Enter your KaaS password and click Download.
- Make sure you have the kubectl client installed according to the instructions for your operating system.
- Next you'll need to go to the command line and point to the kubeconfig file you downloaded in steps 1 and 2:
$ export KUBECONFIG=~/Downloads/kubeconfig-kaasdemo.yml - Now you can go ahead and check what resources are available:
$ kubectl get nodes
NAME                                             STATUS ROLES AGE VERSION
kaas-node-3cd4e4eb-7832-4ef8-a1c6-d1cc8ffca8dd   Ready <none> 20m v1.15.3-8+d06f4e3032941e
kaas-node-5d541aac-c52c-4c21-a867-5bc621926e81   Ready master 21m v1.15.3-8+d06f4e3032941e
kaas-node-81df4422-8c99-4d00-9108-52a003b45bae   Ready master 18m v1.15.3-8+d06f4e3032941e
kaas-node-8917ae73-e715-49e1-8684-c11d3b4216b2   Ready master 25m v1.15.3-8+d06f4e3032941e
kaas-node-ee1f417d-9e57-4c0b-8952-7fc9c9363fa8   Ready <none> 20m v1.15.3-8+d06f4e3032941e
$ kubectl get namespaces
NAME              STATUS AGE
default           Active 25m
kube-node-lease   Active 25m
kube-public       Active 25m
kube-system       Active 25m


What to try it out for yourself? Download the Mirantis KaaS public beta!


