
Install Wordpress (or other Murano apps) on OpenStack with a few clicks
- March 24, 2016
“You have to provide a smartphone-like experience in order to get people using your cloud platform” - Erica Brescia, COO and co-founder of Bitnami
We talk a lot about OpenStack itself, but the whole idea is to run applications on top of it as fast or faster and easier than on top of proprietary products. The OpenStack Application Catalog project, Murano, is about building, packaging, and easily deploying apps in OpenStack. This ease of use is important not just for end users, but for developers who want to get their apps in use, and for IT departments in different businesses, as well as System Integrators.
Ease of use is especially important for enterprise businesses with 1000+ employees, such as banks, pharmaceutical companies, and governments. Corporate users should not have to care about the type of cloud they're deploying on, whether it's AWS, Google cloud, MS Azure or OpenStack. All they care about is their apps.
When it comes to making applications easily available in OpenStack, there are actually two pieces to the puzzle; Murano makes it easy to deploy applications, and the OpenStack Community App Catalog makes it easy to find applications to deploy. At the moment, the Community App Catalog simply tells you where to find apps to deploy, but that will likely change in the future, according to Murano contributor (and Newton PTL candidate) Kirill Zaytsev. “From the very beginning of the Community App Catalog project I believed that integration with it is essential for Murano’s growth and further development."
Kirill has been working on implementing the necessary APIs to make it possible, and in fact there's a Horizon plugin that enables users to search the app catalog right from their OpenStack Dashboard. However, just the existence of both Murano and the Community App Catalog means that it's possible for non-technical users to easily find, configure, and deploy non-trivial applications.
To put that assertion to the test (and to show you that it’s really easy to work with your apps using Murano) we gave our marketing manager, Ilya Stechkin, a mission: deploy WordPress on our OpenStack cloud in the lab. Here is a step-by-step (non-technical) report of what he found.
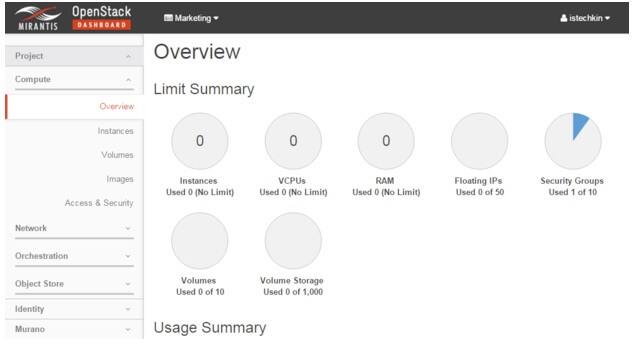
Figure 1: An overview of your project

Figure 2: The Environments page.
Create the new environment by clicking the Add New button, as in Figure 3:

Figure 3. Create a new environment.
We add the environment name, and choose the default network. In some cases, this will mean that we tell OpenStack to create a new network.
Click Create to save the new environment.

Figure 4: The new environment
Now we want to add the application, but the system's telling us it's not in the local catalog. In fact, there are no applications at all.
Fortunately, we also get a link to the OpenStack Community App Catalog, so let's go find Wordpress.

Figure 5: The Community App Catalog
Click Wordpress to get more information on the actual package, as in Figure 6:

Figure 6: The Wordpress package
This is the package we need to import into OpenStack. We highlight the package name, then back in Horizon, we choose Manage->Package Definitions, as in Figure 7:

Figure 7: Package definitions.
Click the +Import Package button and choose Repository as the package source. Insert the copied package name in the second field, as in Figure 8.

Figure 8: Import the package
When we click Next, OpenStack retrieves all of the appropriate information about the application, as in Figure 9.

Figure 9: The imported information
We pick Next, and choose the appropriate category, as in Figure 10:

Figure 10: Choose a category
Now we can click Create to tell OpenStack to work its magic. When it's done, we can see all the packages that were imported, as in Figure 11:

Figure 11: The packages imported with the Wordpress application
Now that Wordpress is available, we need to actually go ahead and configure and deploy it.

Figure 12: Components available for deployment
Now we can configure the ones we need by dragging them into the "Drop Components Here" banner. We could do these one at a time, but we want to make it as simple as possible, so we drag the Wordpress app into the banner, as in Figure 13:

Figure 13: Add the Wordpress application
As anybody who's ever tried to deploy Wordpress by hand knows, you need a web server (with PHP), and a database. Rather than doing it manually, we can tell Murano to handle it for us by clicking Add Application for each. For example, we can click +Add Application for the MySQL server, as in Figure 14:

Figure 14: Configure MySQL
We can change the name if we want, but we'll leave the defaults and click Next to get to the actual configuration screen, where you can set the database name, username, and so on. In our case, we're just going to keep the defaults and click Next again. That gives us the opportunity to define what kind of instance we want to run, as in Figure 15:

Figure 15: Specify the database VM specifics
We'll choose an image with the murano-agent pre-installed and click Create.
Next we'll click +Add Application and do the same for the Apache HTTP server, as in Figure 16:

Figure 16: The Apache HTTP server
We'll choose to enable PHP (because Wordpress runs in PHP) and assign a floating IP (so Wordpress is available to the outside world). Then we'll click Next. Again, we'll specify the instance information, as in Figure 17:

Figure 17: The web server instance
Finally, we click Create, and we're ready to move on with configuring Wordpress, as in Figure 18:

Figure 18: Wordpress has all its components.
We could optionally add monitoring here, but we'll skip that for now and click Next to move on. Now we have to add the actual Wordpress configuration parameters, which we'd normally set within the Wordpress install flow, as in Figure 19:

Figure 20: Configuring Wordpress
At this point, we click Create, which creates (but doesn't actually deploy) the environment, as in Figure 21:

Figure 21: The completed environment
If we click the Topology tab at the top of the page, we can see the various pieces, as in Figure 22:

Figure 22: The environment topology

Figure 23: OpenStack deploys all the things
And after a few minutes we're ready to play with our new Wordpress!
We we learned two things: First, if you're a user, deploying complex applications on OpenStack doesn't have to be complicated, because Murano makes it easy. Second, If you're a developer and you want to make your users' lives easier, publish your app in the catalog so they can find it and install it.
Until next time, take it easy!
We talk a lot about OpenStack itself, but the whole idea is to run applications on top of it as fast or faster and easier than on top of proprietary products. The OpenStack Application Catalog project, Murano, is about building, packaging, and easily deploying apps in OpenStack. This ease of use is important not just for end users, but for developers who want to get their apps in use, and for IT departments in different businesses, as well as System Integrators.
Ease of use is especially important for enterprise businesses with 1000+ employees, such as banks, pharmaceutical companies, and governments. Corporate users should not have to care about the type of cloud they're deploying on, whether it's AWS, Google cloud, MS Azure or OpenStack. All they care about is their apps.
When it comes to making applications easily available in OpenStack, there are actually two pieces to the puzzle; Murano makes it easy to deploy applications, and the OpenStack Community App Catalog makes it easy to find applications to deploy. At the moment, the Community App Catalog simply tells you where to find apps to deploy, but that will likely change in the future, according to Murano contributor (and Newton PTL candidate) Kirill Zaytsev. “From the very beginning of the Community App Catalog project I believed that integration with it is essential for Murano’s growth and further development."
Kirill has been working on implementing the necessary APIs to make it possible, and in fact there's a Horizon plugin that enables users to search the app catalog right from their OpenStack Dashboard. However, just the existence of both Murano and the Community App Catalog means that it's possible for non-technical users to easily find, configure, and deploy non-trivial applications.
To put that assertion to the test (and to show you that it’s really easy to work with your apps using Murano) we gave our marketing manager, Ilya Stechkin, a mission: deploy WordPress on our OpenStack cloud in the lab. Here is a step-by-step (non-technical) report of what he found.
The basic process
Overall, installing and configuring Wordpress on OpenStack was a pretty simple process. All Ilya had to do was:- Log into the OpenStack Dashboard.
- Create a Murano environment.
- Find the Wordpress package in the OpenStack Community App Catalog and transfer the information to a new Murano application.
- Configure the application.
- Install it.
A closer look at the process of deploying an app on OpenStack
Murano was designed from the beginning to let non-technical users deploy applications on OpenStack, so the steps are pretty straightforward:Step 1: Log into Horizon
First we need to log into our Horizon dashboard. (You may need to get the URL from your cloud administrator, but once you've logged in, you'll see an overview of your project.)Figure 1: An overview of your project
Step 2: Create a Murano environment
Next click the Murano tab on the left, then choose Environments, as shown in Figure 2:Figure 2: The Environments page.
Create the new environment by clicking the Add New button, as in Figure 3:
Figure 3. Create a new environment.
We add the environment name, and choose the default network. In some cases, this will mean that we tell OpenStack to create a new network.
Click Create to save the new environment.
Figure 4: The new environment
Now we want to add the application, but the system's telling us it's not in the local catalog. In fact, there are no applications at all.
Fortunately, we also get a link to the OpenStack Community App Catalog, so let's go find Wordpress.
Step 3. Find and install the appropriate package
If your administrator has installed the Community App Catalog Horizon plugin, you will be able to find the appropriate package by clicking the Applications tab and choosing the Web category. If not, go to the Community App Catalog and click the Murano Packages tab at the top, then scroll down to the Wordpress package, as shown in Figure 5:Figure 5: The Community App Catalog
Click Wordpress to get more information on the actual package, as in Figure 6:
Figure 6: The Wordpress package
This is the package we need to import into OpenStack. We highlight the package name, then back in Horizon, we choose Manage->Package Definitions, as in Figure 7:
Figure 7: Package definitions.
Click the +Import Package button and choose Repository as the package source. Insert the copied package name in the second field, as in Figure 8.
Figure 8: Import the package
When we click Next, OpenStack retrieves all of the appropriate information about the application, as in Figure 9.
Figure 9: The imported information
We pick Next, and choose the appropriate category, as in Figure 10:
Figure 10: Choose a category
Now we can click Create to tell OpenStack to work its magic. When it's done, we can see all the packages that were imported, as in Figure 11:
Figure 11: The packages imported with the Wordpress application
Now that Wordpress is available, we need to actually go ahead and configure and deploy it.
Step 4. Configure the application components
Now if we click Murano->Application Catalog->Envirponments->[ENV_NAME (in our case "Ilya")], we can see that we have a number of application components available, as in Figure 12:Figure 12: Components available for deployment
Now we can configure the ones we need by dragging them into the "Drop Components Here" banner. We could do these one at a time, but we want to make it as simple as possible, so we drag the Wordpress app into the banner, as in Figure 13:
Figure 13: Add the Wordpress application
As anybody who's ever tried to deploy Wordpress by hand knows, you need a web server (with PHP), and a database. Rather than doing it manually, we can tell Murano to handle it for us by clicking Add Application for each. For example, we can click +Add Application for the MySQL server, as in Figure 14:
Figure 14: Configure MySQL
We can change the name if we want, but we'll leave the defaults and click Next to get to the actual configuration screen, where you can set the database name, username, and so on. In our case, we're just going to keep the defaults and click Next again. That gives us the opportunity to define what kind of instance we want to run, as in Figure 15:
Figure 15: Specify the database VM specifics
We'll choose an image with the murano-agent pre-installed and click Create.
Next we'll click +Add Application and do the same for the Apache HTTP server, as in Figure 16:
Figure 16: The Apache HTTP server
We'll choose to enable PHP (because Wordpress runs in PHP) and assign a floating IP (so Wordpress is available to the outside world). Then we'll click Next. Again, we'll specify the instance information, as in Figure 17:
Figure 17: The web server instance
Finally, we click Create, and we're ready to move on with configuring Wordpress, as in Figure 18:
Figure 18: Wordpress has all its components.
We could optionally add monitoring here, but we'll skip that for now and click Next to move on. Now we have to add the actual Wordpress configuration parameters, which we'd normally set within the Wordpress install flow, as in Figure 19:
Figure 20: Configuring Wordpress
At this point, we click Create, which creates (but doesn't actually deploy) the environment, as in Figure 21:
Figure 21: The completed environment
If we click the Topology tab at the top of the page, we can see the various pieces, as in Figure 22:
Figure 22: The environment topology
Step 5. Deploy the app
The next step is for us to simply deploy the app by clicking the Components tab and choosing and choosing the Deploy this Environment button. OpenStack starts deploying all the required pieces, as in Figure 23...Figure 23: OpenStack deploys all the things
And after a few minutes we're ready to play with our new Wordpress!
Conclusion
The whole procedure took about 30 minutes (including capturing screenshots), and took less than 20 clicks, and that's all because of the ease of use we get from having the the app published in the Community App Catalog.We we learned two things: First, if you're a user, deploying complex applications on OpenStack doesn't have to be complicated, because Murano makes it easy. Second, If you're a developer and you want to make your users' lives easier, publish your app in the catalog so they can find it and install it.
Until next time, take it easy!


