
Mirantis OpenStack Express 2.0 - Creating New VM Flavors
This is the fifth in a series of short tutorials showing how to perform common cloud operations tasks in Mirantis OpenStack Express 2.0 – Mirantis’ “Private Cloud as a Service”
In our last tutorial, we looked at attaching block storage volumes. Now we’ll take a look at flavors, which are VM templates, used to define instances at launch.
Basic Ops Tutorials
Mirantis OpenStack Express 2.0 -- Mirantis' "Private Cloud as a Service" -- is the fastest way to get your hands on a fully-functional, optimally-configured, private OpenStack cloud, running on hosted bare metal and able to scale on demand. This series of short tutorials shows how to perform common cloud operations tasks in MOX 2.0, and offers links to documentation and learning resources. Pro tip: though aimed at Mirantis OpenStack Express, many of the techniques discussed here will also work on a private OpenStack cloud deployed using Mirantis OpenStack.
Tutorials:
- Adding New Custom Boot Images
- Launching a VM from a Boot Image
- Creating a Block Storage Volume
- Attaching and Using Volumes
- Creating new VM Flavors
Step by Step
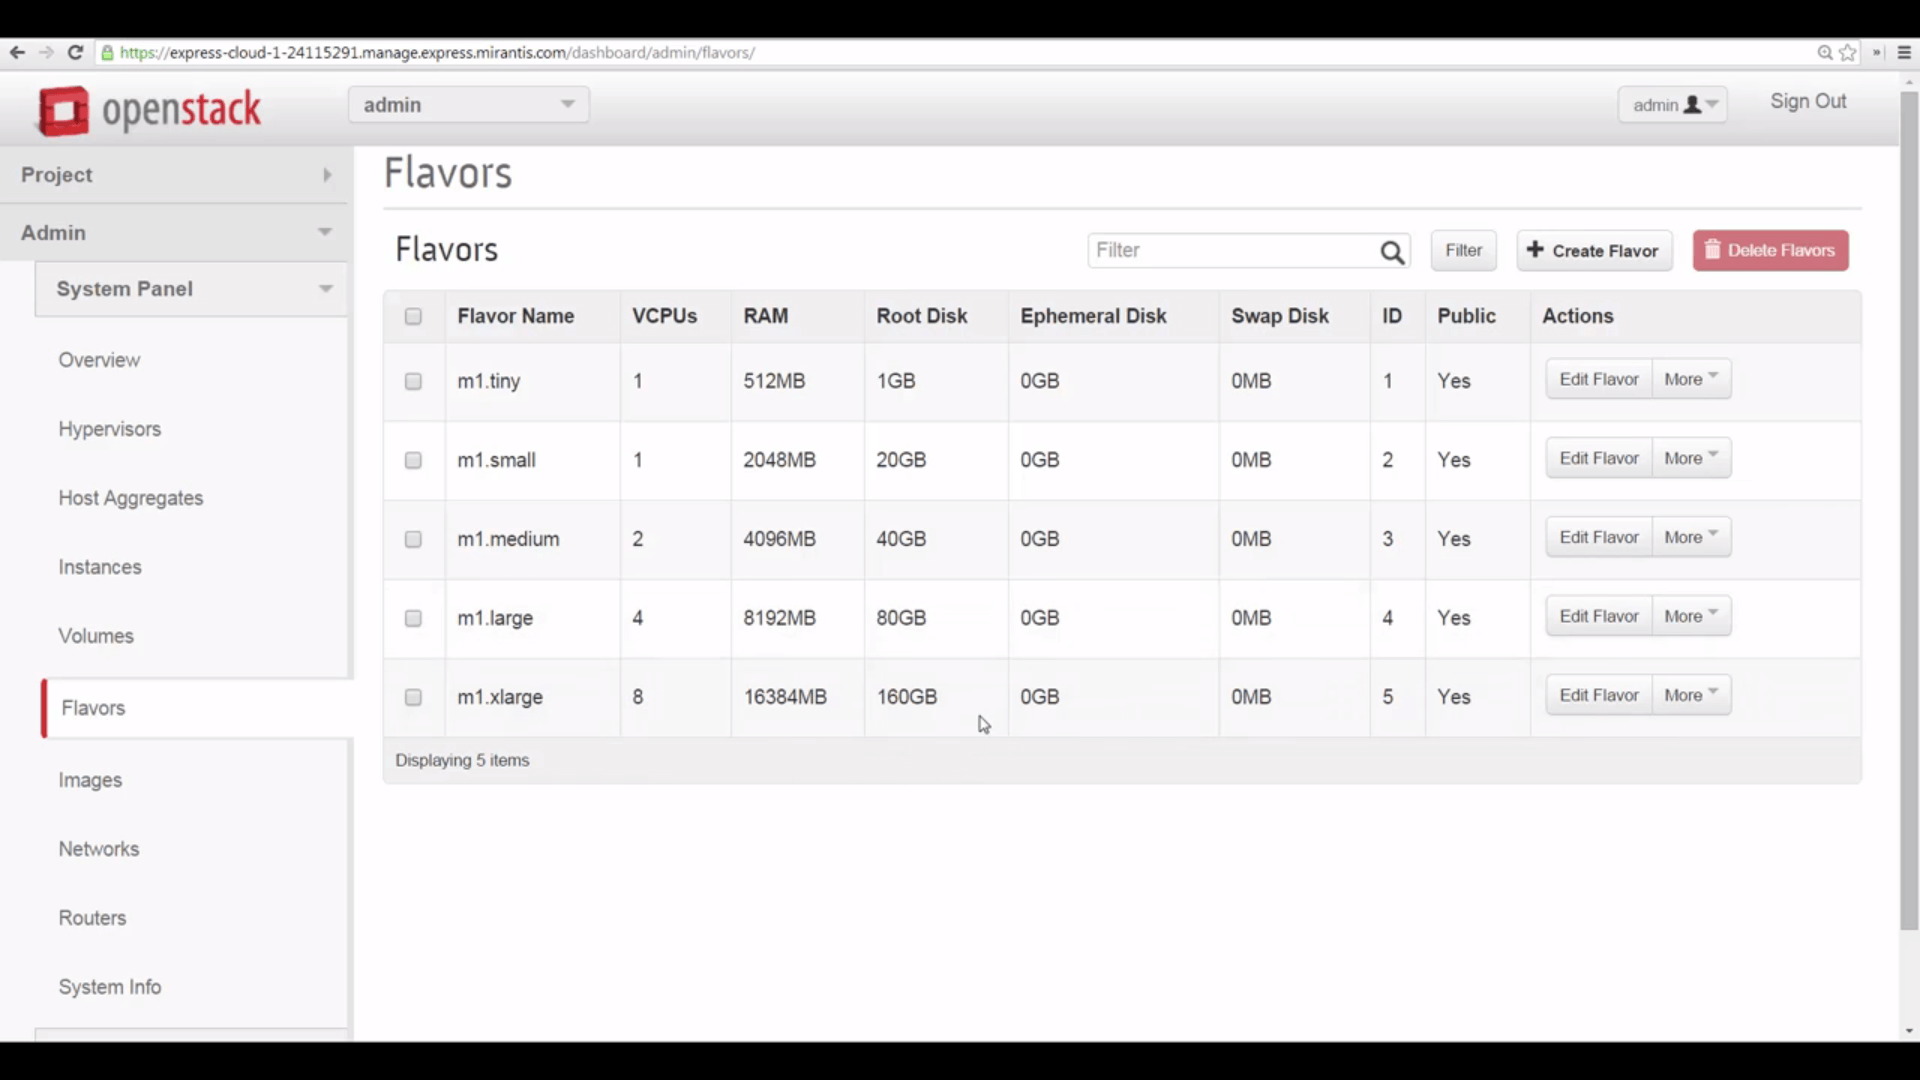
Mirantis OpenStack Express lets you define flavors from the Admin menu.
As you can see from the illustration, OpenStack defines five standard machine flavors for you, ranging from an m1.tiny model with 1 vCPU, 512MB RAM and a 1GB root disk, to an m1.xlarge with eight virtual processors, 16GB RAM and a 160GB disk.
These are useful for many straightforward applications. But a little imagination can show why having the ability to add custom flavors can be important.
Suppose you want to create a platform for an application that needs lots of compute, RAM and scratch space while it’s running, but doesn’t need to maintain stored data once an instance is terminated. Data-analysis, media transcoding, bioinformatic apps might fit this profile.
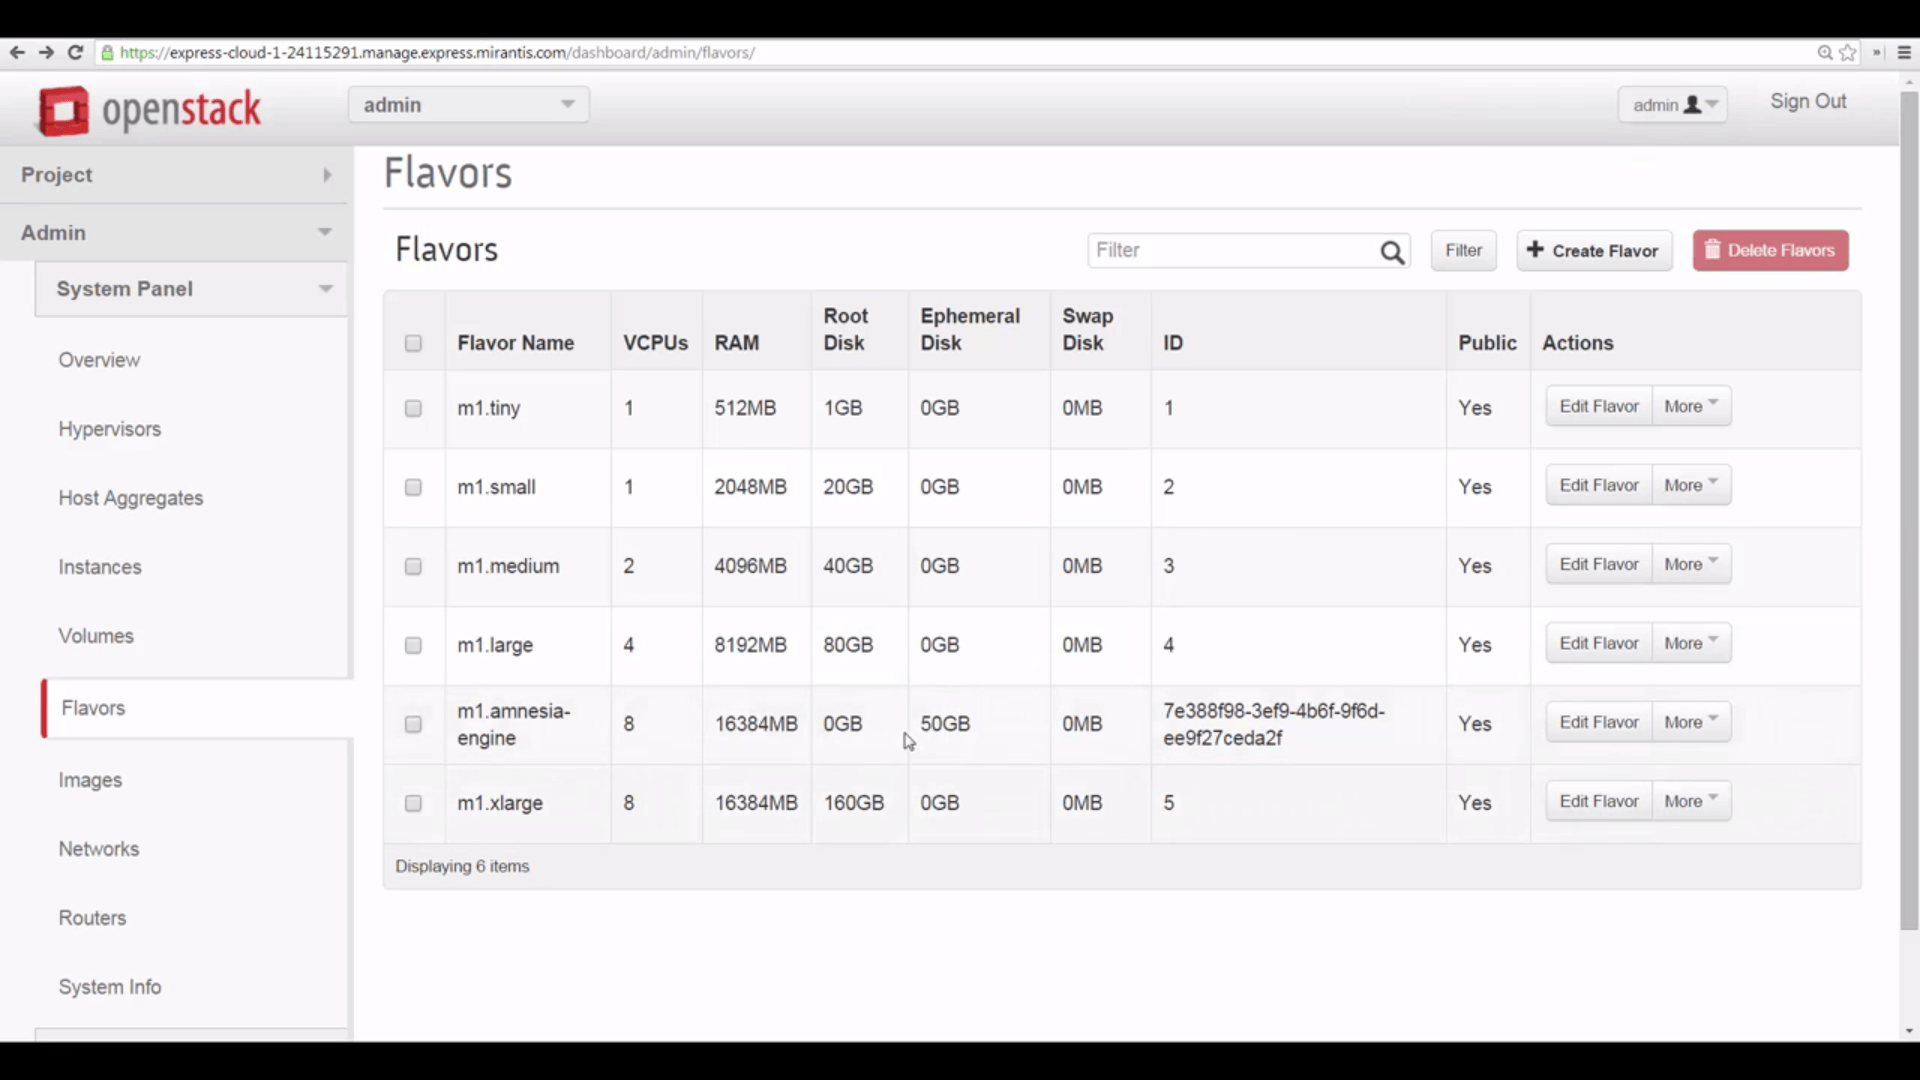
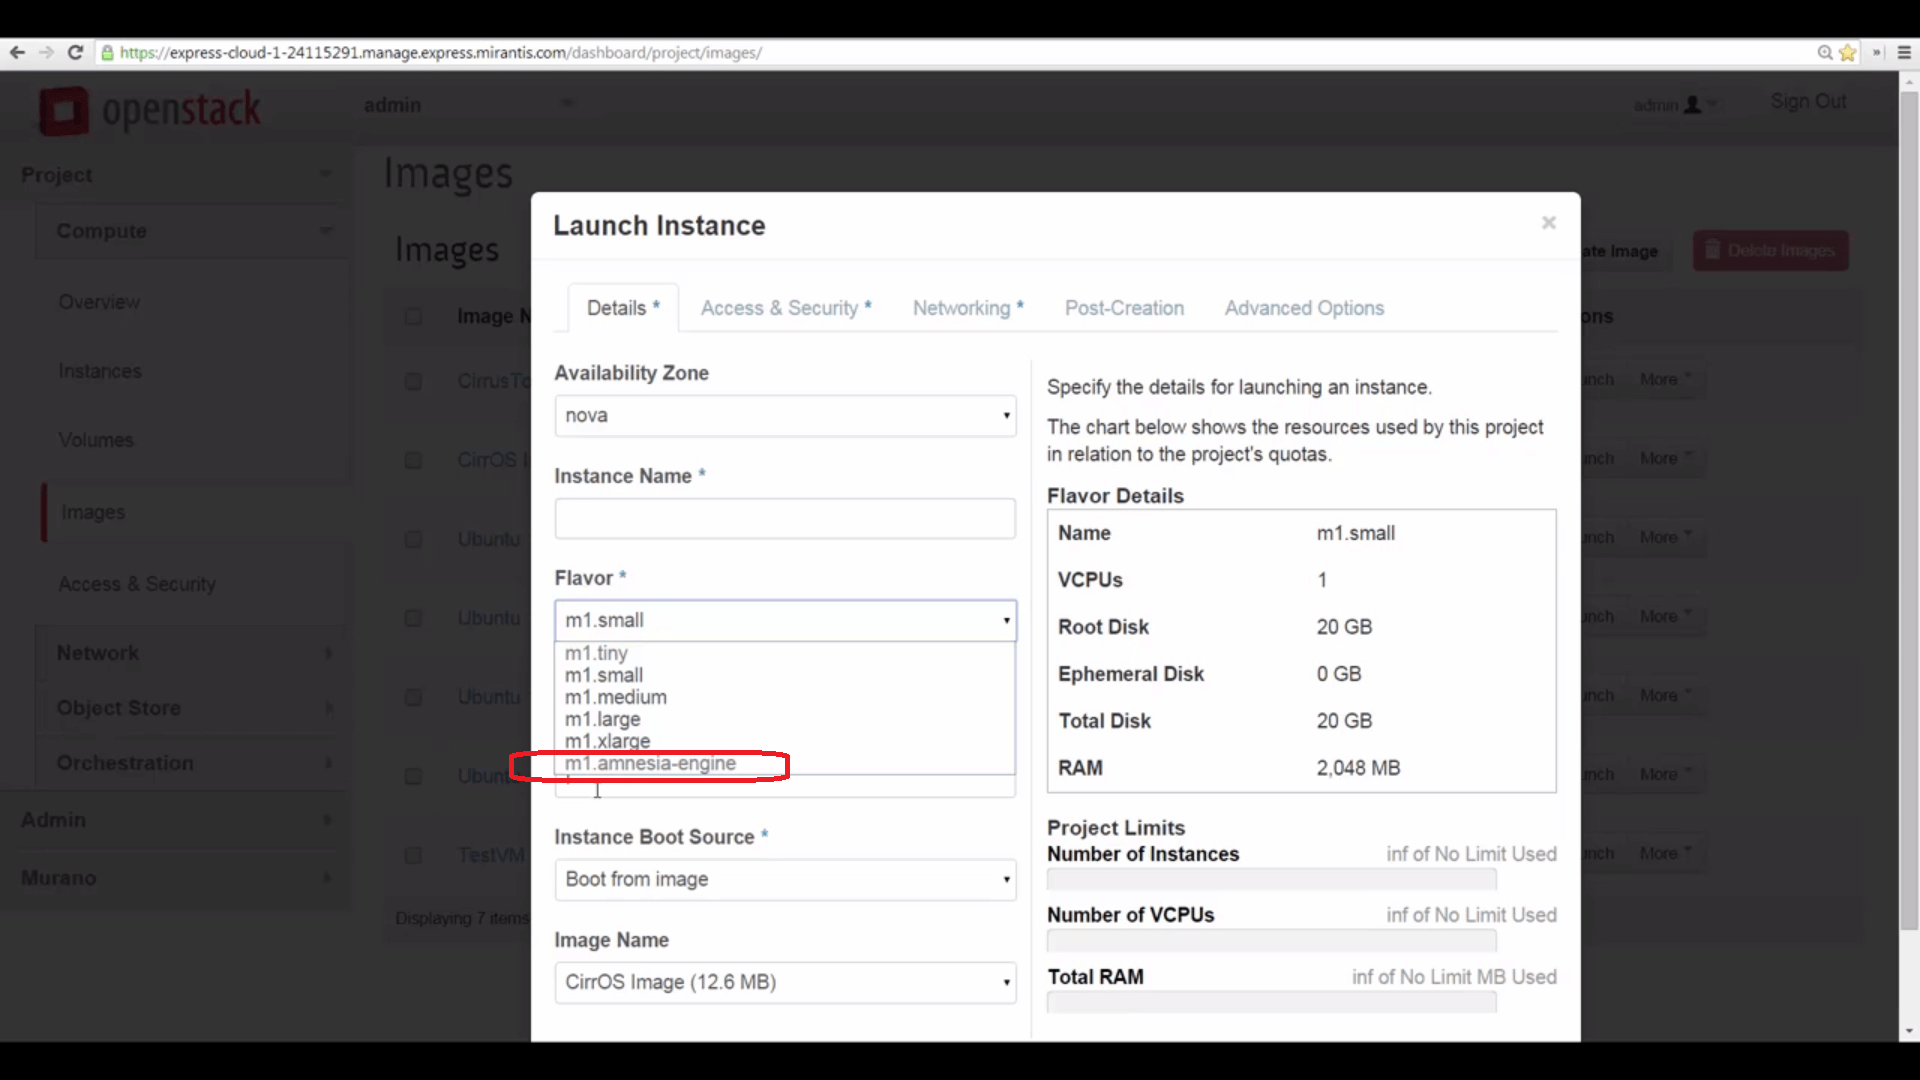
You can use flavors to create a new machine type for this hypothetical application. Click Create New Flavor, and give it a name -- let’s call it m1.amnesia-engine.
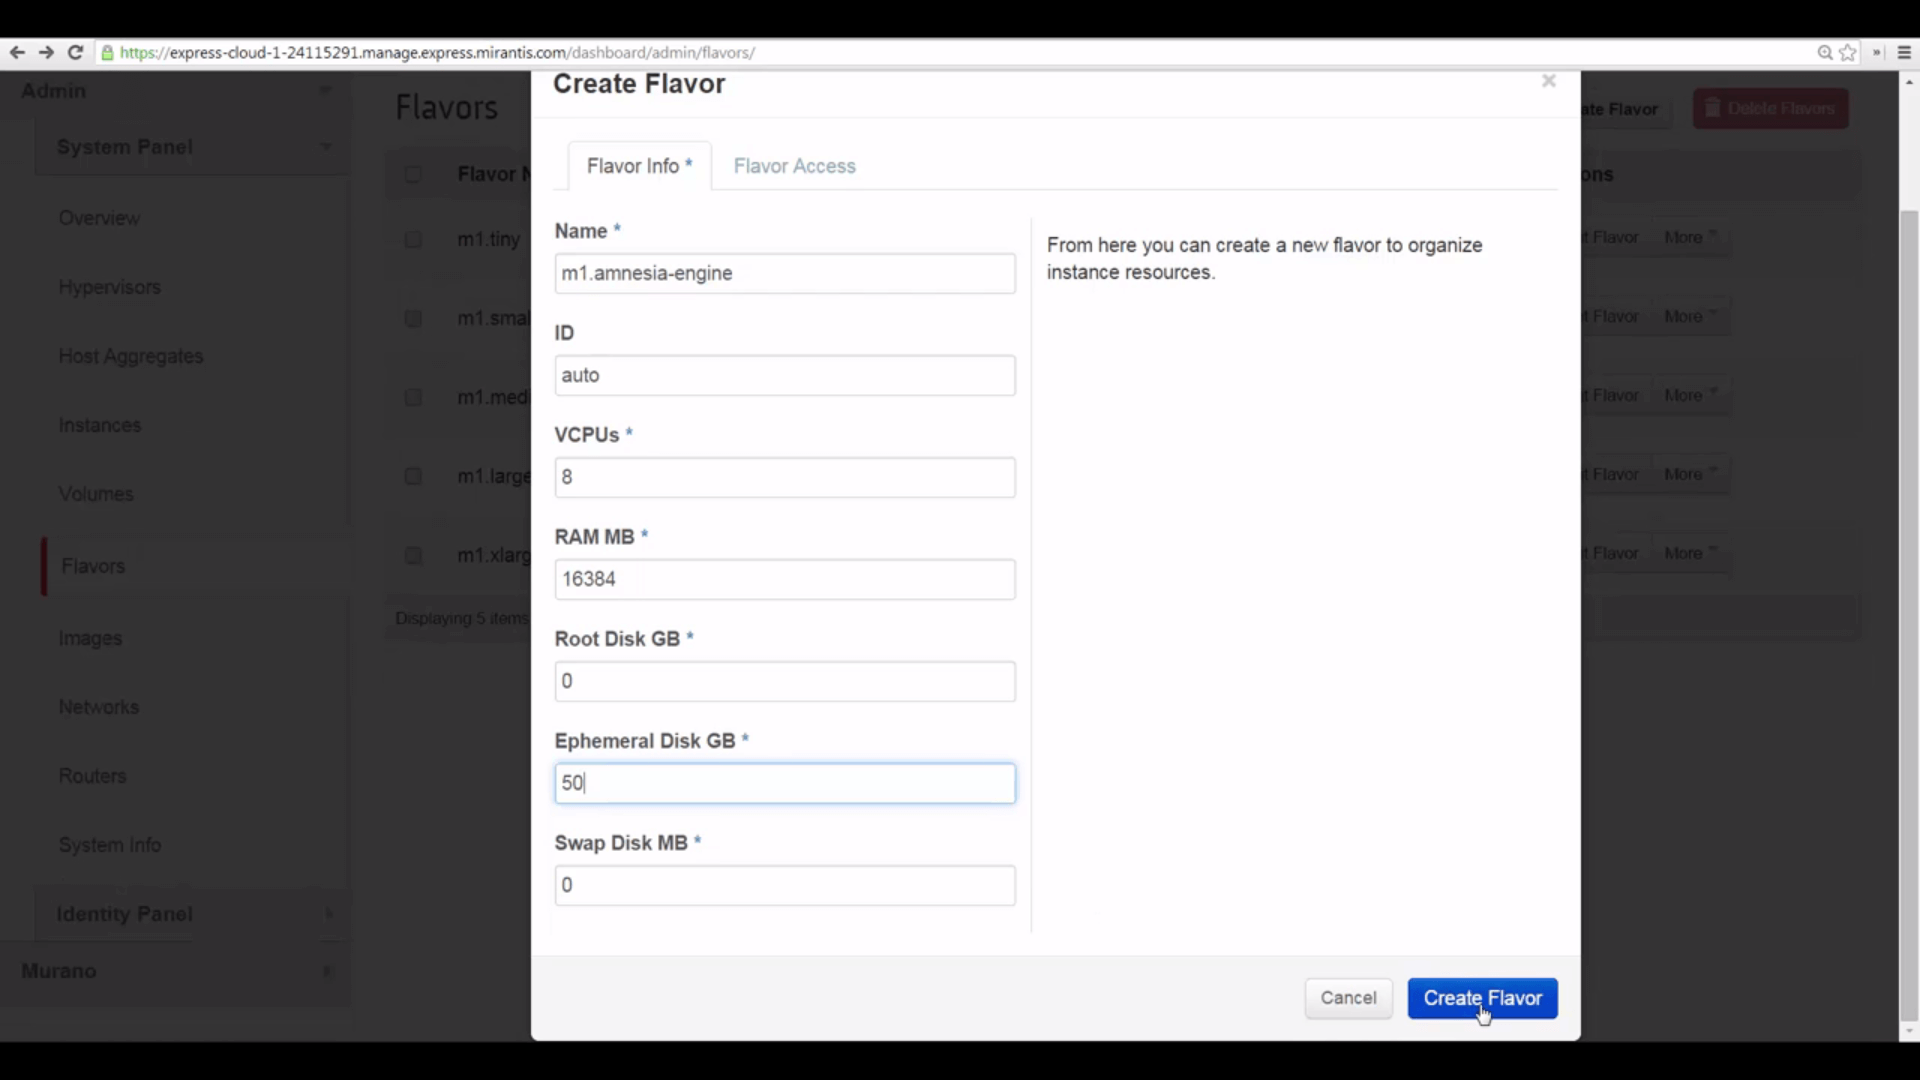
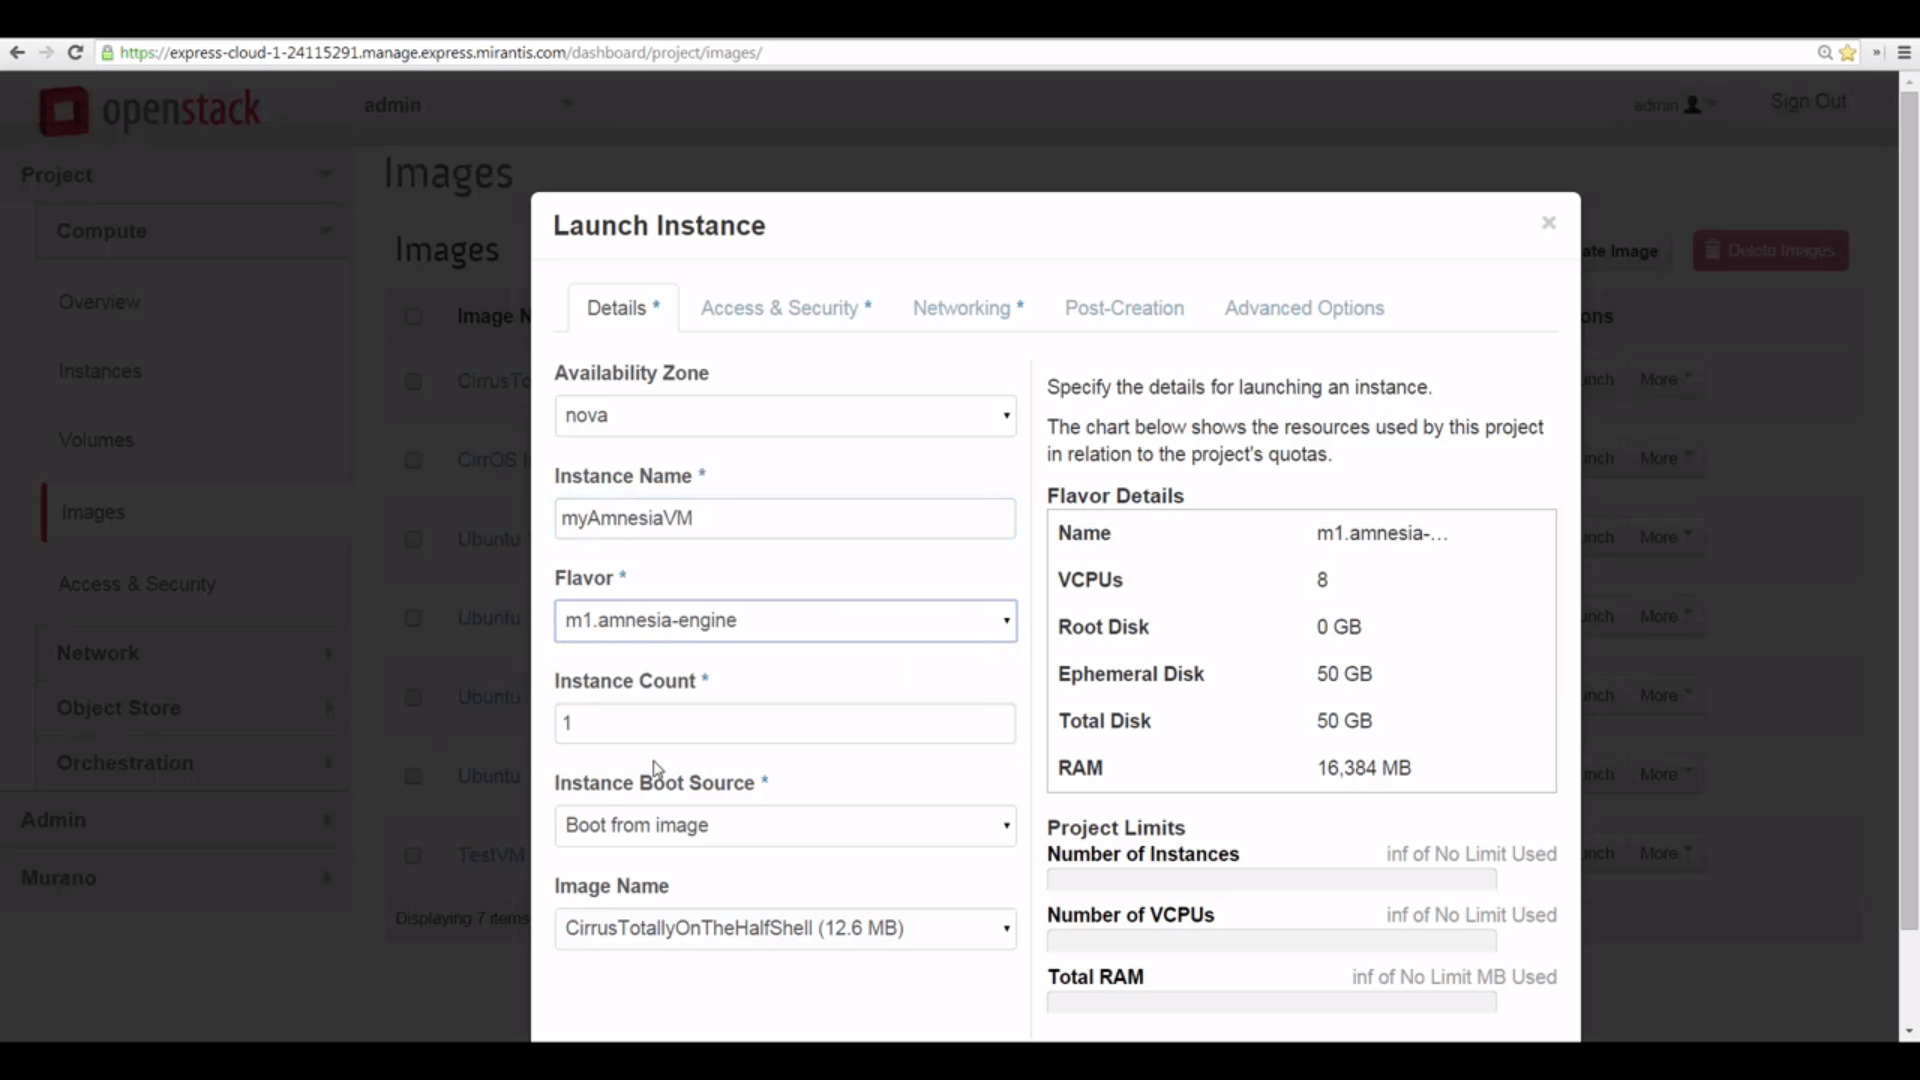
We’ll give it 8 multi-core vCPUs so it can run all our vectorized code. 16GB of RAM, so it has plenty of room to work in. We’ll give it no root disk, and no swap disk. But we’ll give it 50GB of Ephemeral disk, which is a block file storage entity that survives restarts, but goes away when an instance is terminated: exactly what we want. This storage will be attached to /dev/vdb of an instance launched with this flavor template, and our app will need to quickly make a file system there and mount the device to use it.
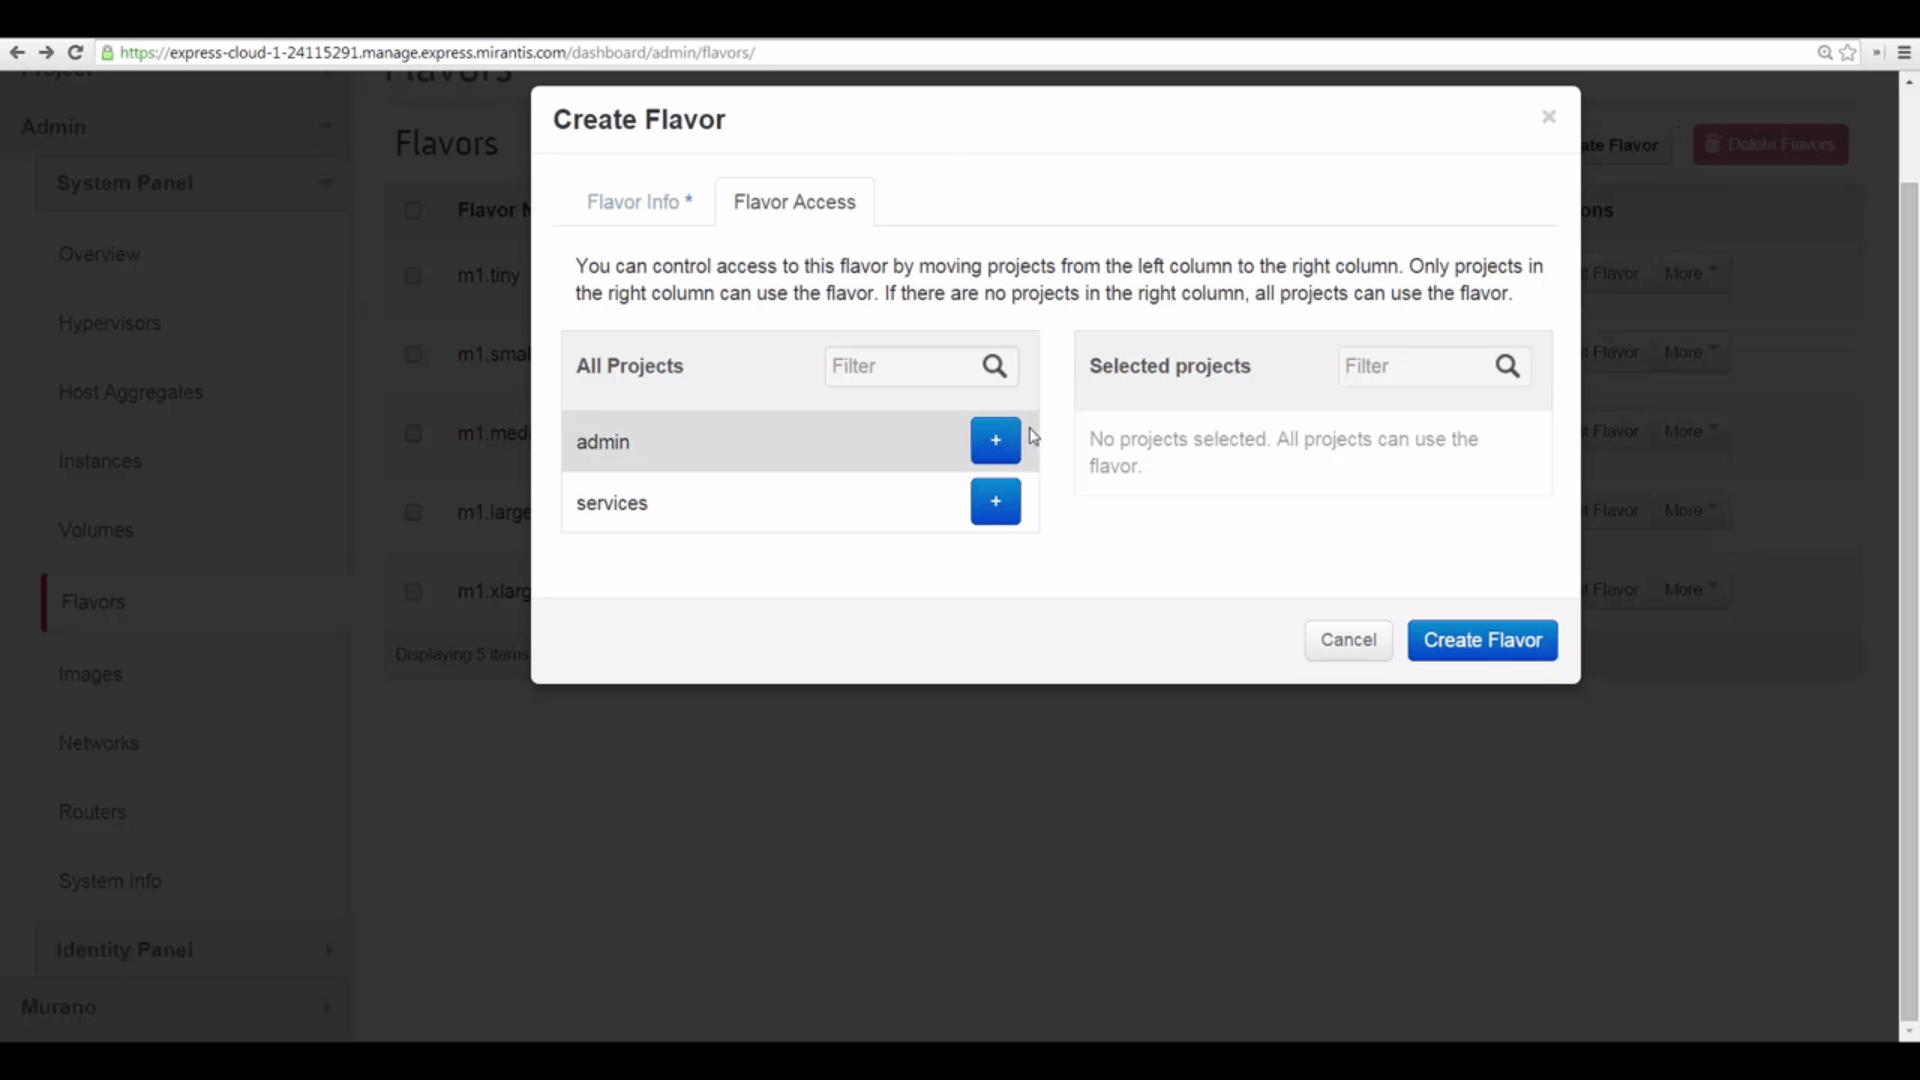
On the second tab of the Create Flavor dialog, we can associate this flavor just with certain projects running on our cloud -- a good thing if you want to keep exotic VM formats restricted. In this case, though, we’ll leave this blank so the flavor is available to all.
Now we’ll launch a boot image with our new flavor. First, let’s try to launch using the CirrosVM image we created several lessons back. As you may recall, when we imported this image, we set a minimum root disk size of 2GB. OpenStack sees this, and will not let us apply our amnesia-engine flavor to this image: an important protection against launching things that will not work.
Now let’s try launching an amnesia-engine machine using an image with no minimum root disk requirement set. We name it, we pick our new flavor, and OpenStack approves: showing us the configuration of the instance we’re about to launch. Set authentication and network parameters, and go.
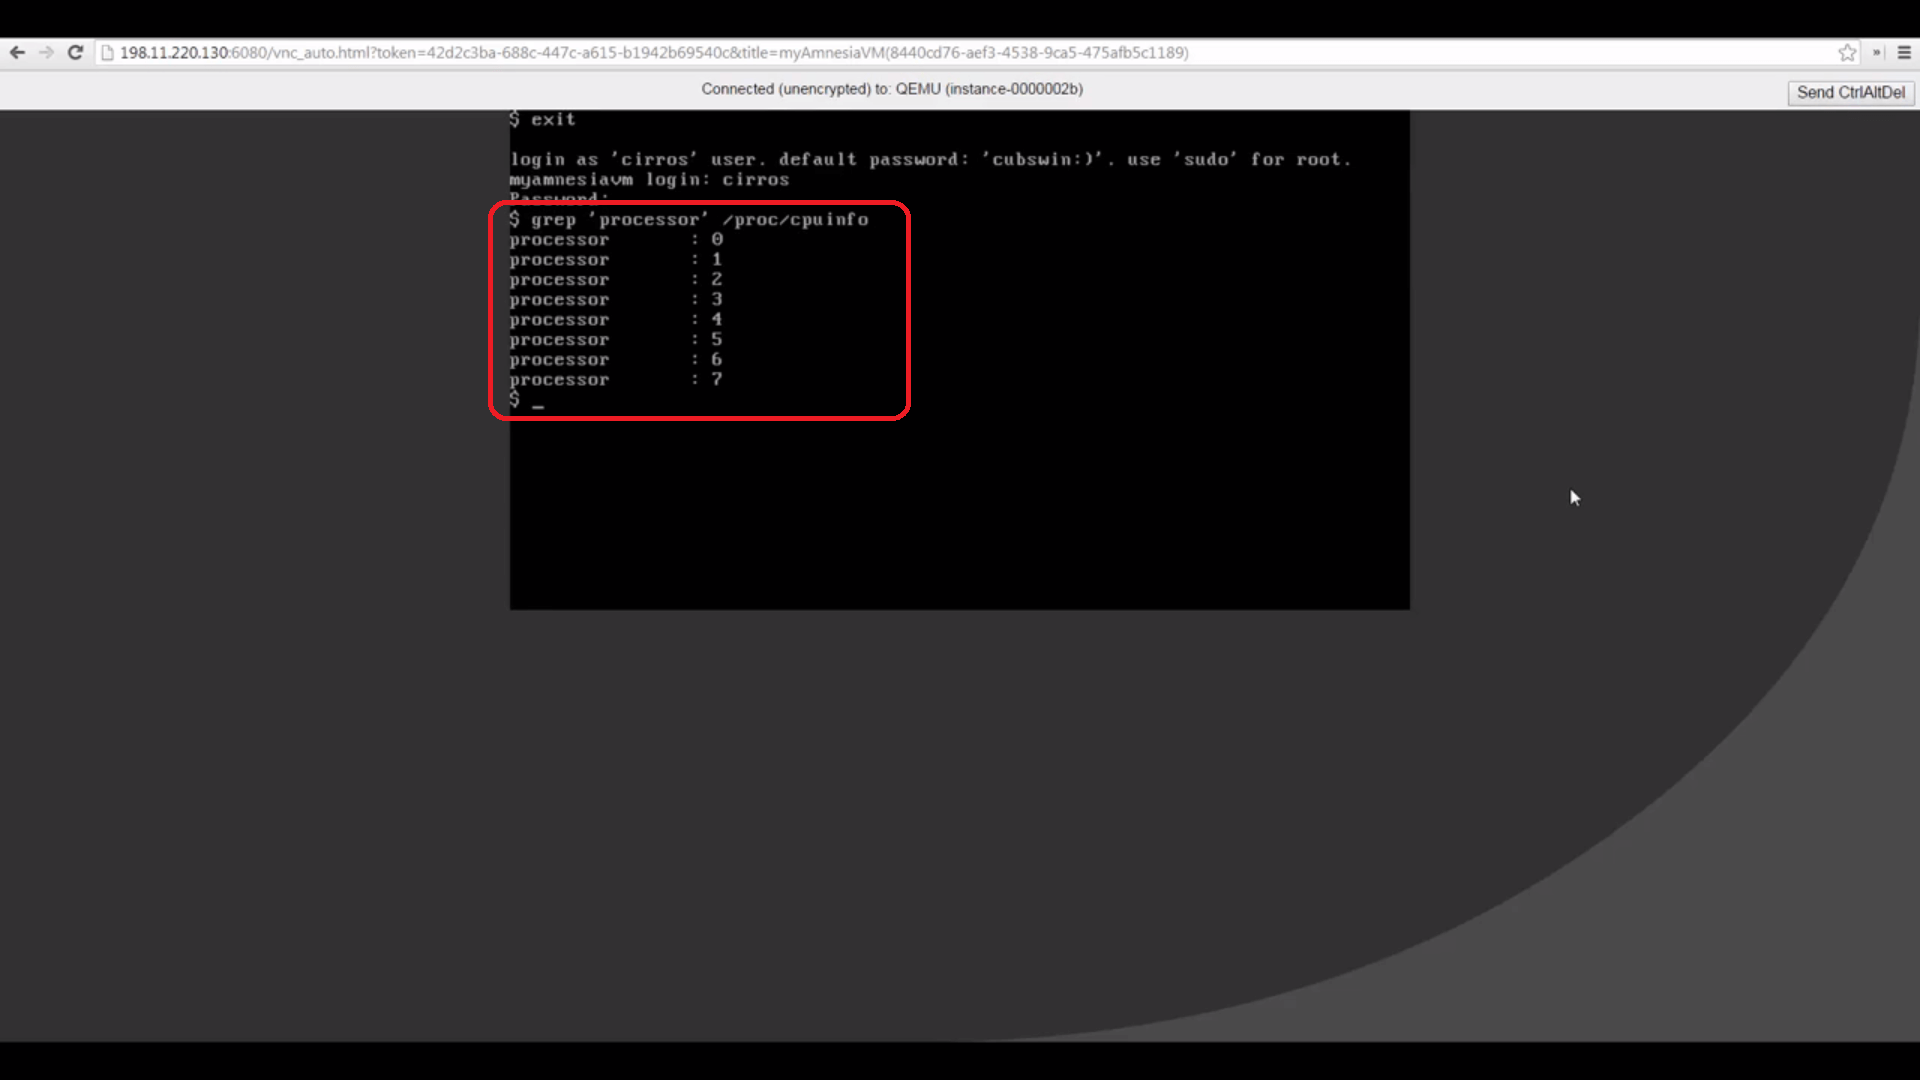
There’s our AmnesiaEngine, ready for work. Log in with the Console ...
And we can execute a cat /proc/cpuinfo command to see all of the many processors we have available.
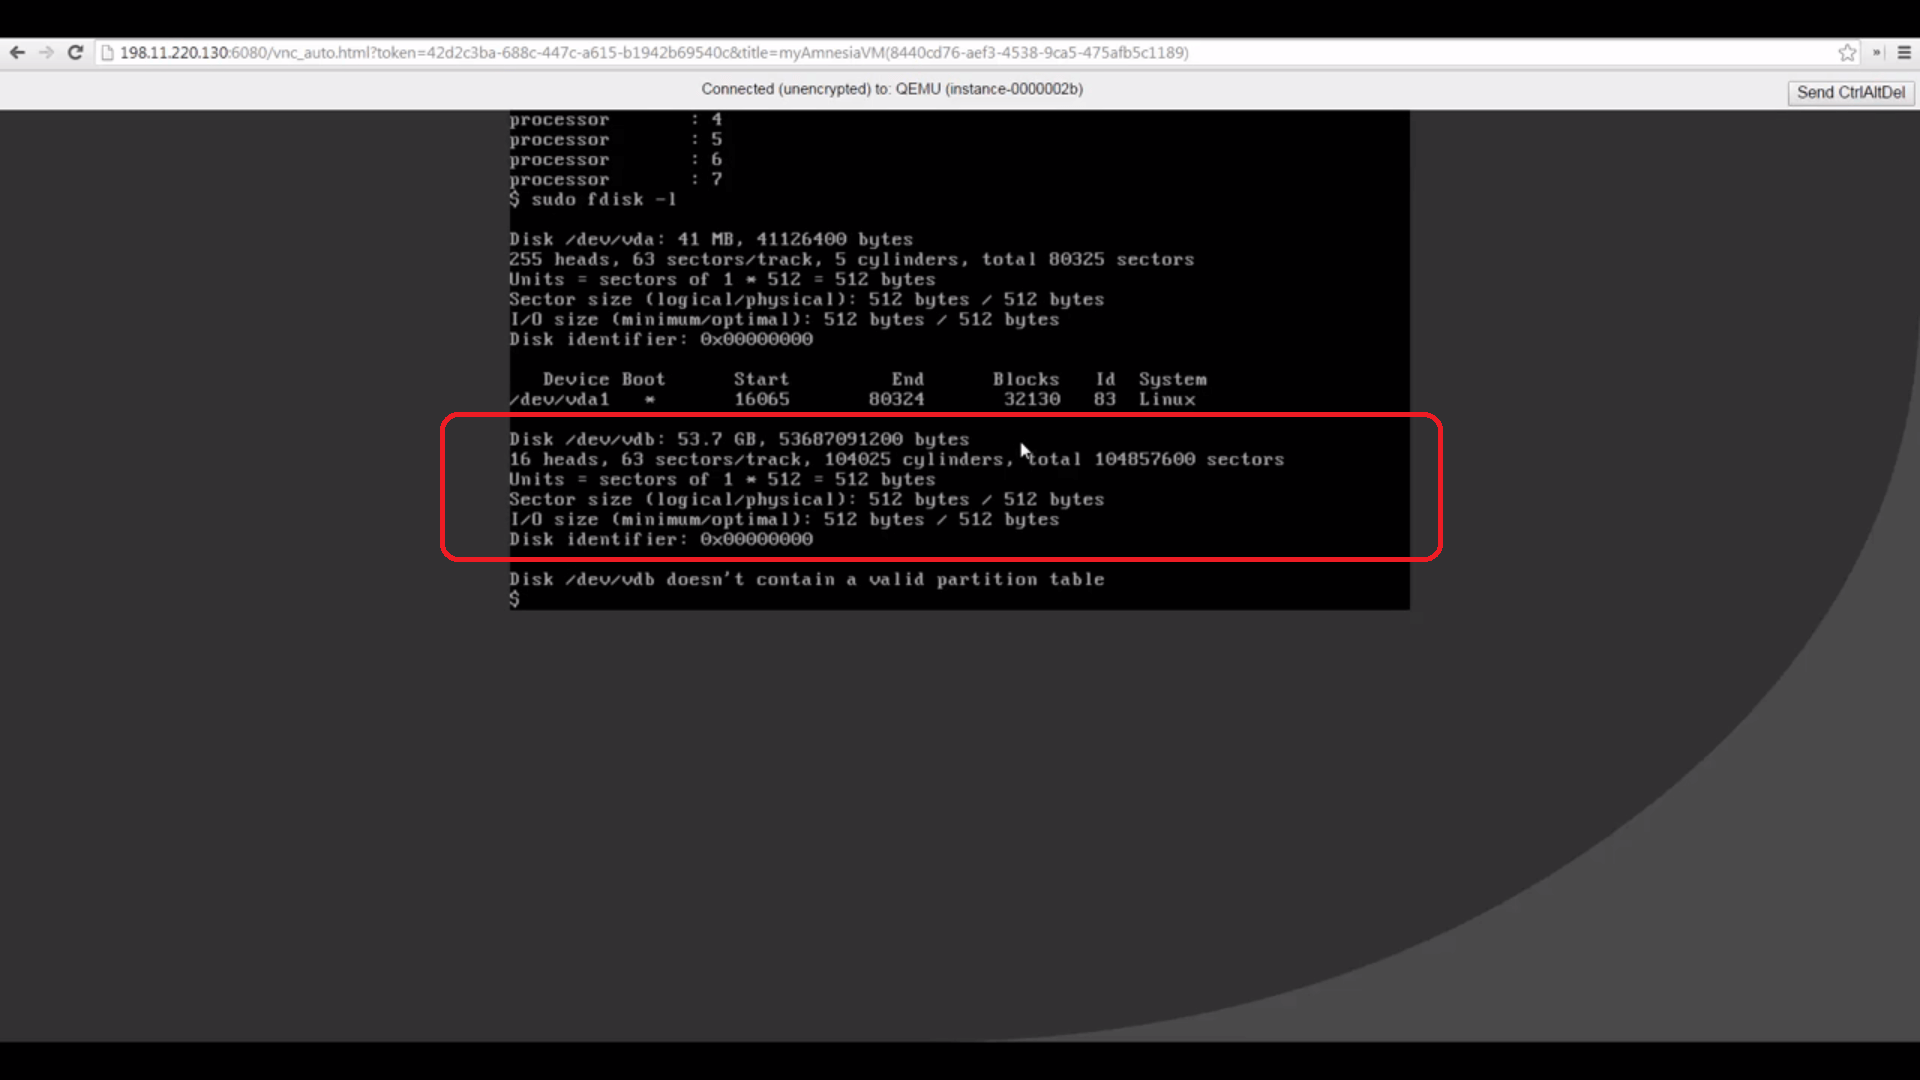
A sudo fdisk -l command shows us the 50GB Ephemeral disk this flavor comes with, ready for partitioning, file system creation and usage.
Now that we’ve explored flavors, our next tutorial will cover higher-level administrative tools for creating Projects and adding Users.
Resources:
Check out Express for yourself at https://express.mirantis.com.


