Mirantis OpenStack Express 2.0 - Launching a VM from a Boot Image
This is the second in a series of short tutorials showing how to perform common cloud operations tasks in Mirantis OpenStack Express 2.0 – Mirantis’ “Private Cloud as a Service”
In our last video, we showed you how easy it was to find and import a pre-configured boot image to Mirantis OpenStack Express 2.0. Now that we have an image, we can configure and launch a new VM instance from it. Before doing this, though, it makes sense to set up a keypair that can be injected into your instance so you can access it via SSH and SCP.
Basic Ops Tutorials
Mirantis OpenStack Express 2.0 -- Mirantis' "Private Cloud as a Service" -- is the fastest way to get your hands on a fully-functional, optimally-configured, private OpenStack cloud, running on hosted bare metal and able to scale on demand. This series of short tutorials shows how to perform common cloud operations tasks in MOX 2.0, and offers links to documentation and learning resources. Pro tip: though aimed at Mirantis OpenStack Express, many of the techniques discussed here will also work on a private OpenStack cloud deployed using Mirantis OpenStack.
Tutorials:
Step by Step
The OpenStack Horizon UI accessible under MOX 2.0 makes it very easy to configure and launch VM instances. Just go to Projects -> Compute -> Access and Security, click the Keypairs tab, and you can name and generate a new SSH keypair on the fly, downloading the .pem file, containing the private key, to your desktop.

MOS Horizon will record the keypair and present its name and fingerprint. Keypairs stored here will be offered in a popdown list, letting you select from among them to configure authentication on new instances at time of creation.

If you use Linux with openssh, you can use the ssh-keygen command to generate a keypair.

Then open the plaintext public key file and copy the contents.
Then choose Import Key to name the keypair and copy the public portion to Horizon.

Now that you’ve taken care of access security, you can launch a new VM instance from your image. Click on the Launch button, pick a name, and pick a flavor for this VM. Flavors are a quick way to select disk and RAM sizes and number of vCPUs. You can create custom flavors.

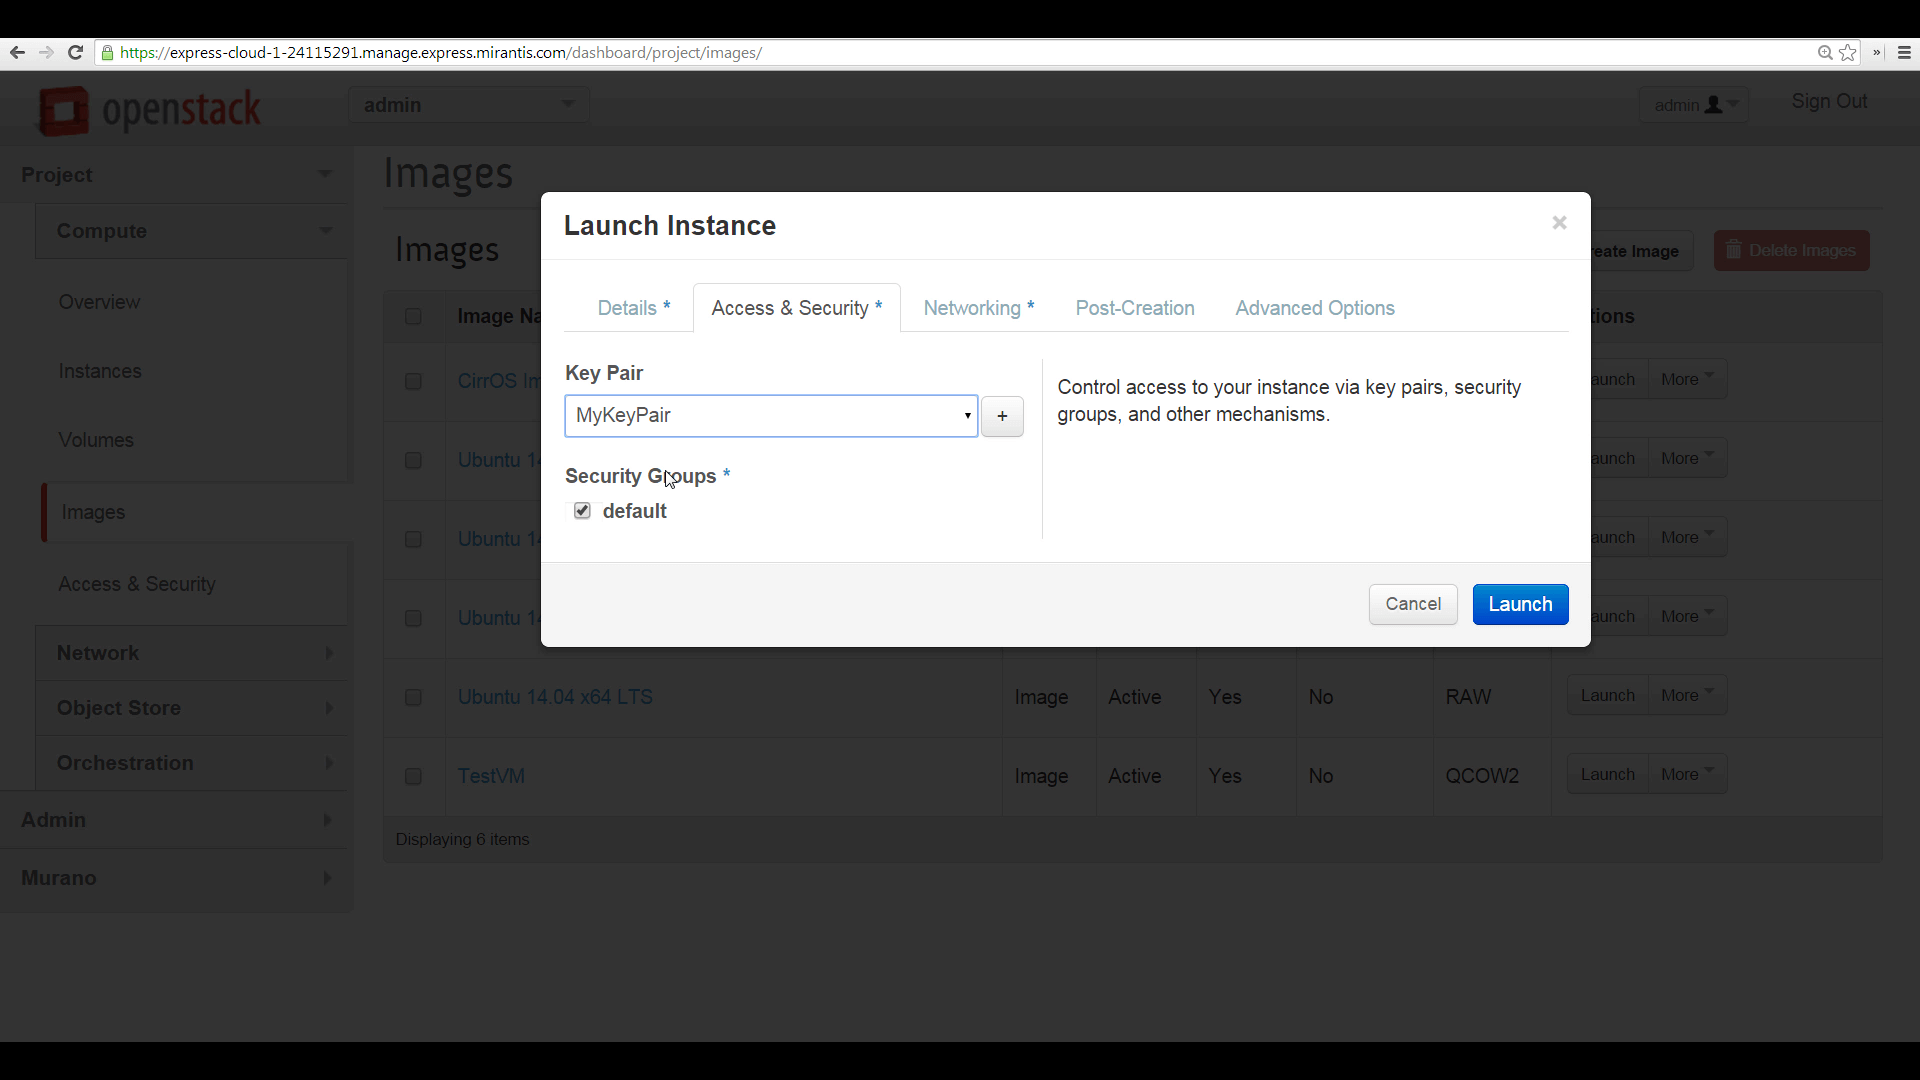
On the Access and Security tab, specify the SSH keypair you want to use to access this instance.
On the Networking tab, drag and drop the basic networking model, which will connect the new VM to the internal network, but not give it a public-facing IP address.
Click Launch. In just seconds, your new instance will be spawned.

To prepare to access your new instance from the public internet, you begin by associating a Floating IP address with it, via the topmost option in the instance’s More menu. The new IP address appears in the list of IPs associated with the instance.
To log into your VM instance, you can use SSH, the associated keypair, and the default username for this image -- in this case, that’s ‘cirros’ -- pointing SSH to the floating IP address you’ve just assigned.

To do this from a Windows PC using the popular free SSH client, PuTTY, begin by using the companion application, PuTTYGen, to load the .pem file, then save the private key in PuTTY’s .ppk format, as shown here.

Then configure a PuTTY session, using the floating IP address as the target, then click ‘Auth’ and browse to the .ppk file. Launch PuTTY, and your session will authenticate. Enter ‘cirros’ as the username.

You can also access Cirros and other appropriately-configured instances from the Horizon VNC console, with username/password authentication. In this case, the default username is ‘cirros’ and the default password is ‘cubswin:)’.

Now that we know how to configure and launch an instance from an image, and how to access it securely afterward, our upcoming videos will examine Mirantis OpenStack Express 2.0 features for configuring and attaching block storage volumes.
Resources:
Check out Express for yourself at https://express.mirantis.com.


