
Mirantis OpenStack Express — Intro to Object Store
This is the tenth in a series of short tutorials showing how to perform common cloud operations tasks in
Mirantis OpenStack Express — Mirantis’ “Private Cloud as a Service”
In our last video, we learned how to reach the OpenStack controller’s command line, and played with launching VMs and
injecting post-boot configuration scripts. Now we’re going to take a look at your Mirantis OpenStack Express
cluster’s Object Store and the Swift API it runs on.
Basic Ops Tutorials
Mirantis OpenStack Express — Mirantis' "Private Cloud as a Service" — is the fastest way to get your hands on a fully-functional,
optimally-configured, private OpenStack cloud, running on hosted bare metal and able to scale on demand. This series
of short tutorials shows how to perform common cloud operations tasks in MOX, and offers links to documentation and
learning resources. Though aimed at Mirantis OpenStack Express, many of the techniques discussed here will also work
on a private OpenStack cloud deployed using
Mirantis OpenStack .
Tutorials:
- Adding New Custom Boot Images
- Launching a VM from a Boot Image
- Creating a Block Storage Volume
- Attaching and Using Volumes
- Creating new VM Flavors
- Setting Up a project
- Murano in a Minute
- Mirantis OpenStack Express VPN-as-a-Service
- Running OpenStack from the Command Line
- Automating VM Launch and Apache Installation
- Intro to Object Store
What’s the Object Store?
The OpenStack Object Store is a facility that lets applications store and retrieve binary objects using the RESTful
methods of the Swift API — this scales better than OS-level access to block storage and conventional file
systems.
The Swift engine is the default back-end for the Object Store, and is also used by Glance for storing images in HA
deployments. But Mirantis OpenStack Express users can also deploy clouds that use Ceph as a back-end for Glance and
the Object Store (via Ceph’s implementation of a subset of the Swift API), as well as block and filesystem storage
(for Cinder and other components requiring these services). For a comparison of Swift and Ceph, this blog post by
Dmitry Ukov is a great resource.
The Object Store is exposed in Horizon so that admins can create object containers for projects (tenants), upload
objects, and manage them. Containers and objects can also be created using the (soon to be deprecated) Swift CLI,
and using REST functions from authenticated endpoints.
We’ll look at all three methods. But first, we’ll modify the default configuration of the Swift proxy in MOX to
permit use of Public containers and objects.
A Quick Tweak
Public containers are a useful feature of Swift Object Storage: they let you save stuff and share it with anyone by
giving them a URL. In combination with helper software, they also permit creation of static websites. But they’re a
potential security risk, so they’re turned off by default in OpenStack clouds that use Keystone authentication
(though they’re on by default in clouds that use TempAuth authentication mdash; a deprecated mechanism).
Let’s see what happens when we create a Public container on a default MOX cloud, put something in it, and try to
access it RESTfully. In Horizon, go to Project -> Object Store -> Containers, click the Create Container button,
give your container a name, and set it to Public with the popdown.
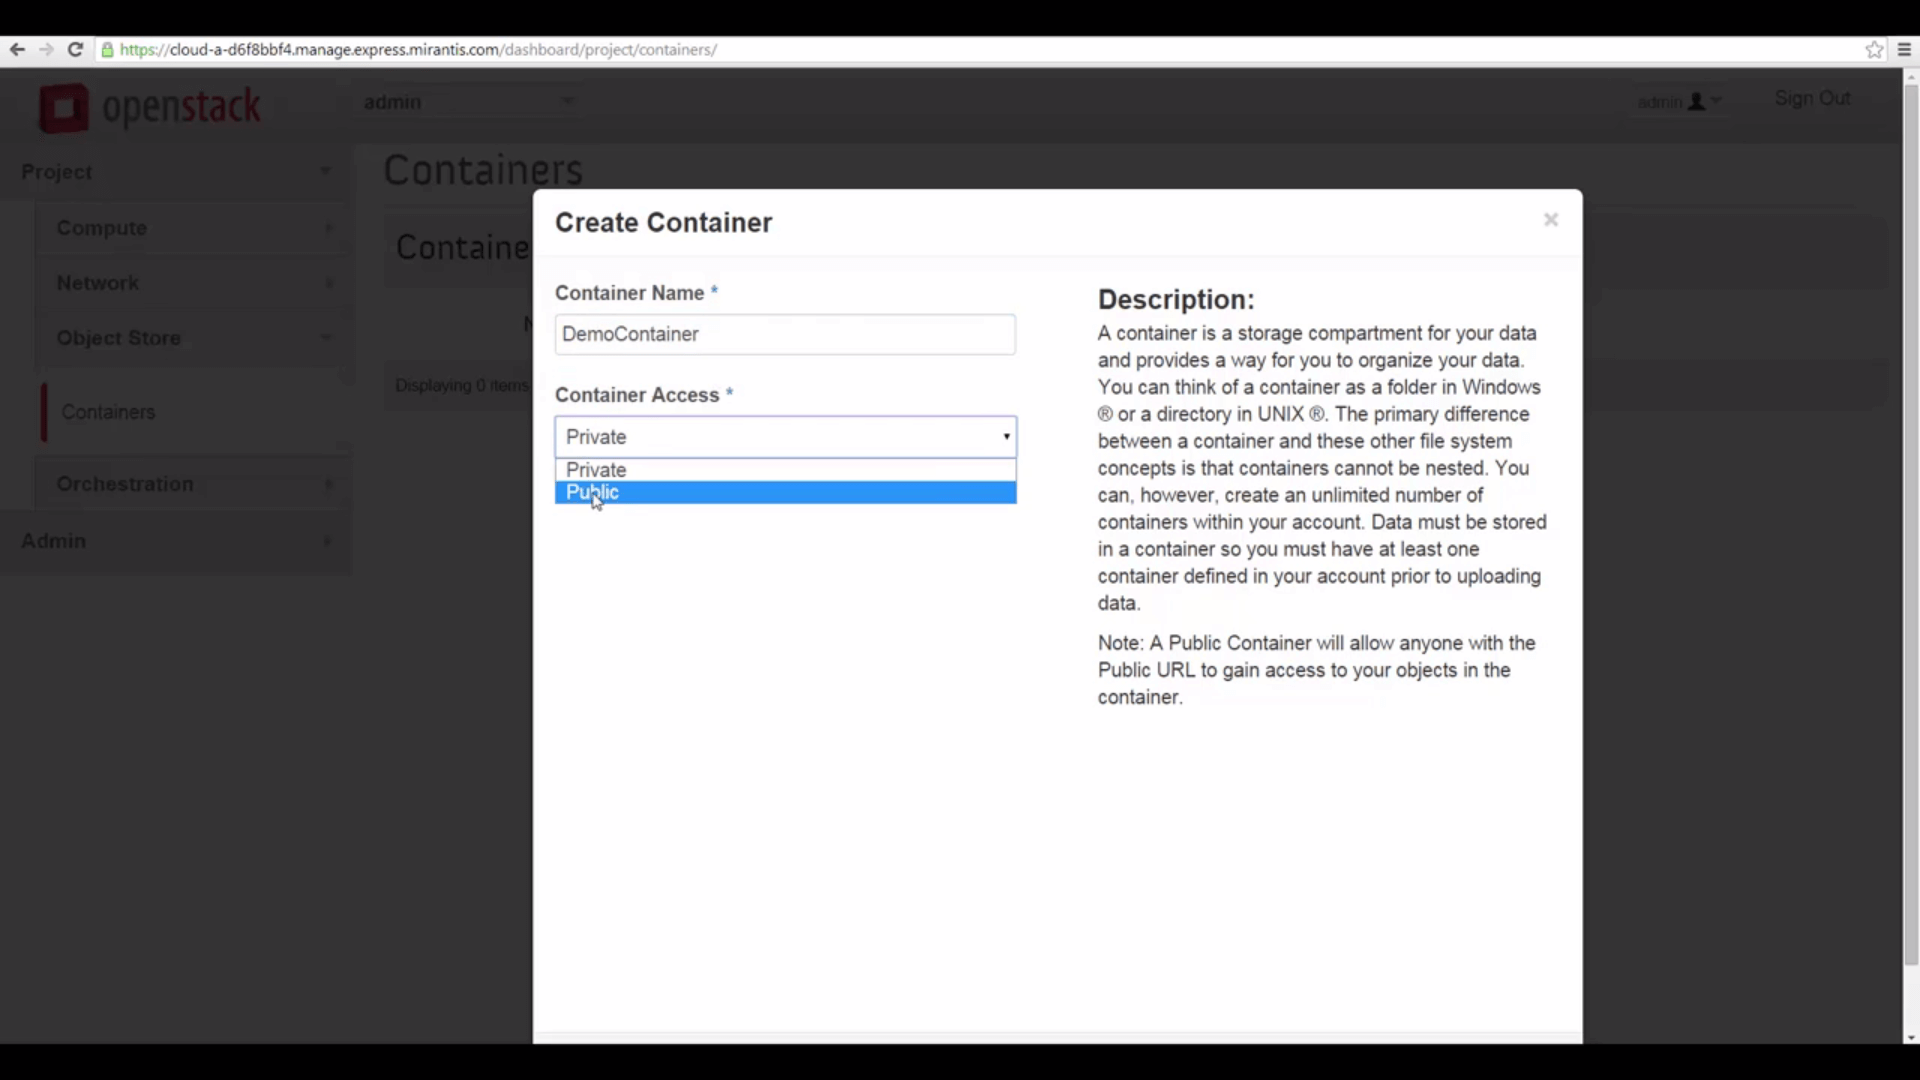
open access via URL alone.
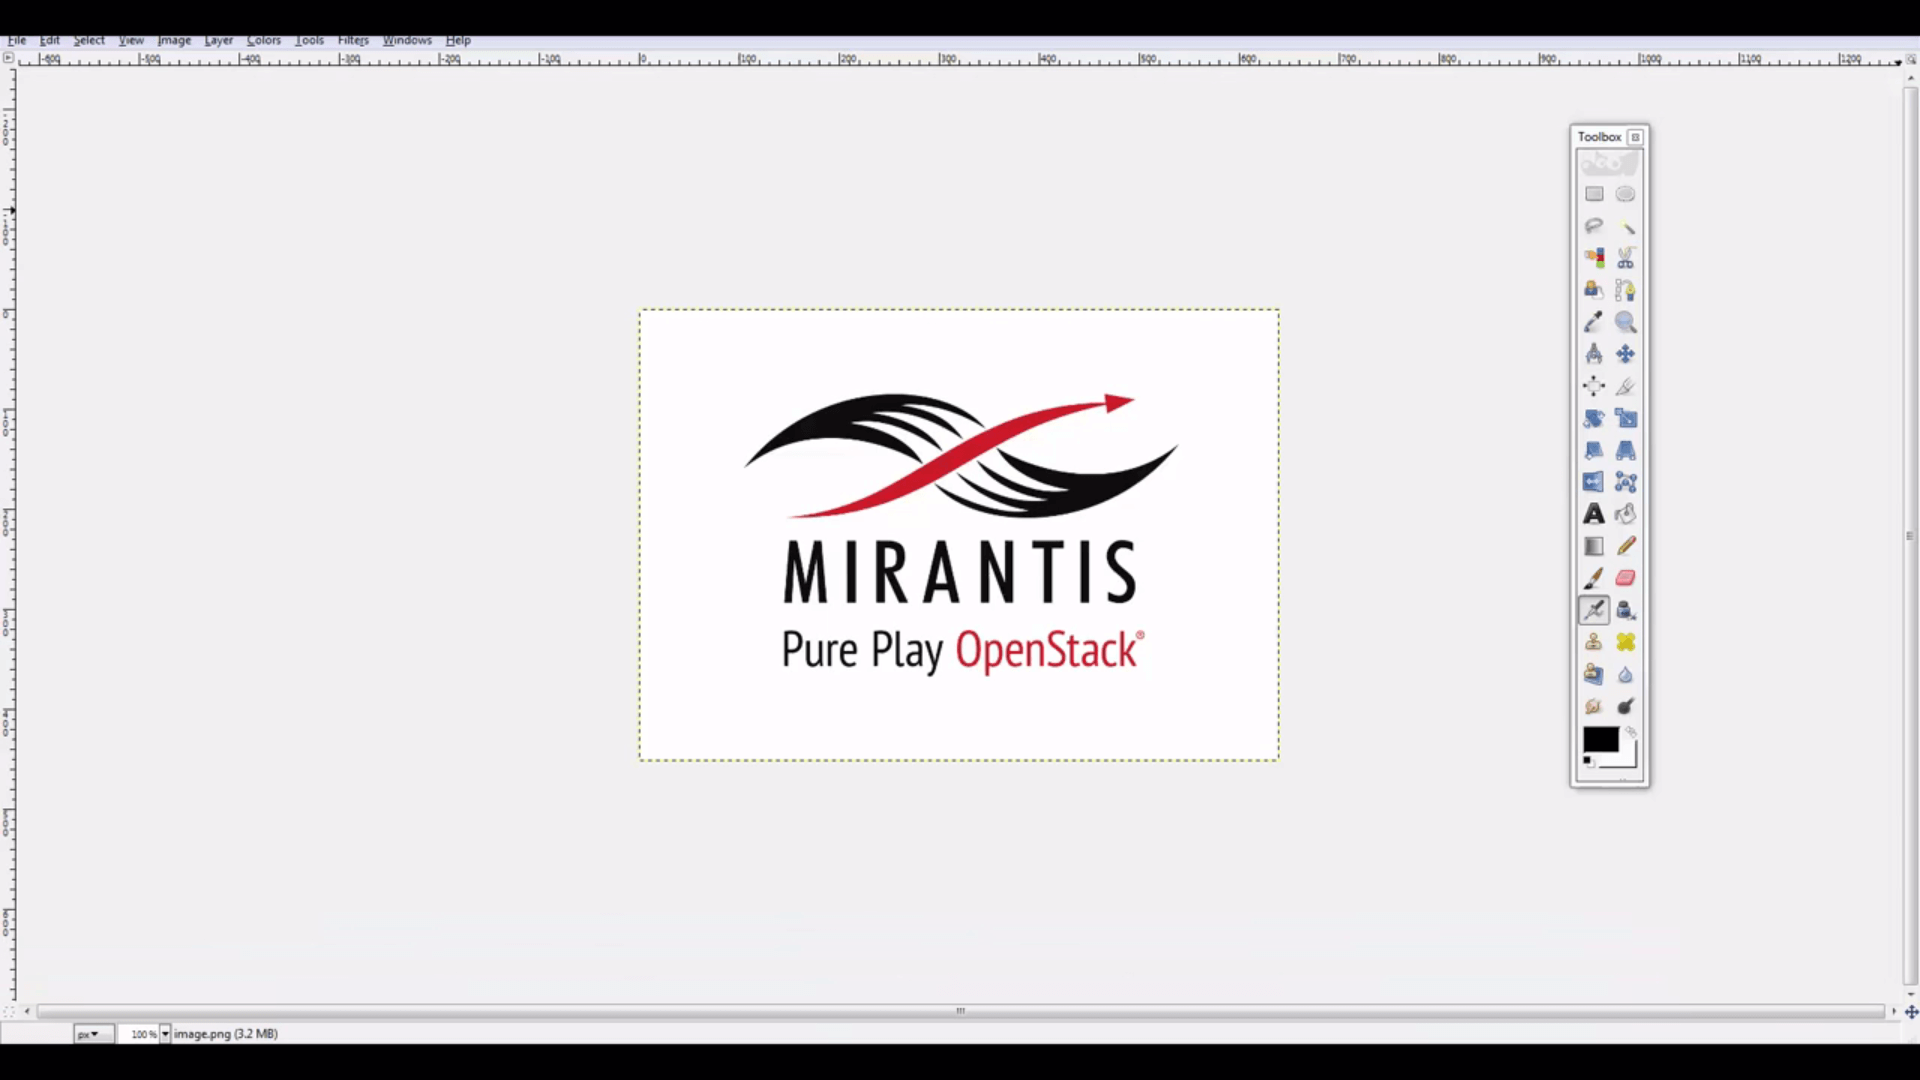
Then click on the container name, click the Upload Object button, and upload an object: any random image (that you
don’t mind exposing to the public internet) is fine.
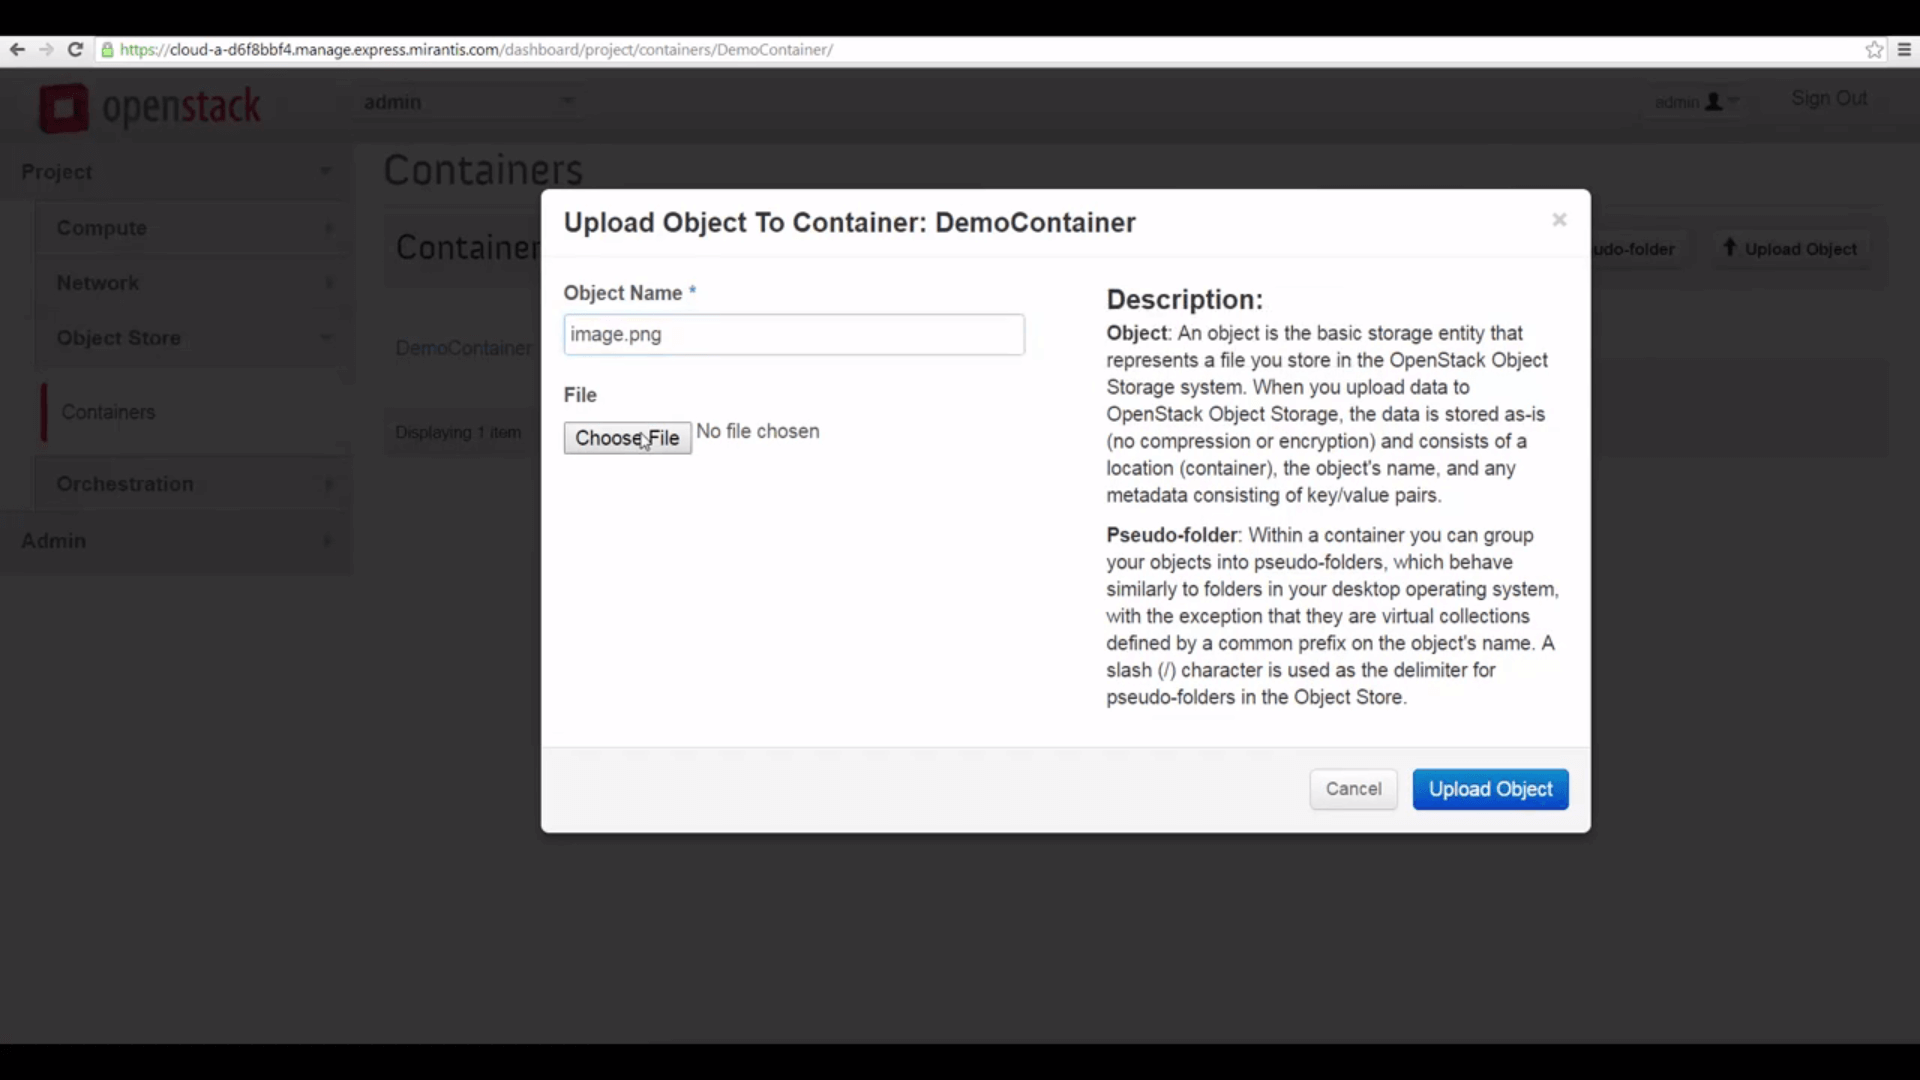
image.png.
Now click the View Details button, and copy the Public URL for the container.
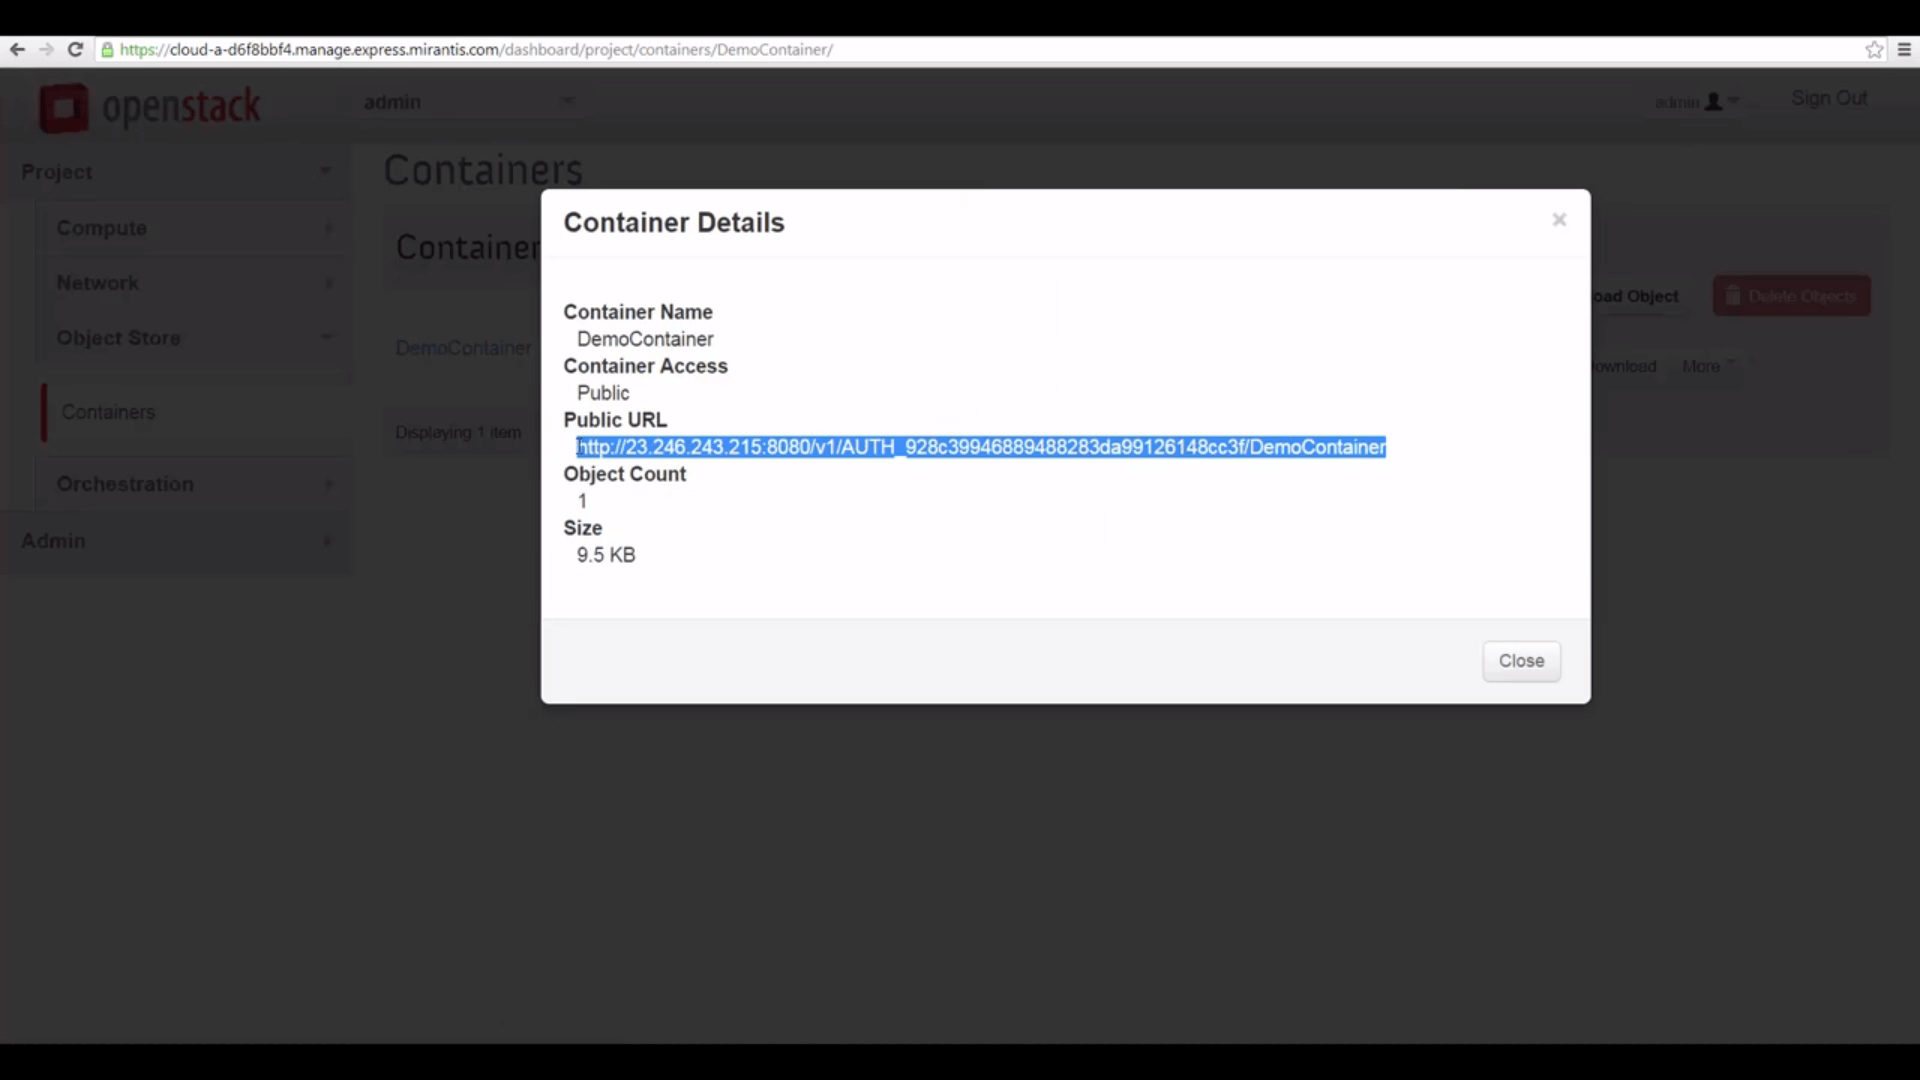
comprising the Storage URL, tenant ID, container name, and object name.
Then create a complete URL for the contained object (in my case, that’s image.png) by appending the object name.
http://23.246.243.215:8080/v1/AUTH_928c39946889488283da99126148cc3f/DemoContainer/image.png
... which has four parts:
- The Storage URL: http://23.246.243.215:8080/v1
- A composite ID identifying the tenant (project): In Swift, this is AUTH_ followed by the tenant ID
- The container name
- The object name
You can, in an appropriately-configured OpenStack cloud, use the above URL in any browser to access a Public
resource. But if we try that with our cloud, it won’t work: we get a page back with the message Authentication
required.
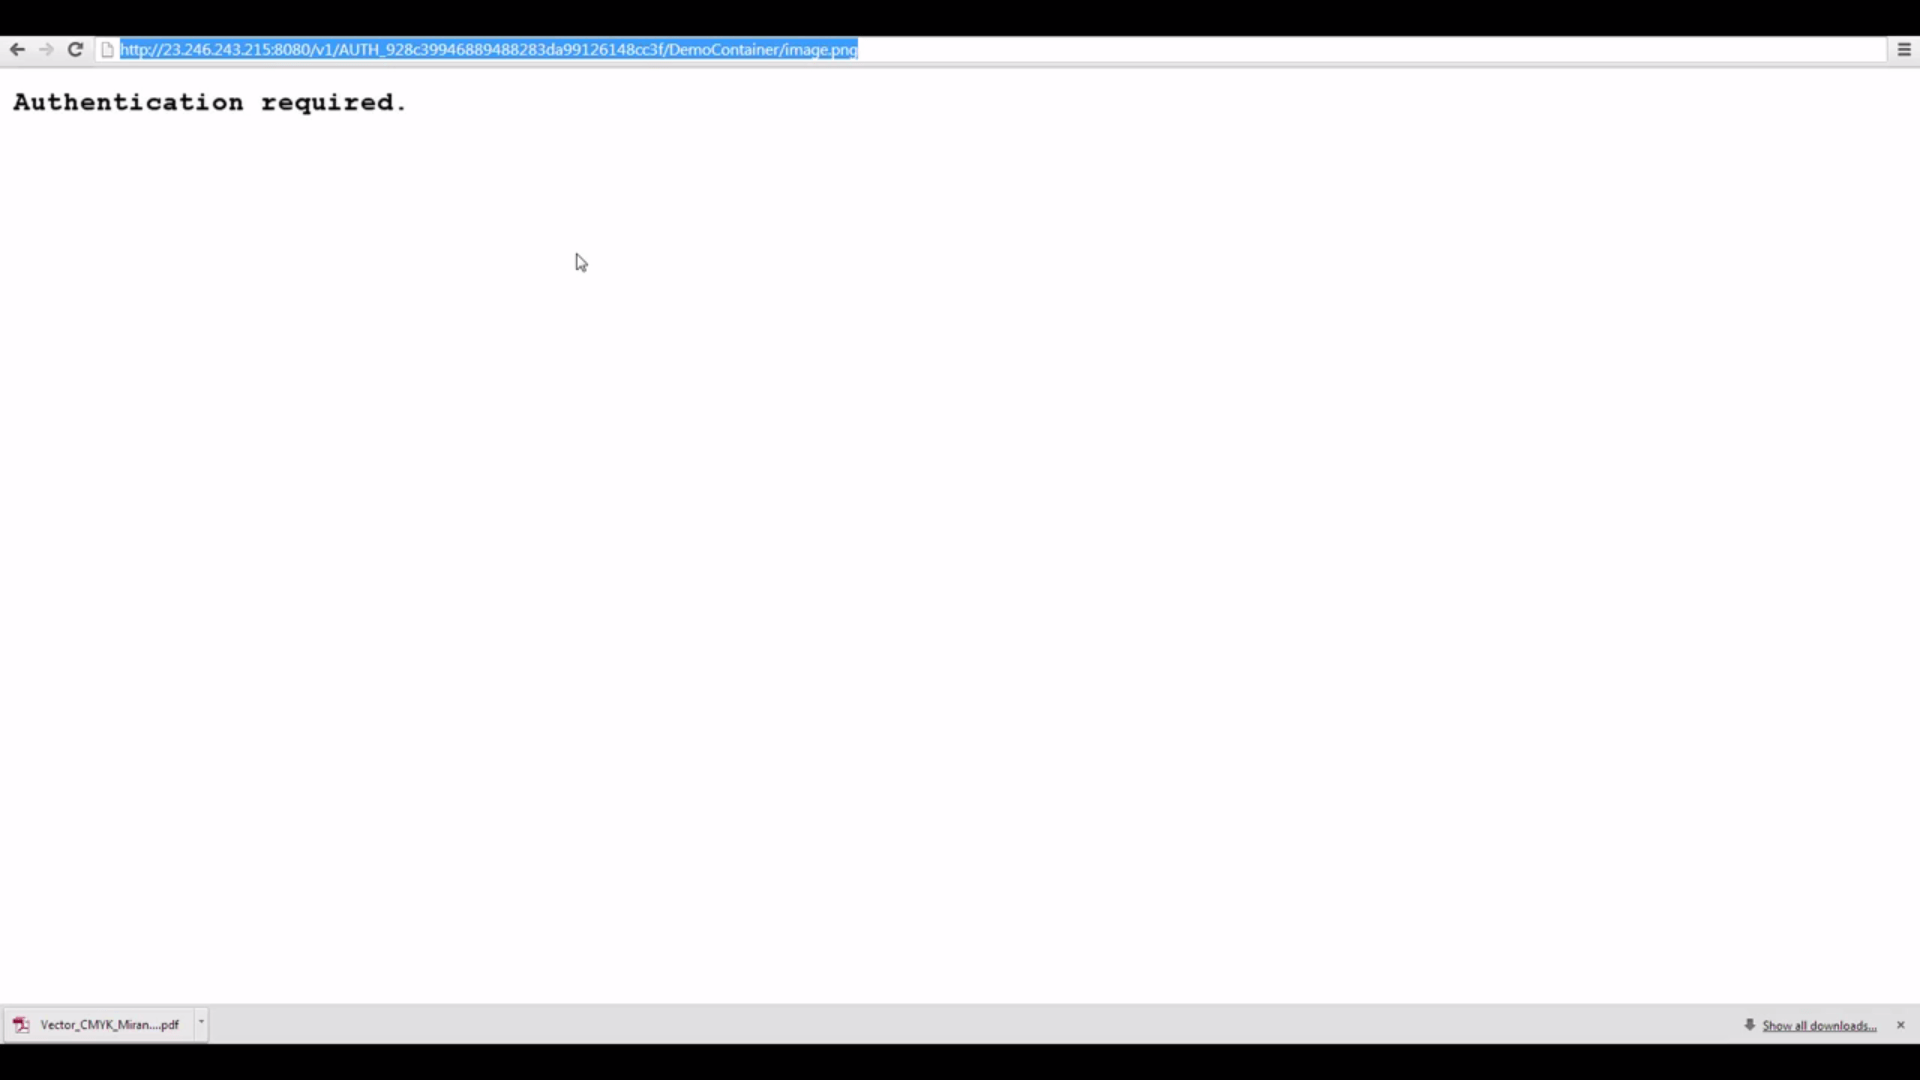
uses Keystone authentication), this Public URL doesn't work for us, unless me make a small tweak in Swift's
proxy server configuration.
There’s a quick fix, however, thanks to our ability to access the OpenStack controller as root. Please note that this
change enables access to containers and objects already designated Public (but not functioning as such in the
default configuration). We recommend evaluating the status of existing containers and contents before making this
change, so that private data is not inadvertently exposed.
Step by Step
Let’s check the IP address and password for our Fuel server under the Credentials popdown of the Mirantis OpenStack
Express dashboard. Then let’s pop a terminal window, SSH into the Fuel Master node, then SSH to our Controller node
using its FQDN or Fully Qualified Domain Name (in the case of my demo cloud, that’s node-5). Finally, let’s source
openrc so we can access the OpenStack CLIs.

Node, then issue the command
source openrc to put authentication info in our environment for theOpenStack client CLIs.
Now let’s tweak the configuration of Swift’s proxy server. Let’s use vi to edit /etc/swift/proxy-server.conf.
Let’s search for the configuration variable delay_auth_decision, which is under [filter:authtoken], and
change its value from 0 to 1. Then save the file and exit.

/etc/swift/proxy-server.conf, changing thevalue of variable
delay_auth_decision from 0 to 1.Finally, let’s restart the proxy by issuing the command /etc/init.d/openstack-swift-proxy restart.

/etc/init.d/openstack-swift-proxy restart.Now, our Public URL will work from any browser to display our image.
Let’s go to a browser and try accessing our object again, using the Public URL. It works!
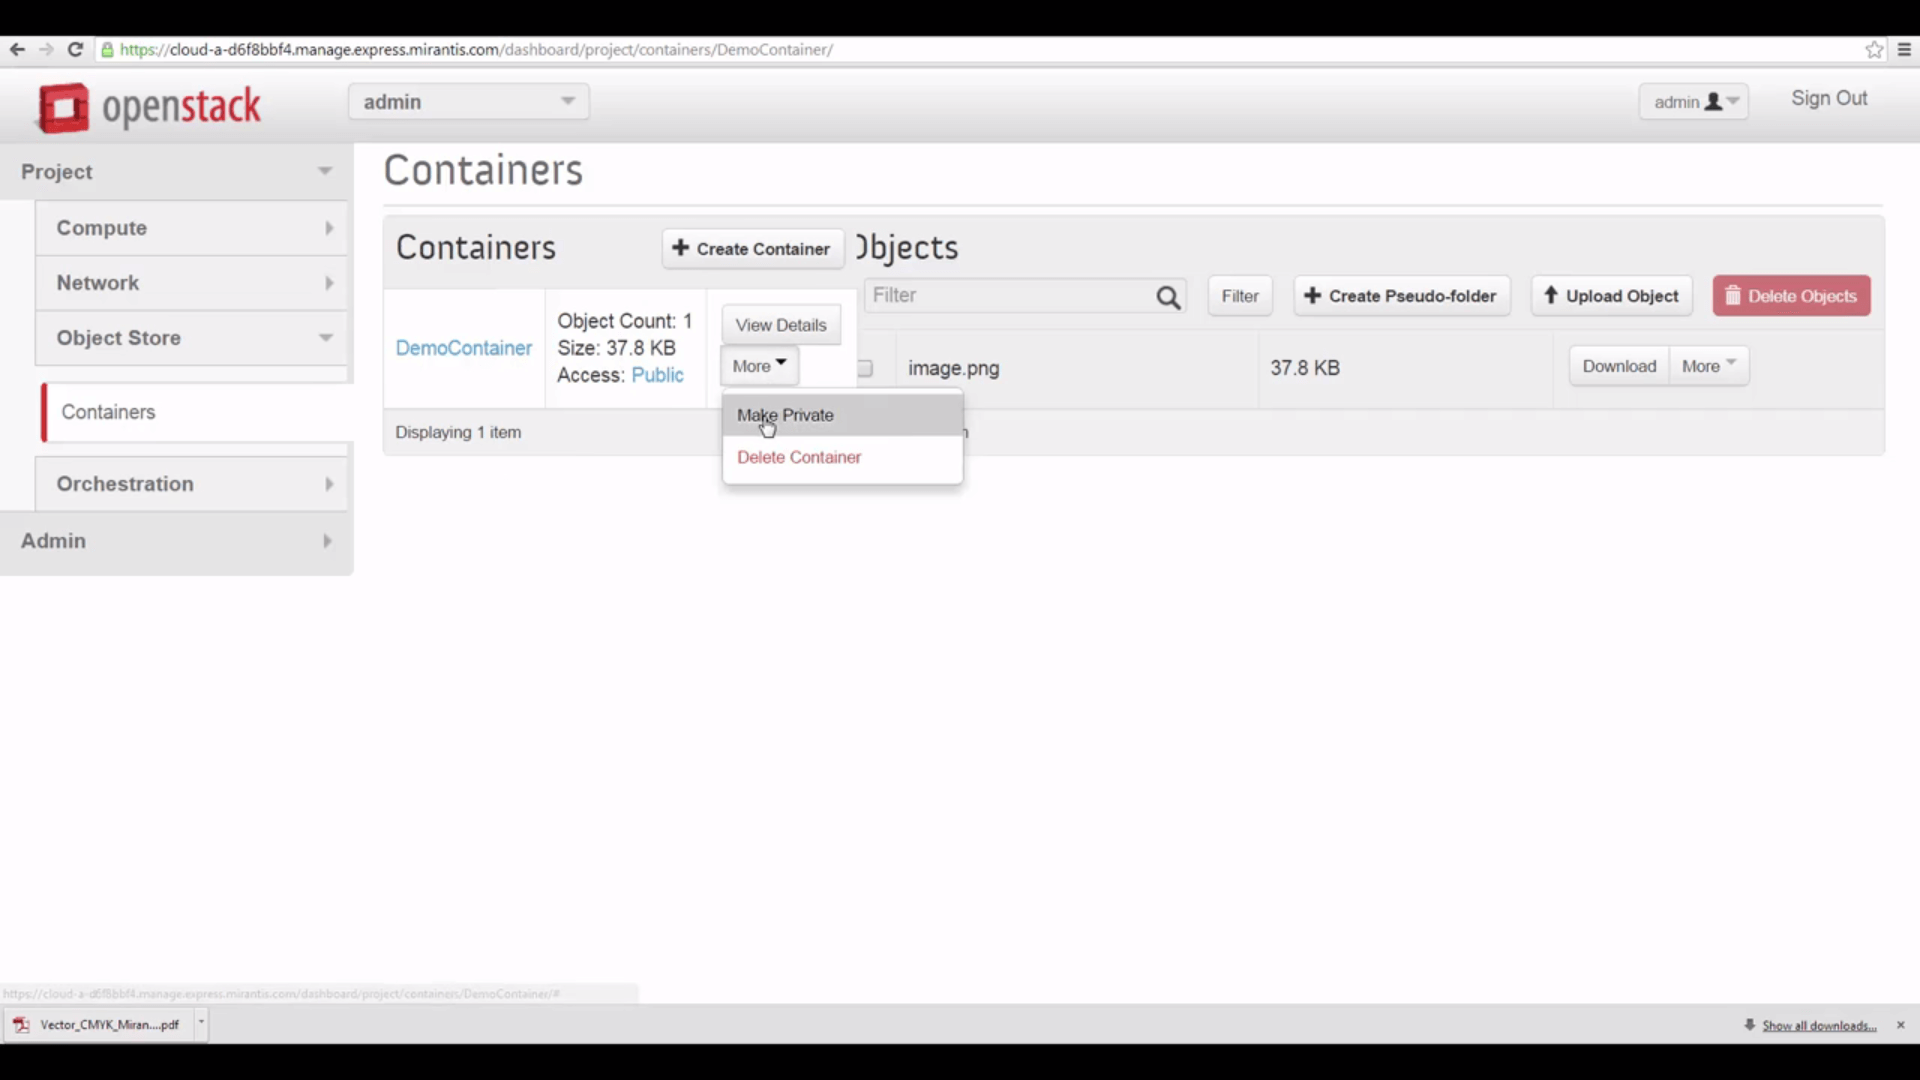
Going Private
Now, let’s go back to Horizon and make our container private by clicking the More button, and choosing Make
Private.
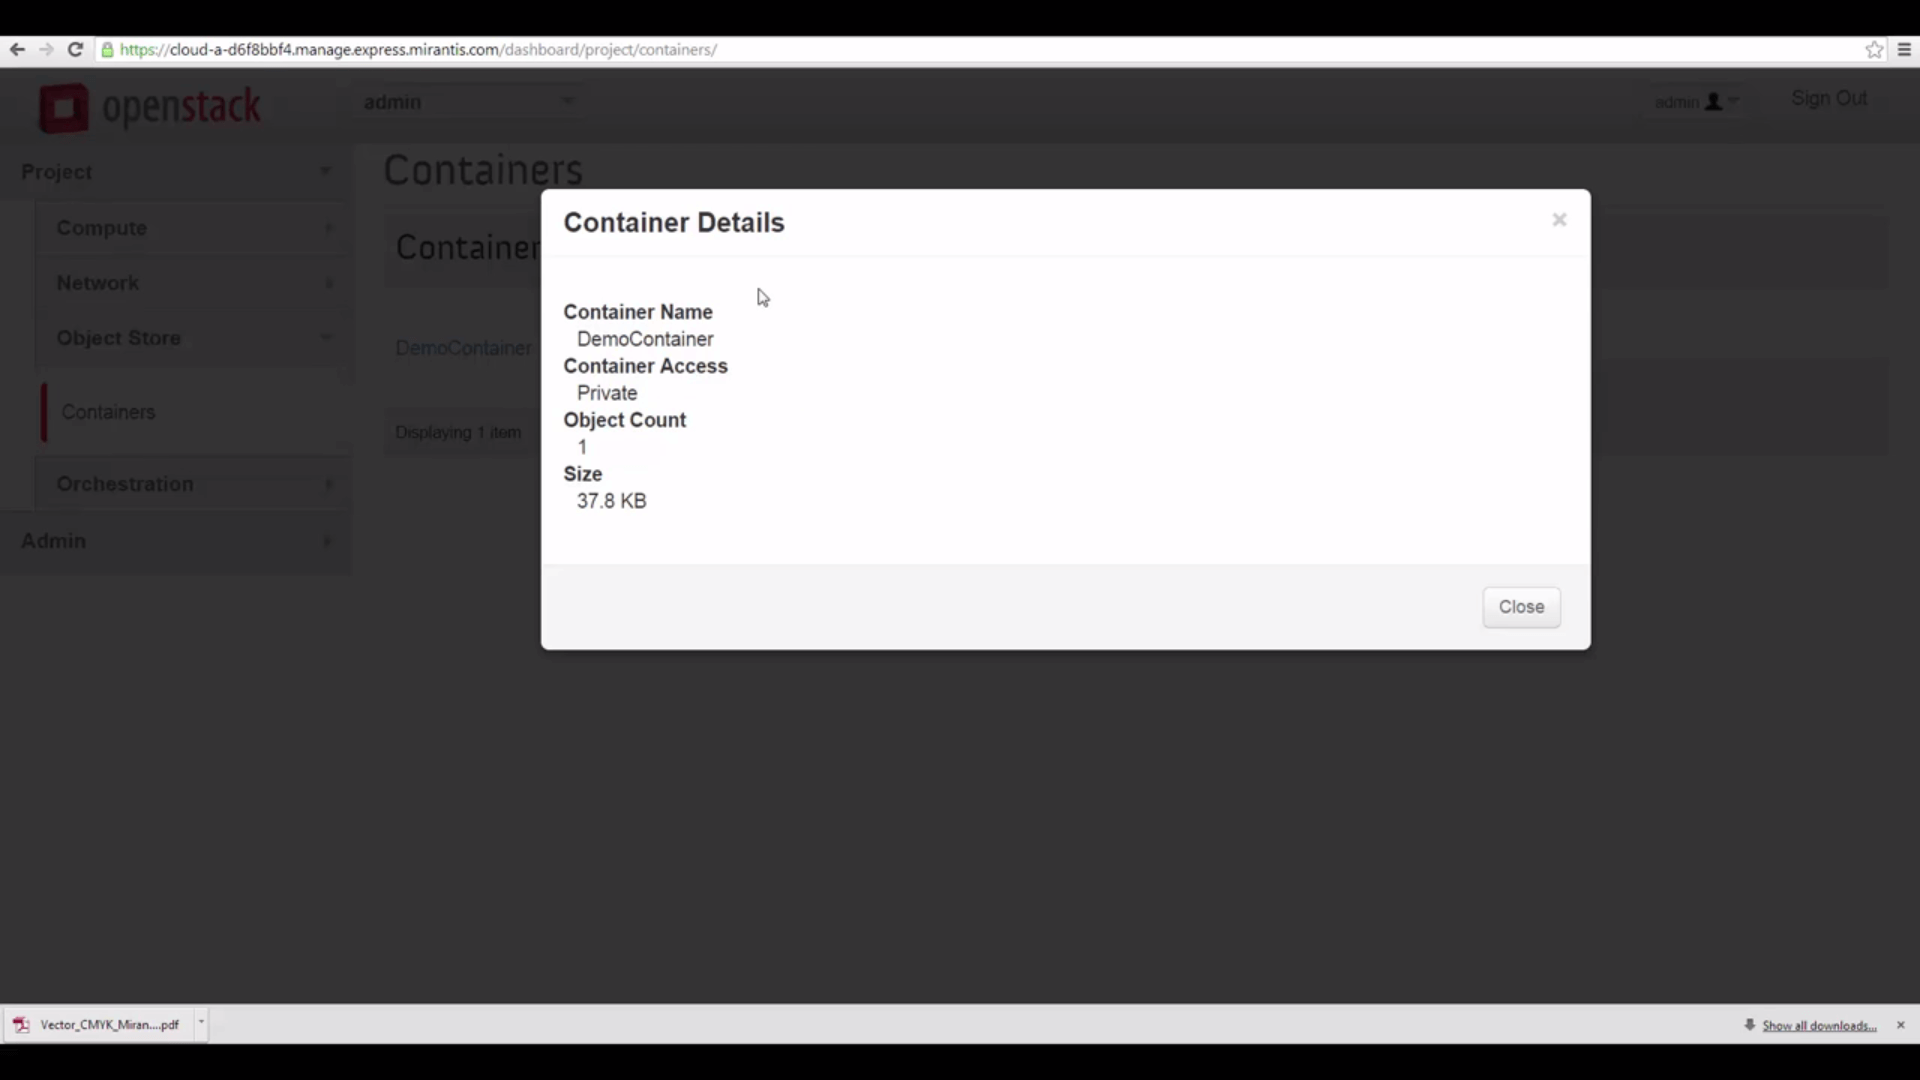
If we check View Details again, we see the Public URL has vanished.
But since we’re the admin — and the owner of this container — we can still access it, though. Let’s start
by using the Swift client CLI and issuing the command:
swift stat DemoContainer
We get info back about the container, the number of objects it contains, and the Account (ours, the admin account)
that it belongs to. We know the container is private, because its Read ACL, or Access Control List, is blank.
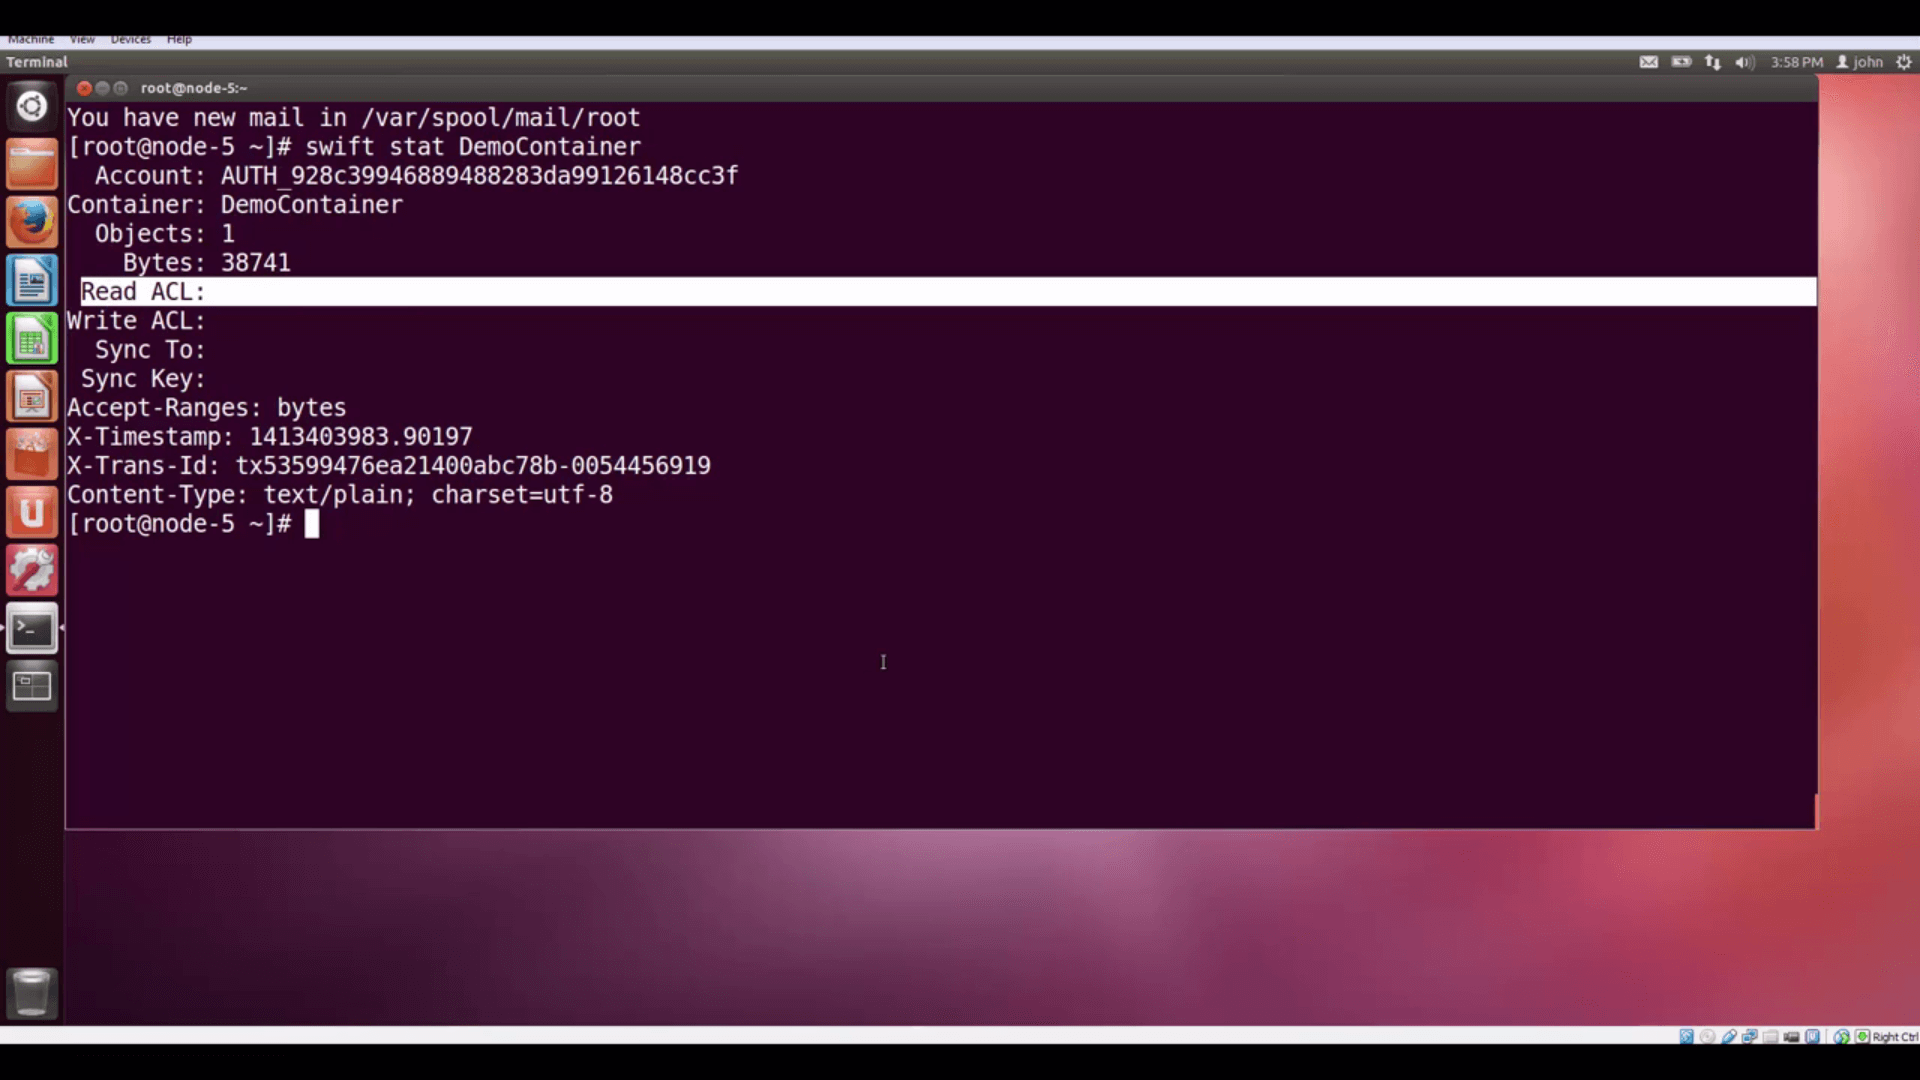
swift stat DemoContainer shows us information about our now-privatecontainer, including the blank Read ACL (Access Control List) that shows it's now private.
We can also do:
keystone tenant-list
… to see the admin tenant’s ID, and compare with the Account that owns the container. As you can see, the Account is
just AUTH_ with the tenant ID appended.

swift stat DemoContainer is justAUTH_, prepended to the admin account's Tenant ID, as keystone tenant-list shows.Now that it’s private, we need an authentication token to access this object. As the admin, a quick way to get this
is to issue the Swift client command:
swift stat -v
… which gives us the StorageURL for our containers (with the Account ID appended), and also shows an Auth Token. In a
standard OpenStack implementation, this kind of token expires in an hour. The swift stat -v command actually gives
us a new token each time we call it.
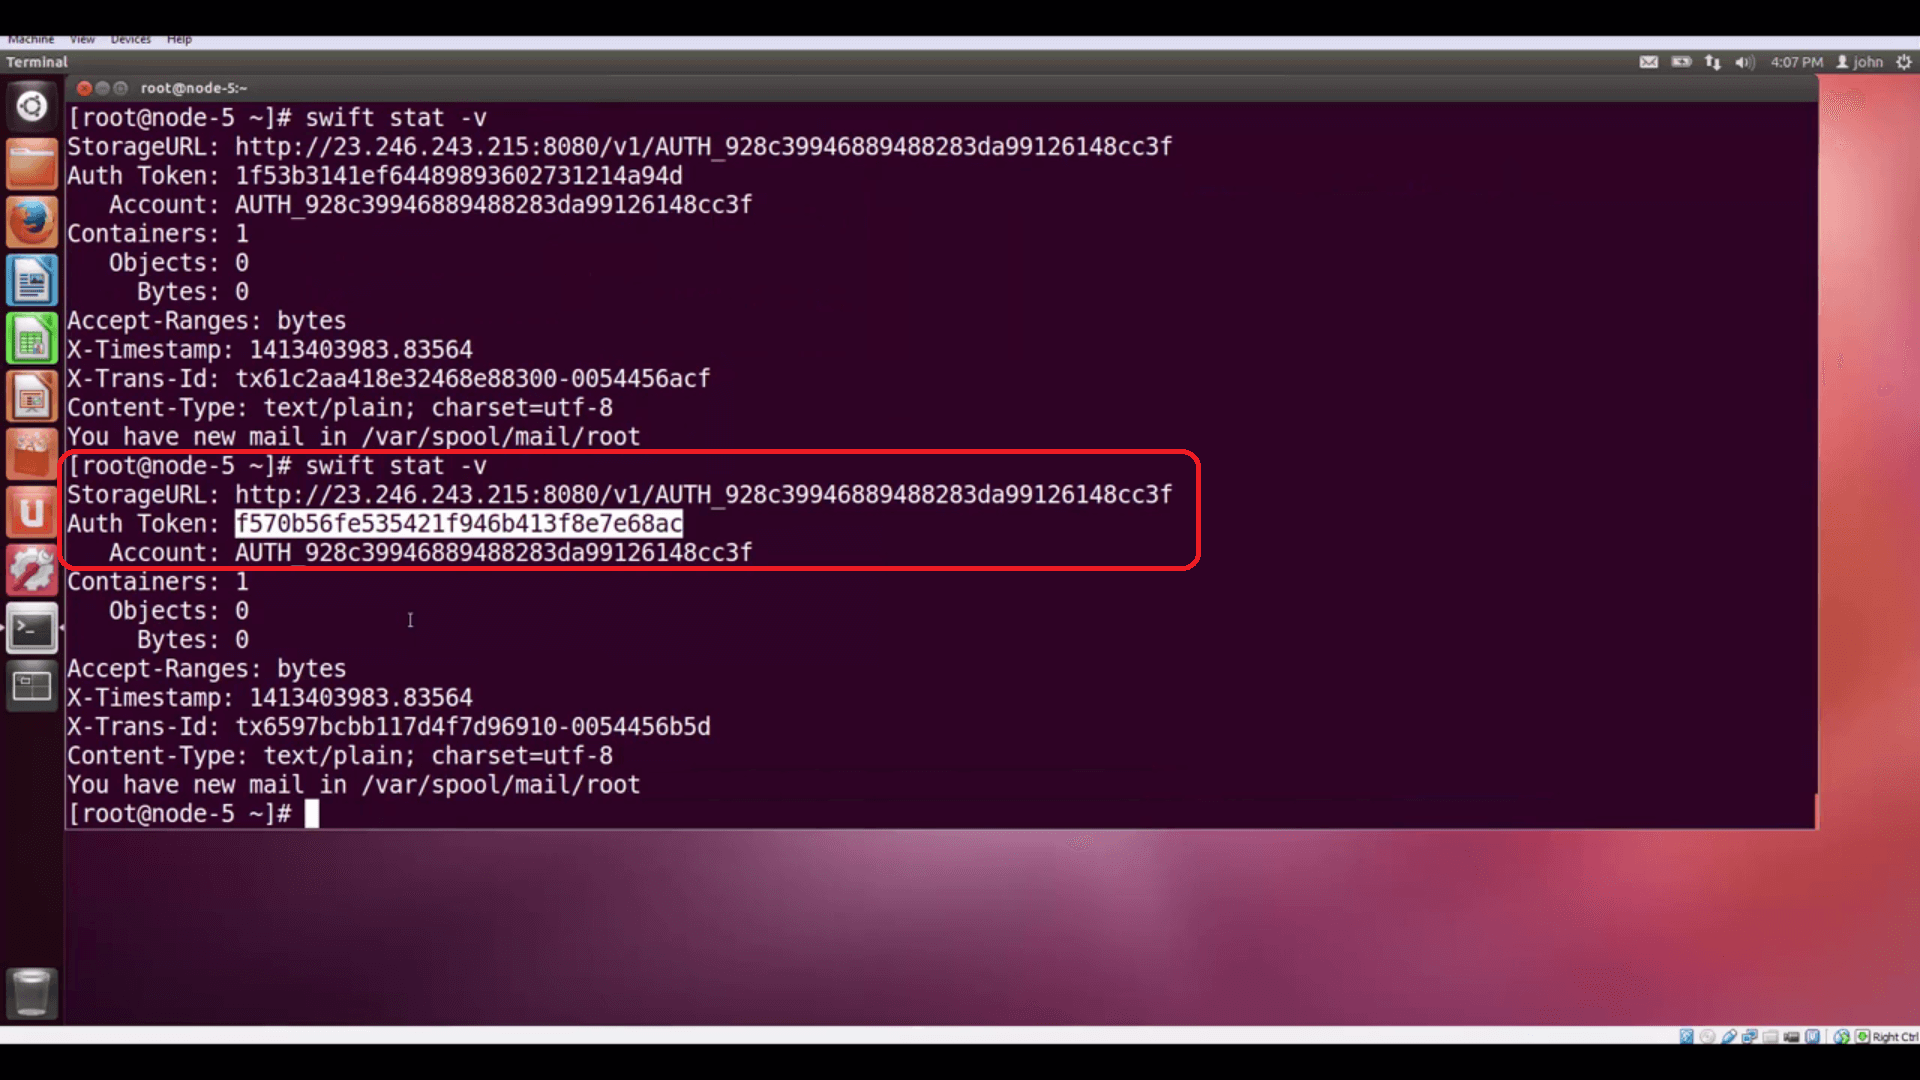
swift stat -v returns information about your Object Store: topmost isthe public Storage URL, followed by an (unscoped) Auth Token that can be used to access private objects.
Using this information, we can compose a REST expression that will authenticate us to Swift and let us access our
stored object.
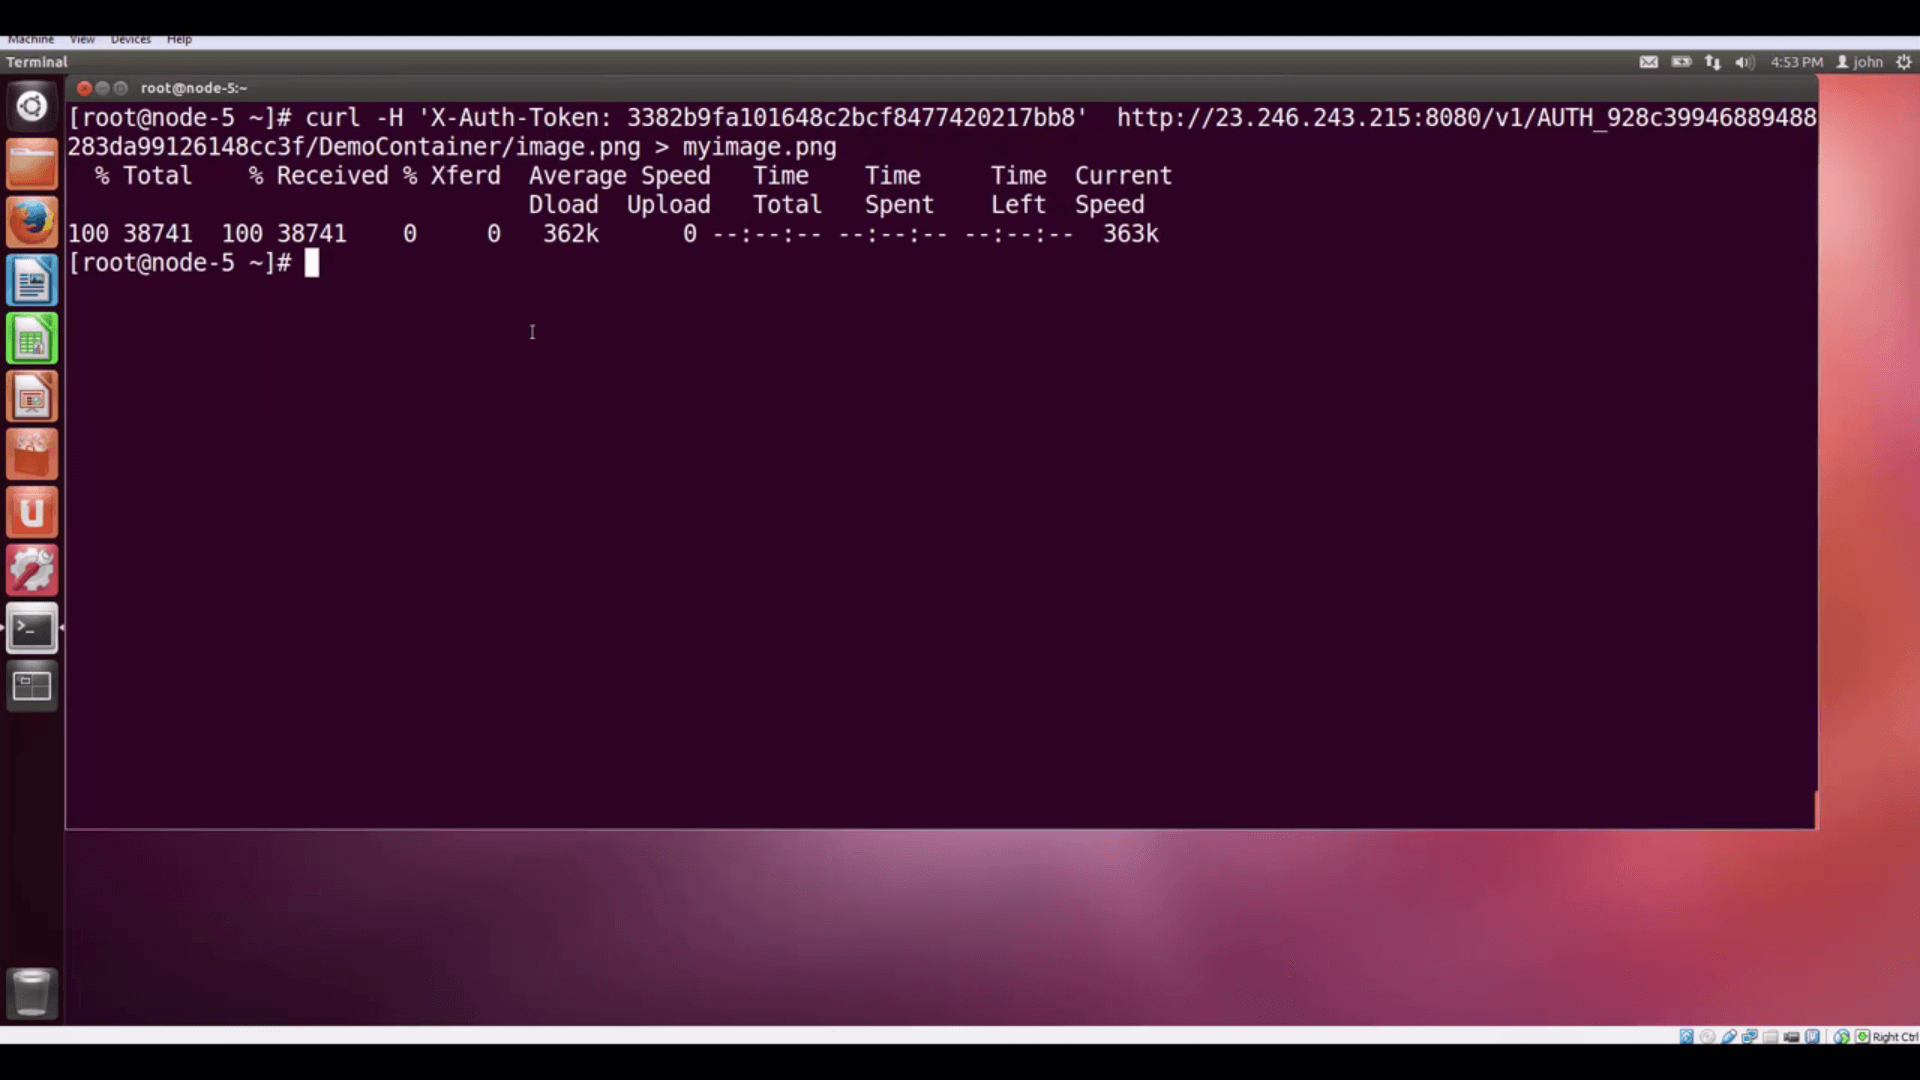
curl -H 'X-Auth-Token: 3382b9fa101648c2bcf8477420217bb8'
 http://23.246.243.215:8080/v1/AUTH_928c39946889488283da99126148cc3f/DemoContainer/image.png > myimage.png
We use the cURL utility to issue the request. The -H option lets us include a request header, which is X-Auth-Token,
plus our authentication token -- that tells Swift who we are. The remainder is just the StorageURL, the account
name, container name, and object name. We vector the returned data into a file so it doesn’t fill our terminal
screen with scary graphics.
in a private container.
the Controller node and onto the desktop, where it can be opened.
In our next tutorial, we’ll show how applications can authenticate with Keystone RESTfully, obtain tokens, and access
their Swift objects.
Resources:
- Mirantis OpenStack Express 2.0 Documentation
- Mirantis OpenStack Express Operations Guide
- OpenStack Command-Line Reference
- OpenStack Object Storage API v1
Reference - API Examples Using cURL
Check out Express for yourself at
https://express.mirantis.com .


