
OpenStack Keypair: How to Create One to Enhance Your VM Security

One way to bolster security on your OpenStack cloud is to set up security options that go beyond password-based user authentication when you create a new instance (be it an image or storage volume). The most common way is to use the OpenStack Dashboard, Horizon, to set up a public/private OpenStack keypair to properly protect the instance at launch time.
A Public/private OpenStack keypair works by keeping the public key on the server, and the private key on your local workstation. Once the server has verified that the two keys match, a secure connection can be made.
A public OpenStack ssh key can be injected into an instance on launch, so that it's ready for you to access using the private key. If you then set up ssh to deny password authentication and instead require the key, you give your instance a much stronger layer of security.
Now let's look at how to set up an OpenStack keypair. Basically, there are three steps in OpenStack: create keypair entries, add it to an instance, and modify it for increased security. Let’s get started!
Create a key pair in Horizon
The first step you need to learn is how to create the actual key pair, if you don't already have one:- Click “Compute” under the “Project” option in the Horizon left-hand menu.
- Select “Access & Security”.
- Click the "Key Pairs" tab.
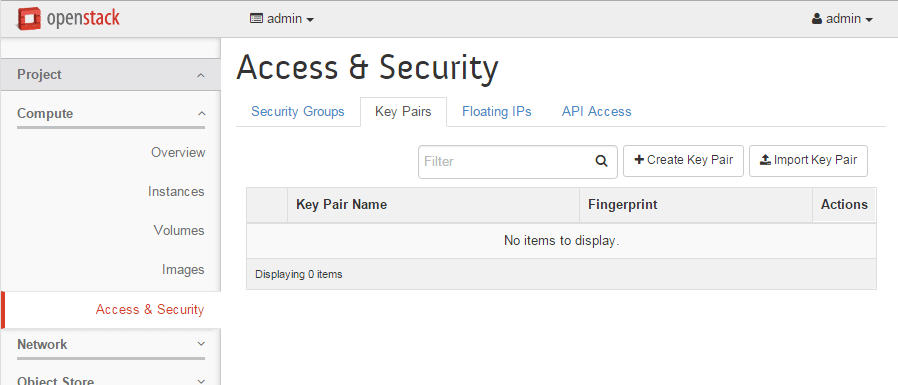
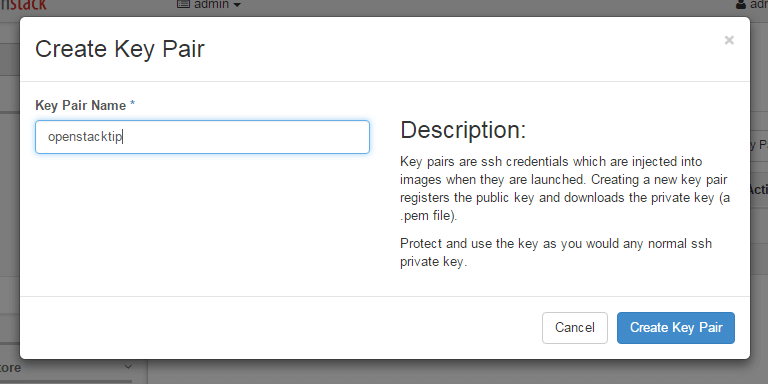
- Click “+Create Key Pair”.
- Name your new key pair and click "Create Key Pair".
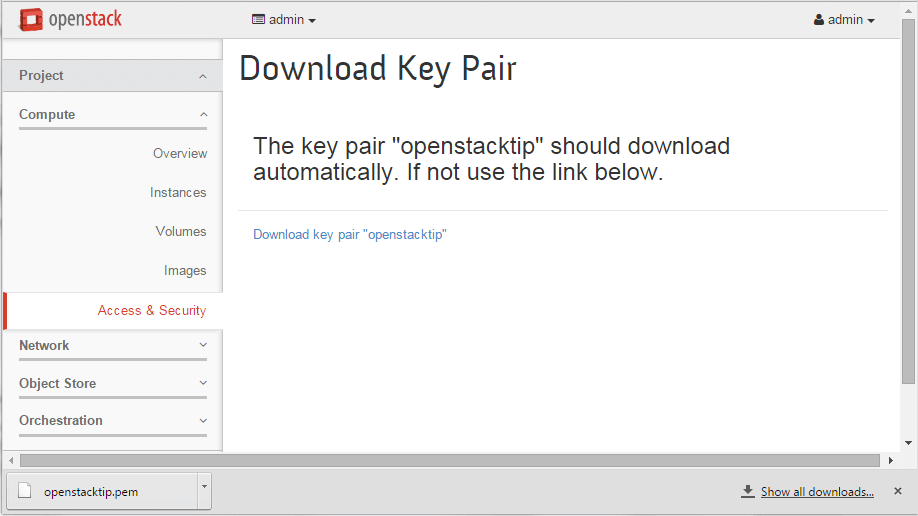
- The new OpenStack keypair will automatically download to your local machine; make sure you don't lose it, or you won't be able to access the new instance.
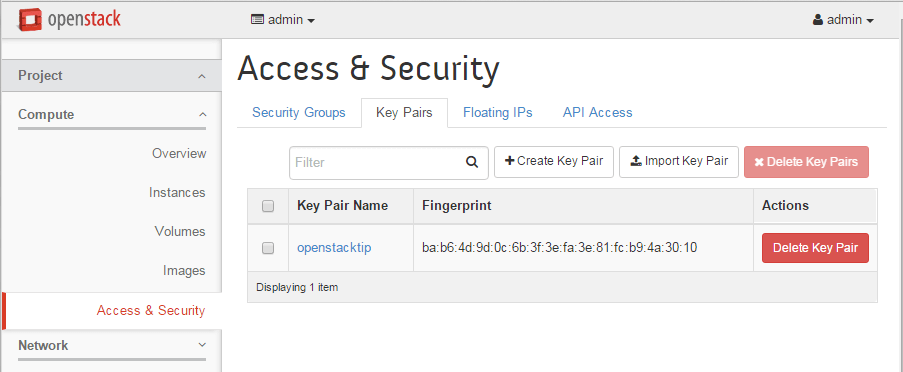
- Click Access & Security again to see your new key pair.
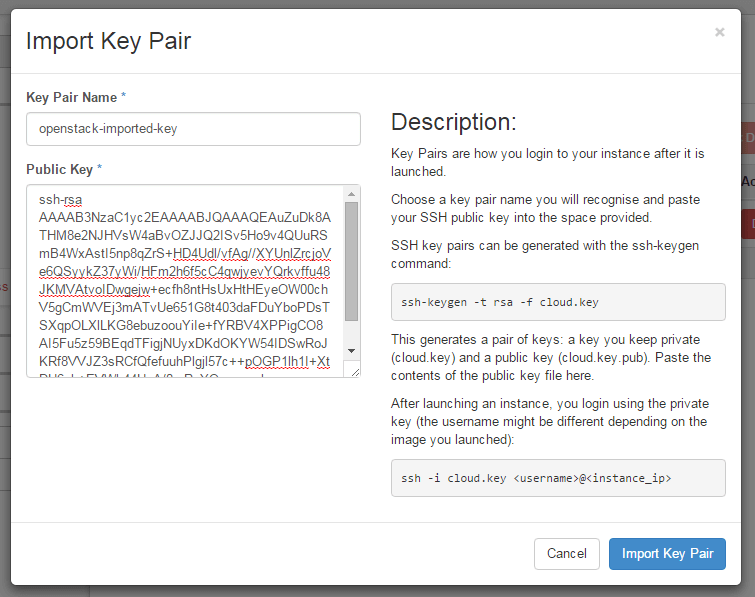
You can also create a key pair manually and import it, or import an existing public key, by click the "Import Key Pair" button and adding it to the form.
Add a key pair to an instance
To add a keypair to an instance, you need to specify it when you're launching the instance.- Under Instances click "Launch Instance".
- Click the "Access & Security" tab.
- Choose the appropriate key pair from the pulldown list (or click the "+" sign to import one).
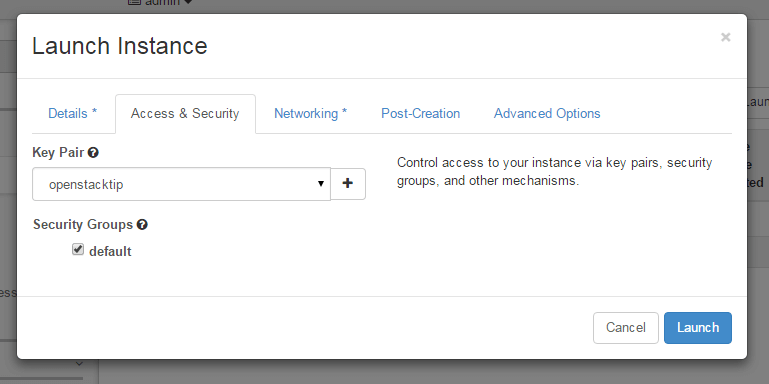
- After completing the rest of the required information on the other tabs, click "Launch".

Securing and using your new key pair
To use your new key pair, you need to make it available to your ssh client. On Linux, follow these instructions:- Copy the downloaded key pair into your ~/.ssh/ directory
- Change permissions to 600:
# cd ~/.ssh
# chmod 600 KEY_NAME.pem - Now you can use the key pair to log on to the instances in question using this key pair:
# ssh -i ~/.ssh/KEY_NAME.pem USER@SERVER_IP
On Windows, how you use your new key will depend on your client. The PuTTY client is an open source SSH client that also handles SFTP and SCP, and enables you to specify the private key to use. The downside of PuTTY is that it doesn't like the *.pem format OpenStack gives you, in which the public and private key are together; instead you must separate them using the PuTTYgen client:
- Download PuTTYgen from the main downloads page.
- Run puttygen.exe.
- Click the Load button and specify "All files *.*" as the file format so it can find the *.pem file.
- Load the key pair you downloaded from OpenStack earlier. You'll see the information in the puttygen window.
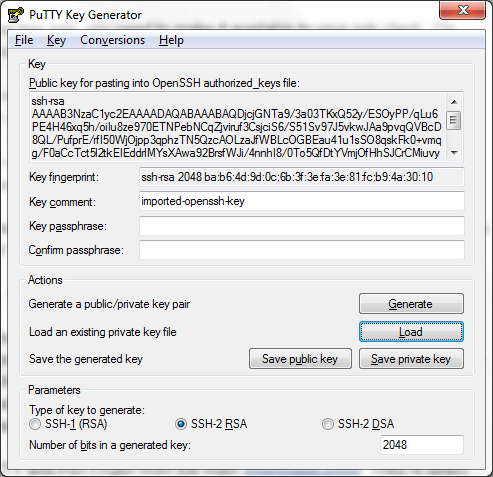
- Optionally add a passphrase.
- Click "Save Private Key" and save the file where you'll be able to find it.
- Download PuTTY from the main downloads page.
- Run putty.exe.
- Specify the hostname or IP for the instance (you can find this information on the instances page once it's launched).
- In the left-hand panel, expand "Connection->SSH" and click "Auth".
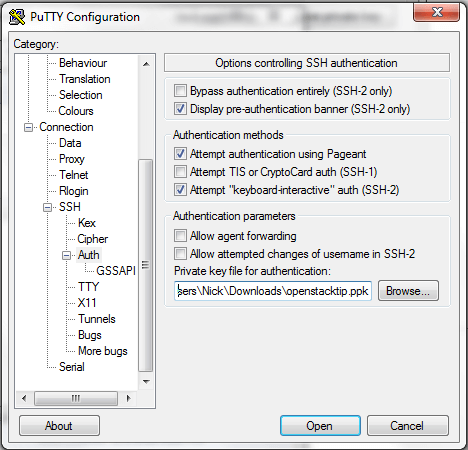
- Click "Browse" and find the *.ppk file you saved from puttygen.exe.
- Click "Open" to connect to the instance.
Not all OpenStack instances will be booted from Horizon, of course; it's very common to boot an instance from the command line, and the OpenStack Compute (Nova) CLI does provide the --key-name parameter to enable you to add an existing key pair to an instance as it boots. (Note that you must add the key to the cluster first.)
Still, for users who prefer to use the OpenStack Dashboard instead, it's convenient to be able to create and add a key pair directly through Horizon and its robust API. In OpenStack, change key pair operations can also be done.
Looking for an easier way to deploy OpenStack? Mirantis OpenStack for Kubernetes combines the VM management of OpenStack with the reliability of containerization provided by Kubernetes. Get more information.


