StackOps: Merging ease and flexibility with OpenStack Cloud
In my previous post, DevStack vs Alamo, I compared tools that could deploy OpenStack easily for test and demo environments. These tools simplified deployment by stripping out configurations that make OpenStack deployments complex. As a result, these tools lacked some features and flexibility and were substantially easier to understand and use than installing OpenStack manually using bins.
StackOps takes a different approach. They have taken the complex parts of OpenStack deployment–configuration and parameterization–and built a wizard around it, thus retaining features and flexibility while still maintaining ease. In the sections below I'll cover my experience with StackOps, its key advantages, and where it fits in the world of OpenStack. While StackOps recently released an Enterprise Edition of their product, this review is based on the community edition.
Getting Started
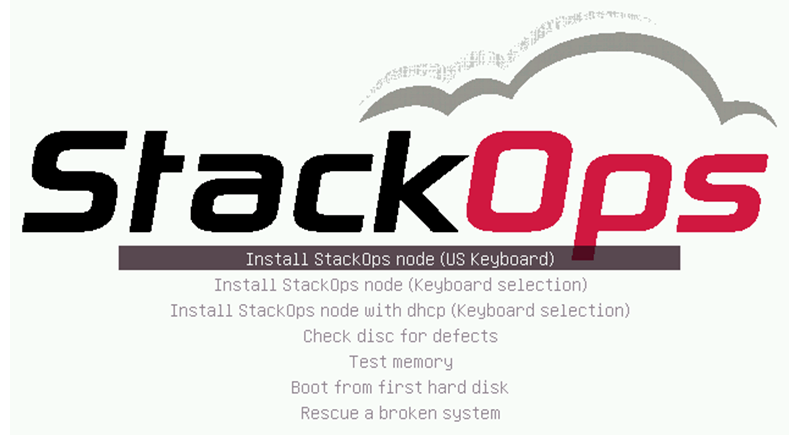
Like RackSpace private cloud software (Alamo), the deployment starts with downloading an ISO, making a bootable USB and installing it on physical hardware. The similarities end there. Instead of having configuration steps like selecting controller node or compute node during the ISO install, StackOps only requires basic networking configuration–akin to setting up any Linux distribution during the ISO part of the installation (Figure 1.1). At this point, every node is exactly the same, making it easy to clone the nodes using a single disk image. Everything required for these nodes to become Controller Nodes, Compute Nodes, Storage Nodes (volumes), Network Nodes, or All-in-One nodes has been included with the ISO.
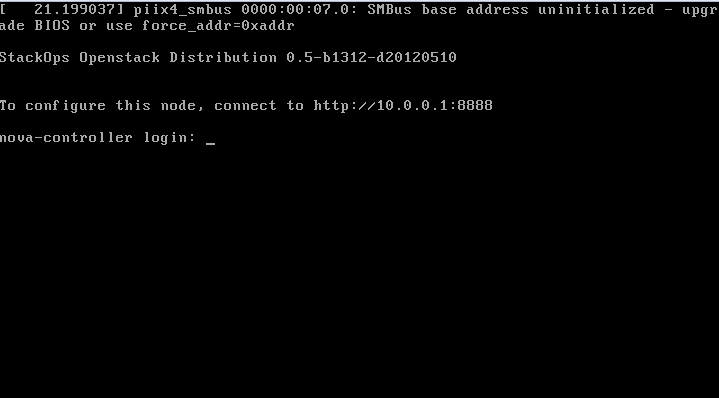
When the install completes, you are provided with the Ubuntu console login without any desktop components. This screen directs you to visit http://<node ip>/ to configure the node (Figure 1.2). You need to do this from a computer that has both an Internet connection and a connection to the StackOps node. The StackOps node does not need an Internet connection, as the computer used for configuration serves as the man in the middle.
Configuration: Smart Installer
After opening http://<node ip/>, you are redirected to http://installer.stackops.org/login/auth. You first need to register and create a StackOps account before proceeding. This account is used for storing your deployment configurations ("Nova Zones") and for accessing and posting comments to StackOps forums. After registering, you log in and are greeted with what StackOps calls the "Smart Installer". The Smart Installer is a configuration template creator that is similar to an installation wizard where you navigate through various screens and enter various parameters before finalizing.
Deployment Architectures
The first step of the Smart Installer lets you select from three deployment architectures listed below (quoted from Stackops):
- Single Node Architecture: This is the classic installation if you only want to test drive the platform. All the components of the Openstack solution plus others are installed in a single node. Moreover, the system can be installed in a Virtual Machine and then QEMU emulator is used instead of KVM as the default hypervisor. If this is your first approach to OpenStack, then this is your choice. You only need one network card to run your system.
- Dual Node Architecture: This is the minimum installation for production. All the components of the Openstack solution plus others are installed in Node Controller, but the Compute node is installed in different node. Both nodes can run in a virtualized environment, but it's recommended to run the Compute Node in a physical server. You can add more Compute Nodes at any given time. You need TWO Network cards on each server to run the solution successfully.
- Multinode Architecture: This is the standard installation for production. The components split all around the different nodes and a minimum of 4 physical servers are recommended. You can add more Compute Nodes at any given time. Controller, Network, Volume and Compute nodes need a dedicated server with very specific system requirements. This architecture adds extra complexity at networking level.
I selected Single Node Architecture since I'm only building a test environment to review StackOps and have limited physical resources. The video here shows you how this works:
Parameterization
I was pleasantly surprised with Smart Installer's ability to configure complex parameters. The wizard is polished and shows that a lot of work has gone in to its design. The four major components that stood out for me were:
- Excellent side-by-side explanation of the parameters (Figure 2.1, outlined in red)
- Ability to navigate back and forth between any step (Figure 2.1, outlined in blue)
- Basic and Advanced toggling for complex steps (Figure 2.1, outlined in green)
- Modification to the node is deferred until the wizard is complete and the user explicitly submits the configuration. This makes for fewer configuration errors and easier to revert/change parameters.
Gotchas
I found the Smart Installer easy to use and intuitive. The only stumble I had was with the final step with pushing the configuration to the node. The caveat is that this is the final most important step. I think the main issue has to do with the lack of response output on the final page. This screen shows nothing and just spins as if were timing out (see Figure 3.1). It makes the user feel like something went wrong and nothing is happening; but in reality, you just have to be patient and wait for scripts to complete in the back-end.
Tip: To view the status of what is going on, log in to the node via ssh. The username and password are root and stackops. Once you login, run the following to see what is going on in the backend.
tail -f /var/log/nova/installer_agent.py.log
Once you can see the log, there shouldn't be any problems finishing the installation as this log shows when the agent is done, along with any problems it may have.
Usage and Features
StackOps community distro is based off Ubuntu 12.04 LTS and OpenStack Essex stable. StackOps allows for volume creation and attachment which Alamo lacks. Adding additional compute nodes seems quite straightforward as well. HA is missing, similar to the other tools; however, StackOps claims HA capabilities in the Enterprise Edition.
StackOps Dashboard
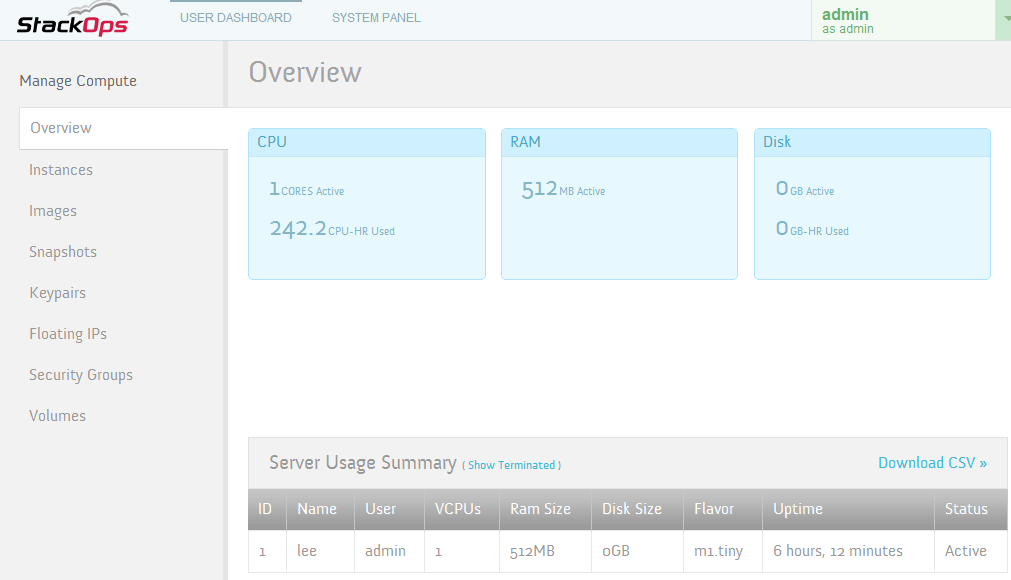
StackOps uses a skinned version of the Horizon dashboard to manage the cloud deployment. The majority of the screens look the same as Horizon Dashboard with a few exceptions:
- The dashboard has a StackOps logo and a flattened navigation tab instead of four grouped tabs(Figure 3.1)
- The Create User screen does not provide a second entry for password validation (Figure. 3.2)
Loading images
Obtaining common VMObtaining common VM images is easy using StackOps as they have various scripts already built into the installation. Running their scripts fetches the images from the Internet, registers them in Glance and uploads them to Glance back-end, and then makes them available for provisioning VMs. Most of the images are based off Linux distros, and none are available for Windows (probably due to licensing).
Limitations
HA or lack thereof
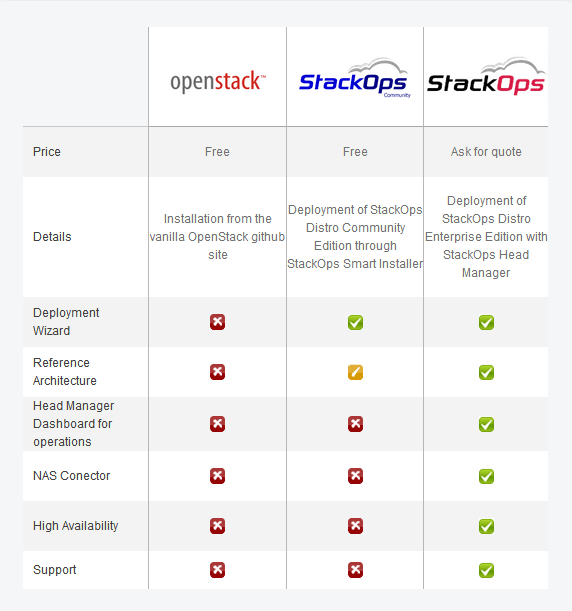
Even though StackOps claims that the Dual Node and Multi Node deployment architectures are suitable for production, I don't believe any deployment of OpenStack can be considered "production" without HA. Based on the graphic below (Figure 4.1), only the Enterprise Edition of the StackOps supports HA. I did not try the Enterprise Edition so I can't confirm whether it works and comment on how it's implemented.
Only one networking manager: FlatDHCPManager
If you've read our VlanManager post by Piotr Siwczak, you'll understand its importance in OpenStack, and why it's the preferred network manager. In short, it allows for complete tenant isolation on the networking layer. The use case is that you can have multiple Tenants on your Cloud Deployment and ensure that Tenant A cannot see networking traffic of Tenant B. While StackOps has a drop down that makes you think it supports more Networking options, the only item it shows is FlatDHCPManager. I've tested this for both Single Node and Dual Node Deployment Architectures since I originally thought the option was limited by using Single Node Architecture.
Conclusion
StackOps has a great UI for deploying OpenStack. It is friendly to new users in basic mode and caters to veterans with the advanced mode. While I was disappointed with lack of HA and with the limitation to a single network manager, I hope to try out the enterprise version and see how it incorporates these features.
Another downside is that StackOps stores all installation files on every node type: The same ISO is used for controller nodes, compute nodes, network nodes, storage nodes and all-in-one nodes. This makes for a heavier footprint; for example, a compute node does not need RabbitMQ, MySQL, Horizon, Keystone etc. I do understand that by doing it this way they can have just one ISO for all nodes and reduce complexity, but having separate ISOs for controller nodes and compute nodes would be a good compromise.


