Mirantis OpenStack Express 2.0 - Basic Cloud Operations: Adding New Custom Boot Images
Creating and managing boot images for Guests is a frequent, routine task for cloud operators. The core task can range from very simple -- finding and loading a trustworthy, prefab image from a known repository -- to relatively complicated, where you modify an image with a utility like guestfish or qemu-img, or craft a specific image configuration from a distribution .iso - work mostly performed from the Linux command line. Many documentation resources exist to get you up to speed - here are a few:
- Mirantis OpenStack Express 2.0 Operations Guide (p. 10, Adding Images)
- OpenStack Documentation - Chapter 2, Get images
- OpenStack Virtual Machine Image Guide
- How to Quickly Create your own OpenStack Image
- OpenStack Documentation - Chapter 4, Modifying Images
Mirantis OpenStack Express 2.0 is designed to simplify and reduce the time required to import and manage guest images, launch VMs, create and attach volumes, and perform other basic administrative tasks. In this short video, we’ll begin by looking at MOX 2.0’s image features, and show how you can quickly create a new image from a reliable source.
Step by Step
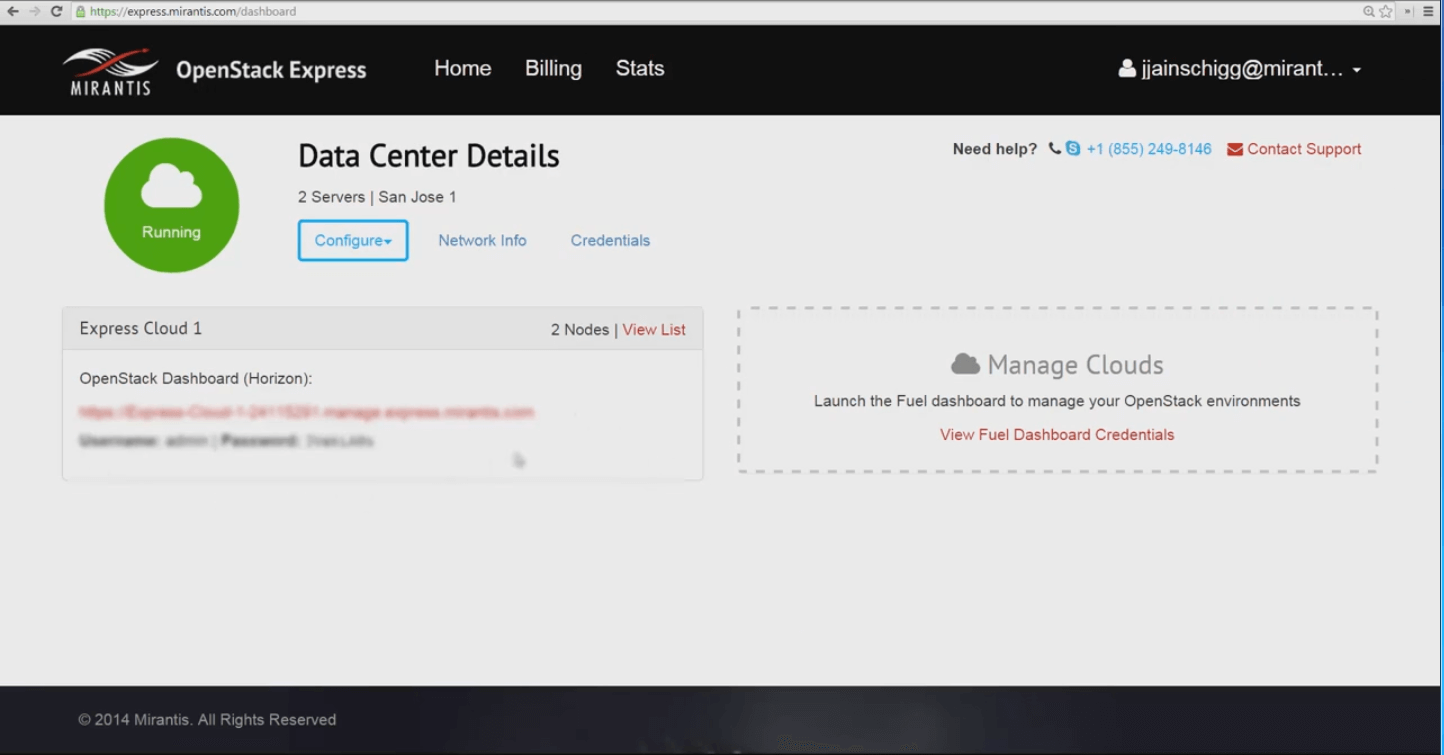
Getting into Mirantis OpenStack Express is simple: just log in -- the home screen shows server usage and cluster locations, and provides links and authentication for the Horizon console associated with each of your OpenStack clouds.
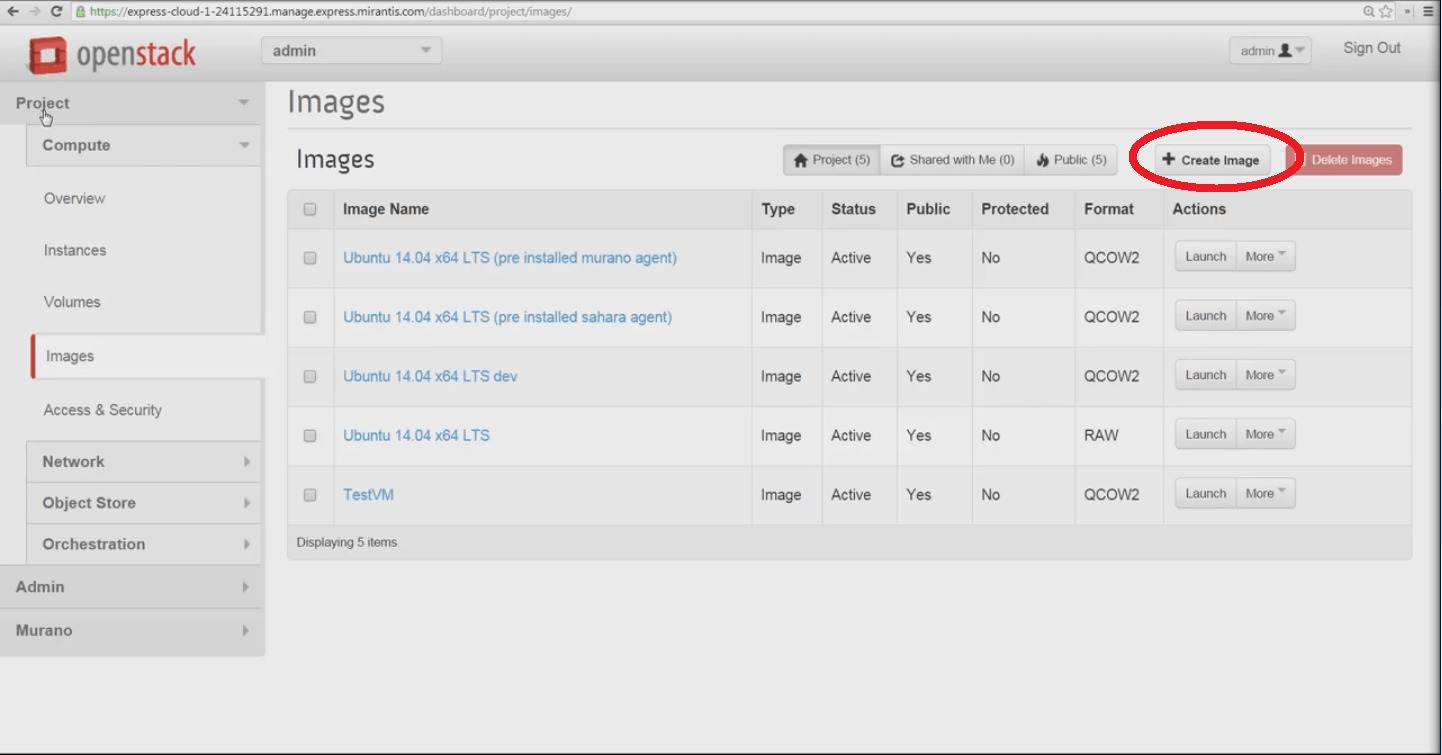
OpenStack Express 2.0 comes with several default cloud server images already in place, that work with the default Q-Emu hypervisor. The default images are useful variations on the Ubuntu 14.04 LTS cloud image maintained by Canonical. Most are in QCOW2 format that Q-Emu supports. The Xen and KVM hypervisors can also boot VMs from QCOW2 images, as can Oracle VirtualBox and other desktop virtualization frameworks.
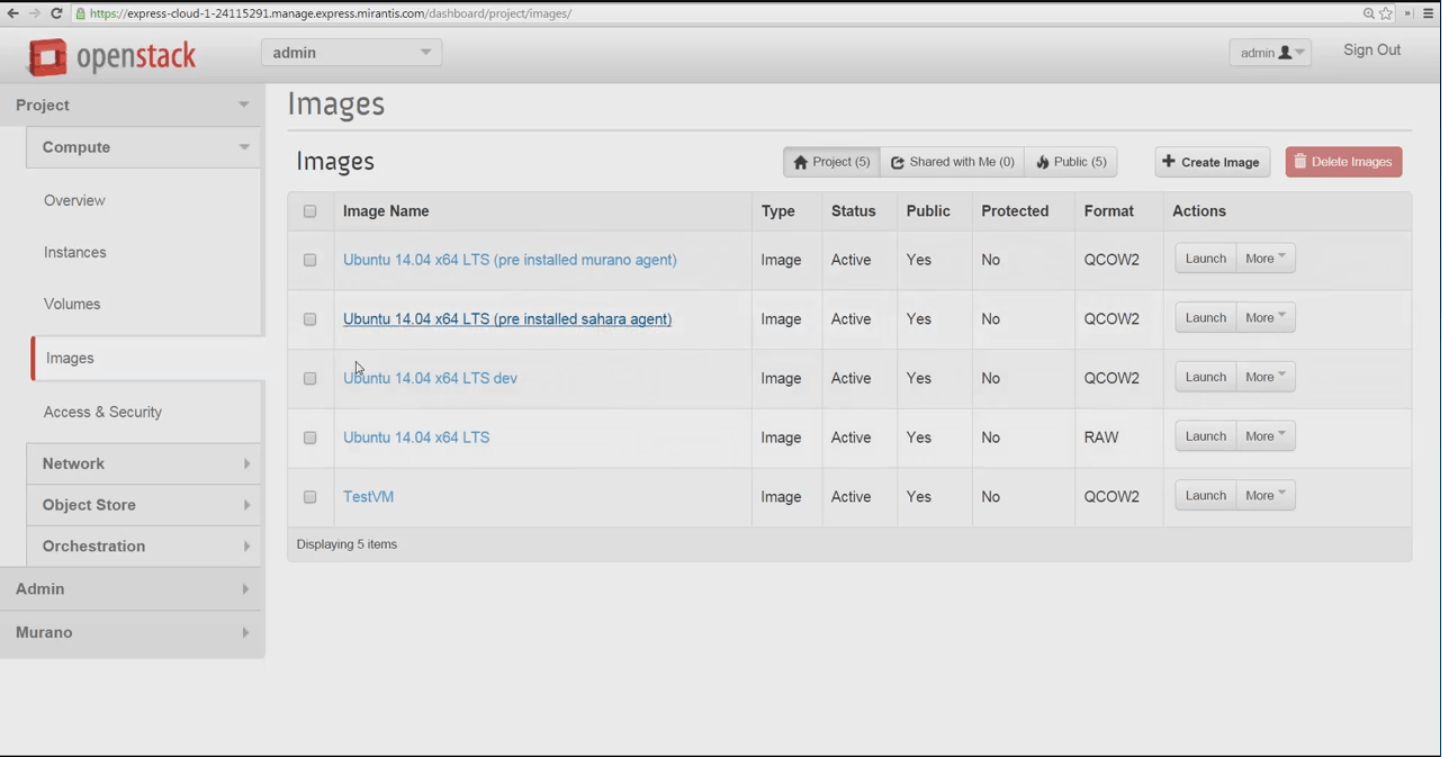
It’s also easy to add new cloud server images from .img, .iso, and compressed tar.gz files maintained by Linux providers and communities. These can be retrieved by Horizon via URL and imported into OpenStack Express. The versions linked at OpenStack Documentation - Chapter 2, Get images -- should work well with OpenStack Express. Images linked here have been built with cloud-init, a component that enables SSH key and user instance data injection so that instances made with this image can be configured at launch. We’ll see this process in our next blog post on Mirantis OpenStack Express, where we'll launch an instance from an image.
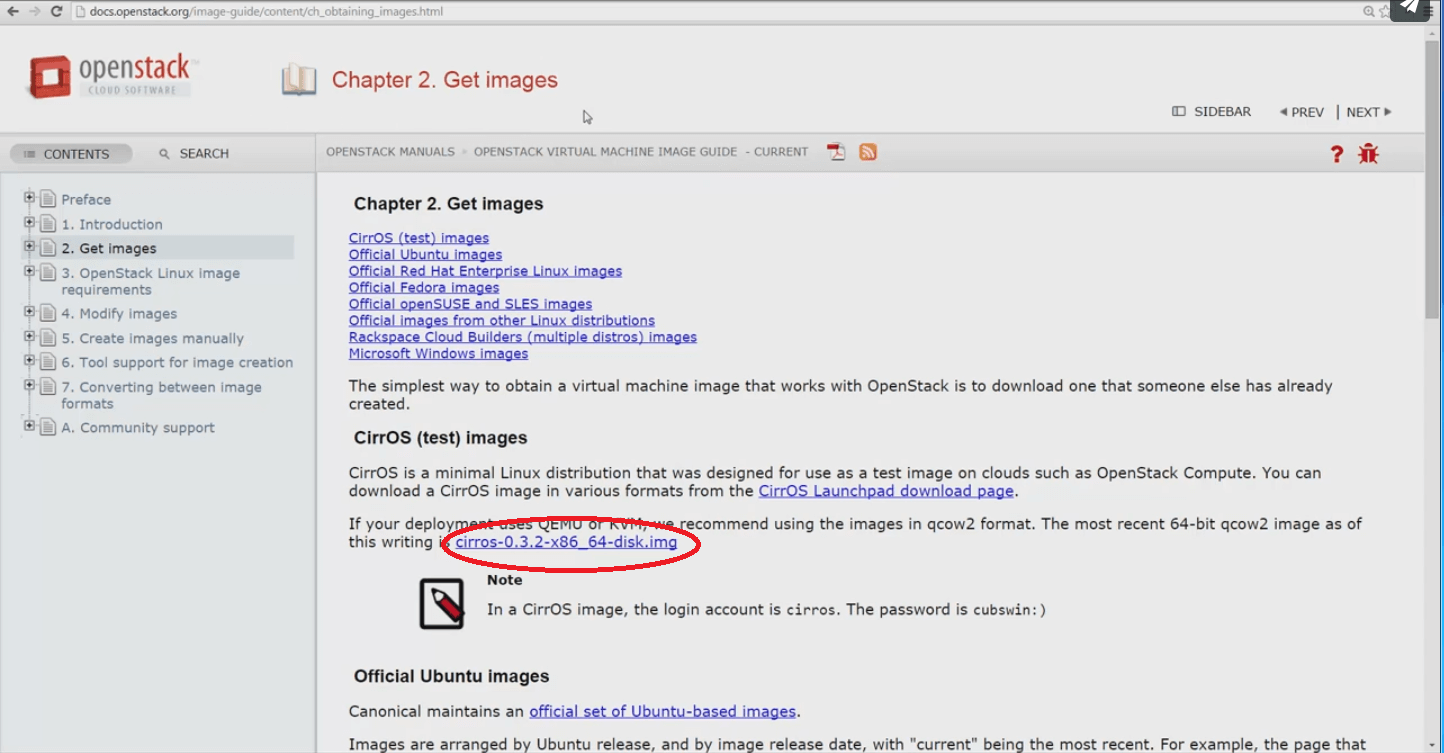
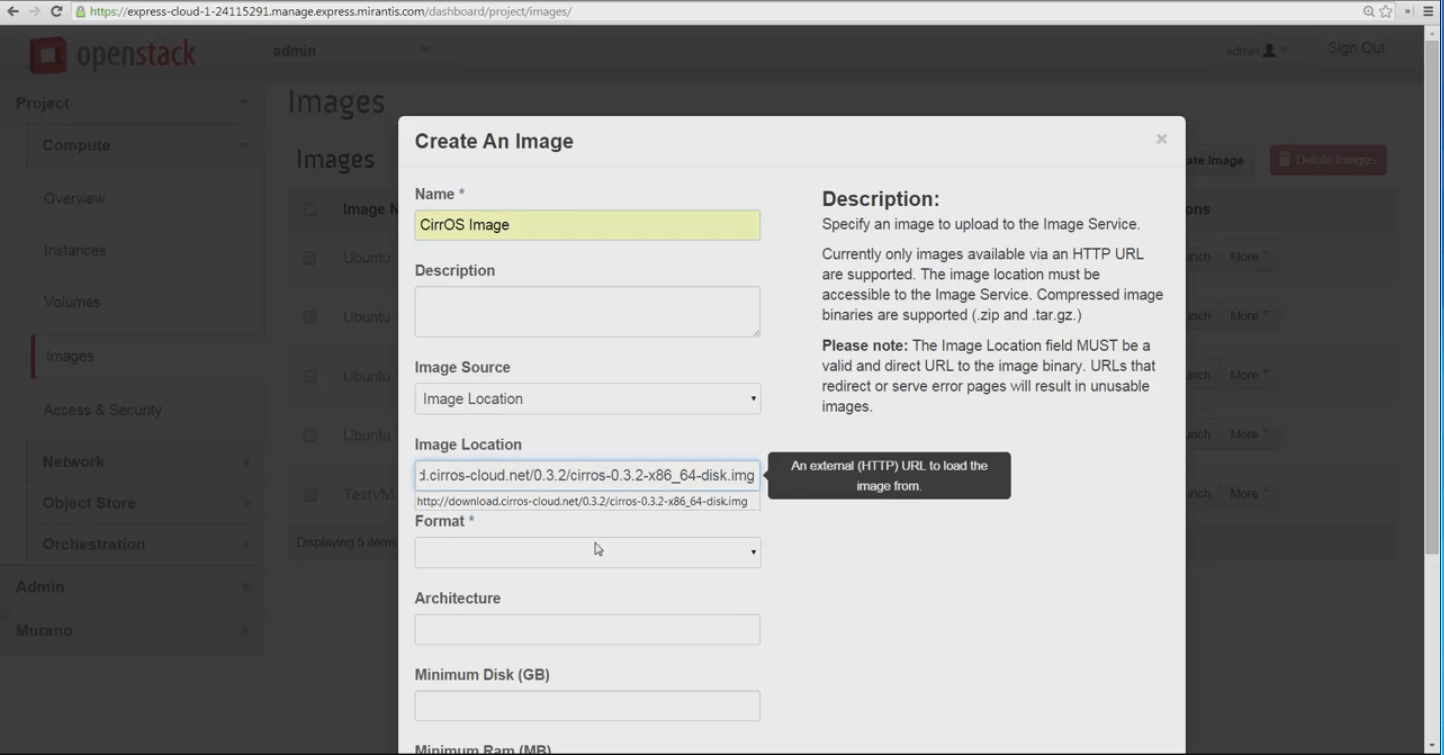
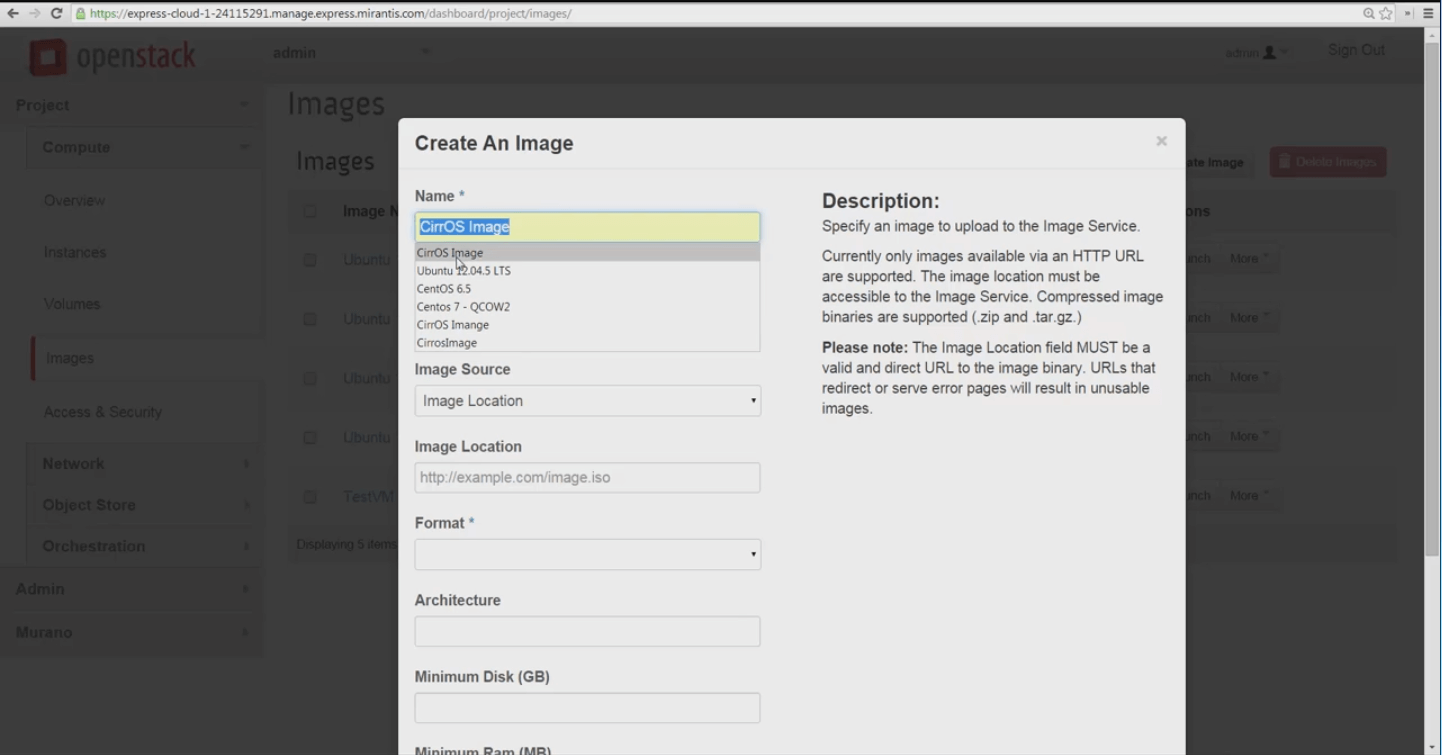
For our current purpose -- importing an image -- we’ll use CirrOS, a very light, cloud-oriented Linux distro, useful for testing. We’ll start by right-clicking the URL and copying it. Then we’ll return to Horizon console for our Mirantis OpenStack Express 2.0 cloud and choose Project -> Images -> Create Image. A simple dialog box appears.
Name your image, then paste the source URL into the Image Location slot provided. MOX 2.0 Horizon can consume images in .iso, .img, and tar.gz compressed file formats.
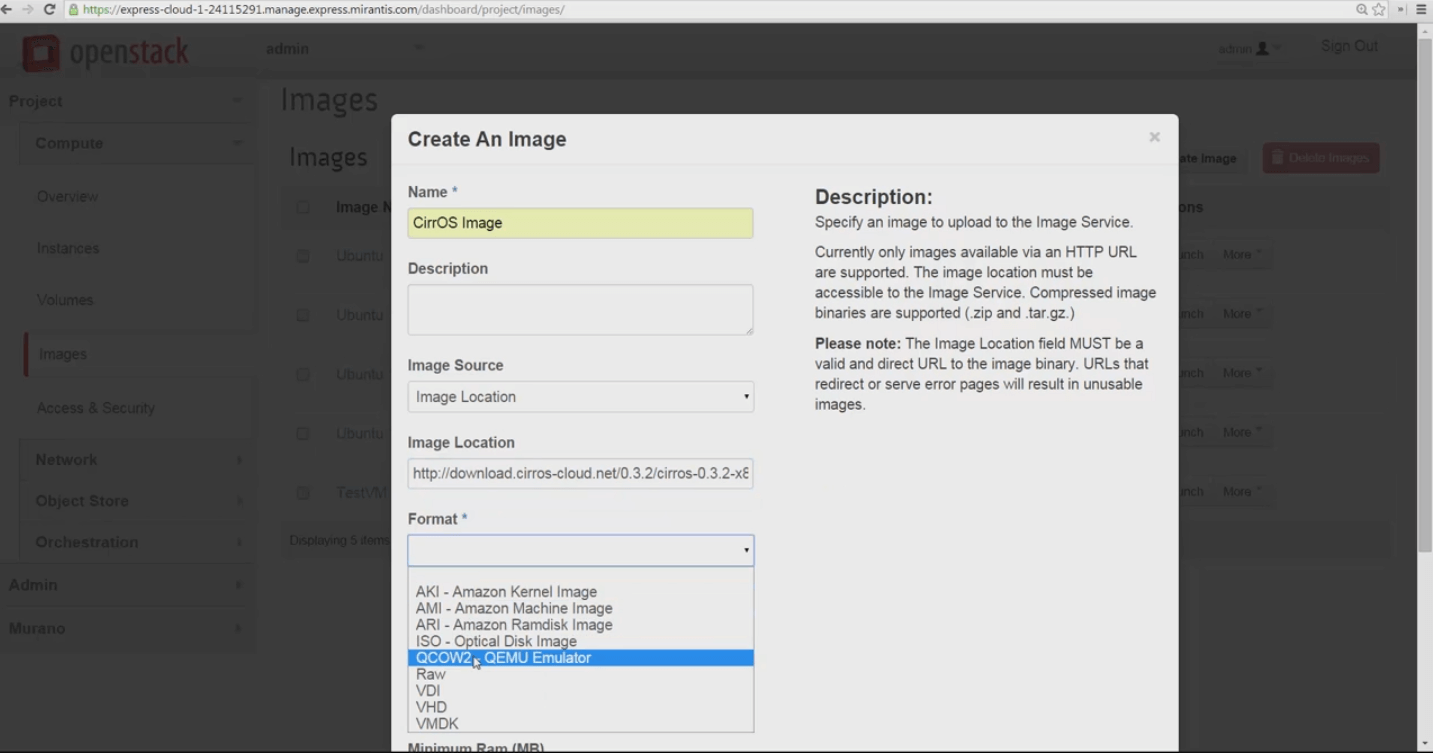
Pick the image hypervisor format from the Format dropdown - In this case, we’re picking QCOW2.
Identify minimum disk and RAM sizes to let this image run comfortably, click Public availability, then Create Image and let MOX download, store and create your new guest image.
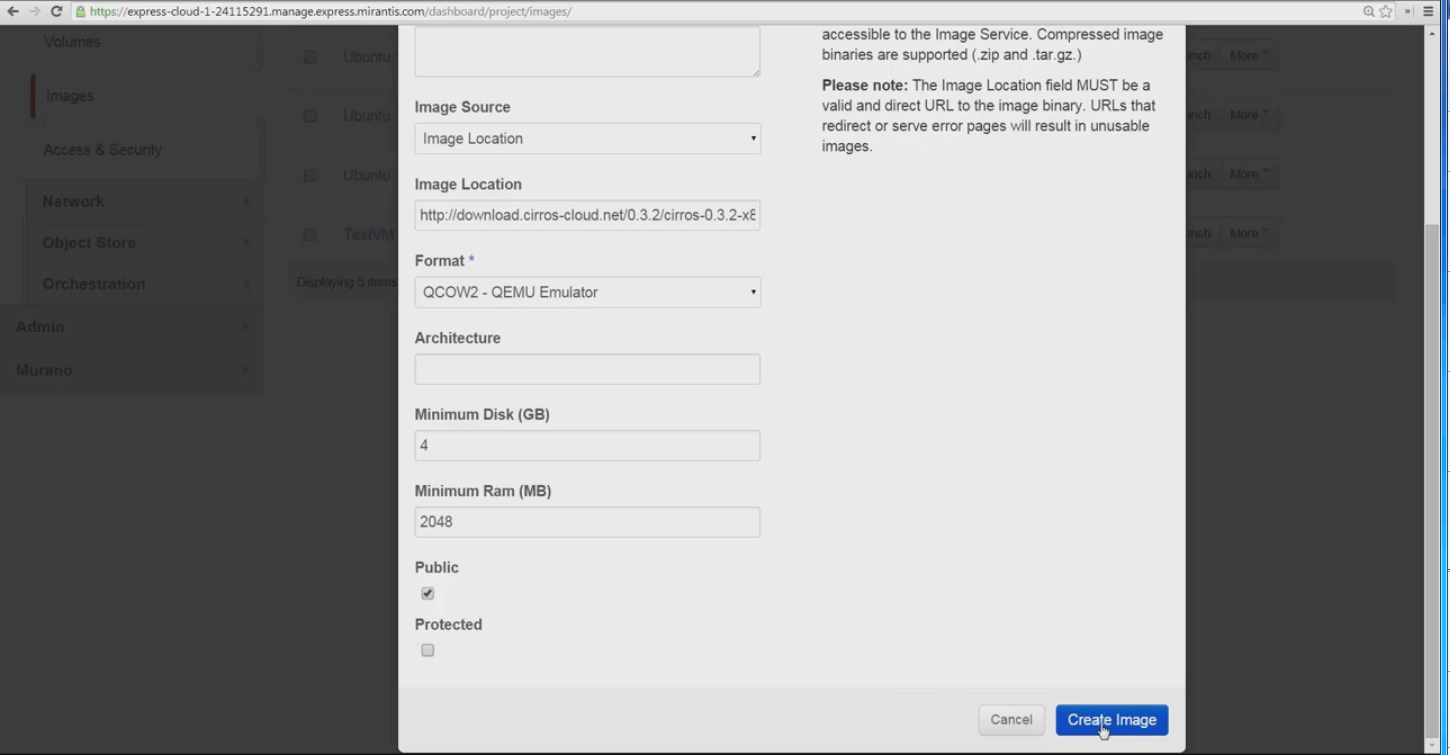
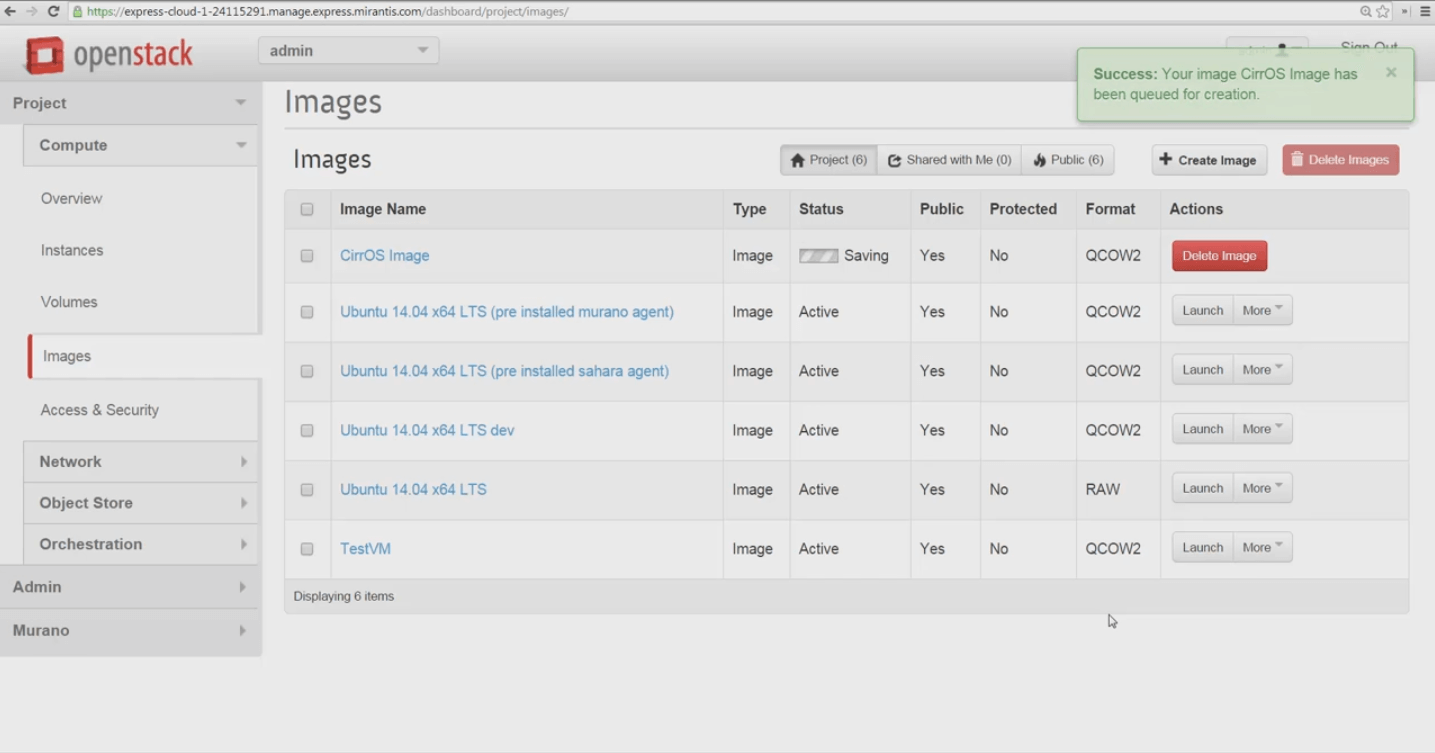
Depending on the size of the source file and download time, this can be very rapid -- larger boot images take a couple of minutes to transfer and become available.
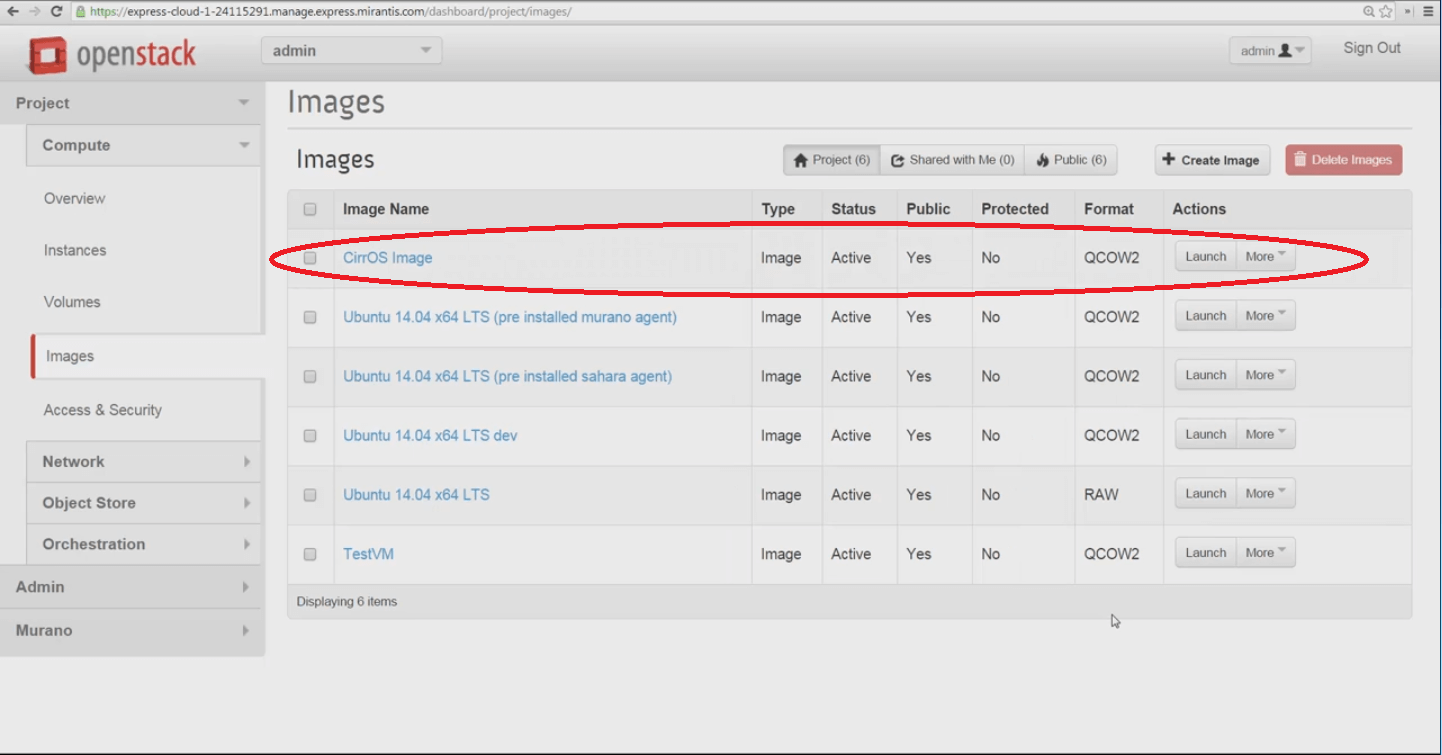
Success! Our image is imported and can now be used to configure and launch VM instances. In our next video, we’ll use this image to configure a new VM instance for SSH access, and launch it.
