
Managing VMware vCenter Resources with Mirantis OpenStack 5.0 — Part 1: Create the vSphere Cluster
One of the great things about OpenStack is that it enables you to make the most out of the resources that you have, providing a self-service IaaS environment that lets you move faster and operate more efficiently. But what if you already have a virtualization system in place, such as VMware vCenter?
This 3-part tutorial shows you how to create a sample environment using Mirantis OpenStack 5.0 and integrate it with VMware vSphere to enable self-service and other OpenStack features, all while using ESXi as your hypervisor and creating VMs that can also be managed by vCenter. When you create an instance in the OpenStack Dashboard, the instance shows up in the vCenter console, ready for management.
In part 1, we'll create and configure a vSphere cluster so that we can integrate with it in part 2. In part 3, we'll look at managing the VMs from both OpenStack and vCenter.
Architecture of the system
At the end of this project, you will have four virtual machines:
- The vCenter server, which manages your vSphere resources
- The ESXi host, which acts as the hypervisor for the instances OpenStack creates
- The Fuel master node, which makes it easy to install OpenStack and create a controller node that knows how to talk to vCenter
- The Fuel slave node, on which the master node will install the OpenStack controller
These four servers will be connected by two networks, as you can see in Figure 1:

Figure 1: The general architecture of the system
Note that the IP addresses are just examples, but as you can see, the Fuel master talks to the slave node through one interface, and the OpenStack cluster is managed through another.
The controller (Fuel-slave), creates instances on the hypervisor (ESXi), where they're seen by both the controller and vCenter, and can be managed by either.
Now let's look at setting up the necessary hardware and software.
Prerequisites
You have the option to use actual bare metal servers for this project, but it's not necessary. For this tutorial, we assume that you will be using VirtualBox VMs, so you only need one machine. That one machine will be doing an awful lot, however, so we recommend the following minimum requirements:
- 16GB RAM
- 4 cores CPU
- 50Gb of free space at hard drive
(You can probably get away with only 2 CPUs, but you'll sacrifice some performance.)
You'll need to have the following software installed:
Install VirtualBox version 4.3.7 or higher with Extension Pack for VirtualBox on the base machine. You can download both from the VirtualBox site.
Install Mirantis OpenStack 5.0 or higher on a VirtualBox VM. You can download Mirantis OpenStack from the Mirantis site. You can find instructions for installing Mirantis OpenStack 5.0 in the Quick Start.
Install VMware vCenter, and VMware ESXi on separate VirtualBox VMs. If you don't already have an installation, you can find instructions in the VMware documentation.
SIDEBAR Please note that by default, when ESXi is nested in VirtualBox, you can only run 32-bit virtual machines.
Creating the vSphere Cluster
To create a vSphere cluster, you'll need to create a Datacenter, then create and configure a Cluster within that Datacenter. We'll start with the Datacenter.
Create the Datacenter
Begin by opening your browser and navigating to the vSphere web client, located at
https://<vCenter-host-IP>:9443/vsphere-client/
Note: You must use the secure https protocol to avoid getting an error from the server.
Log in with the administrator username (such as Administrator@vsphere.local) and password for the vCenter installation.
In the left-hand column, select vCenter, as in Figure 2.
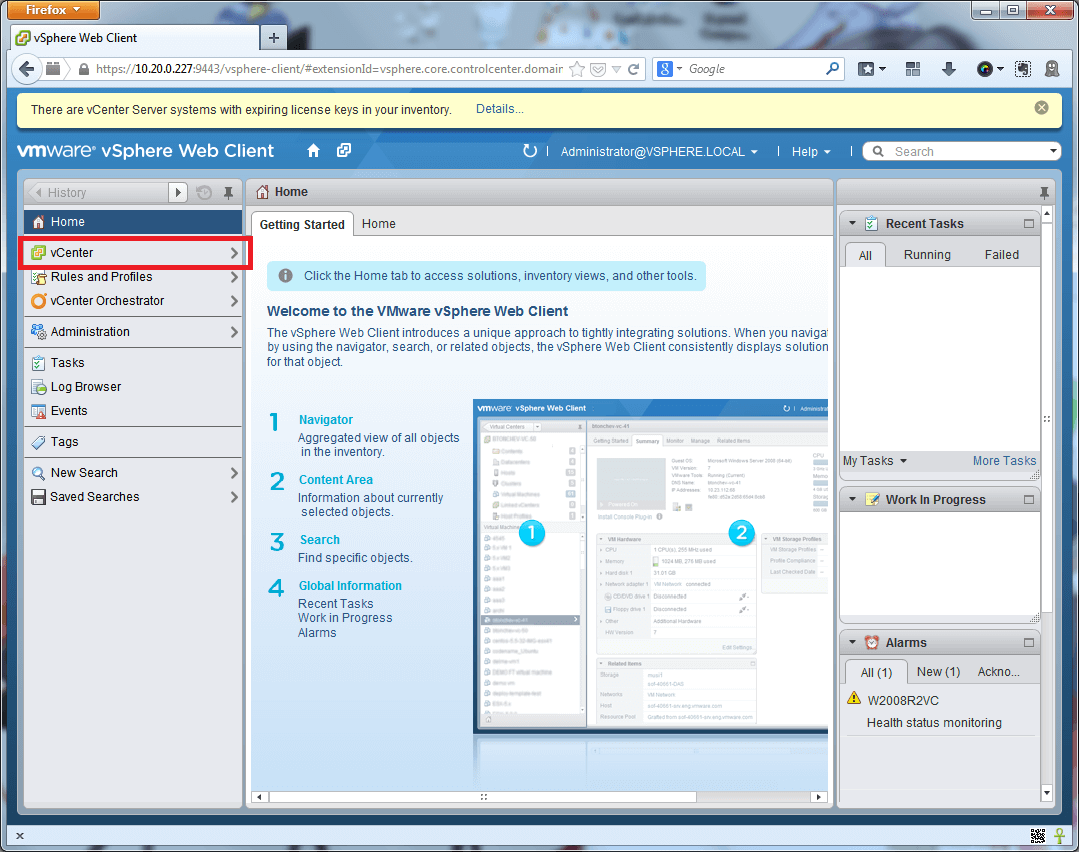
Figure 2: Select vCenter in the left-hand column.
Select Datacenters, as in Figure 3.
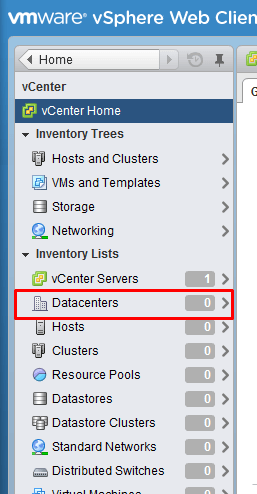
Figure 3. Select Datacenters.
Click the Add Datacenter button, as in Figure 4, to bring up the Add Datacenter wizard.
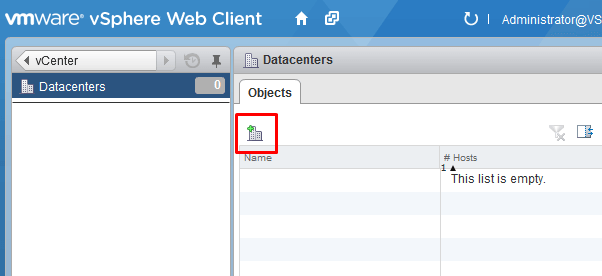
Figure 4. Add a new Datacenter.
In the wizard shown in Figure 5, name the Datacenter DC1 and select the appropriate vSphere host. (For a small test installation, this is usually the same server on which vCenter is installed.)
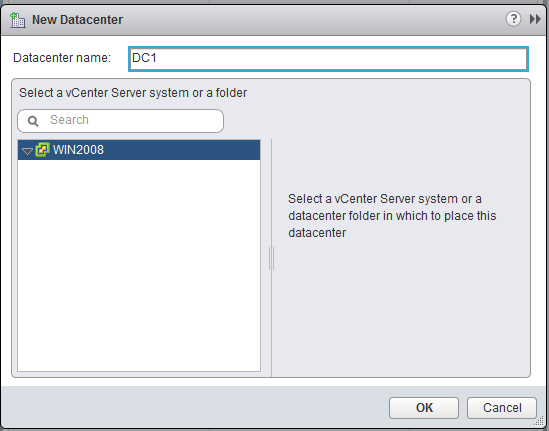
Figure 5. Name the Datacenter.
Create the cluster
The next step is to create the vSphere cluster. To do that, execute these steps:
On the vCenter page, select the Clusters page, as in Figure 6:
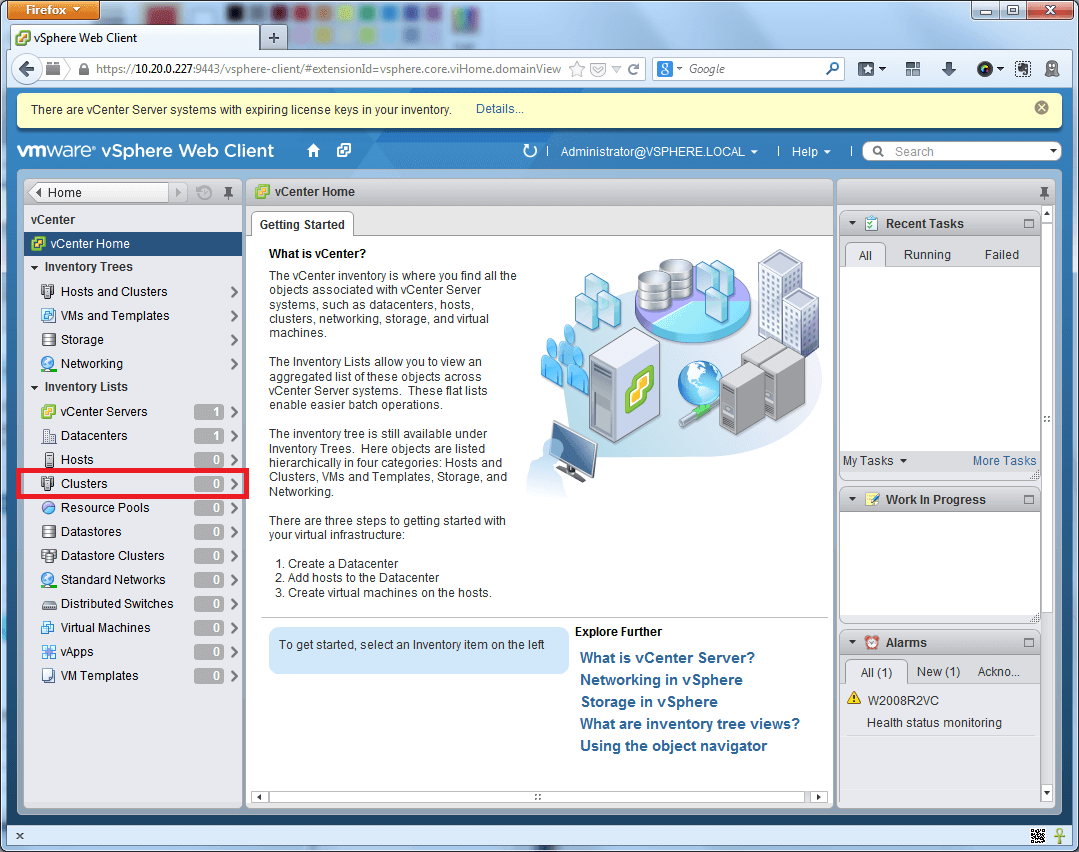
Figure 6: Select the Clusters page.
Click the Add new cluster button, as in Figure 7:
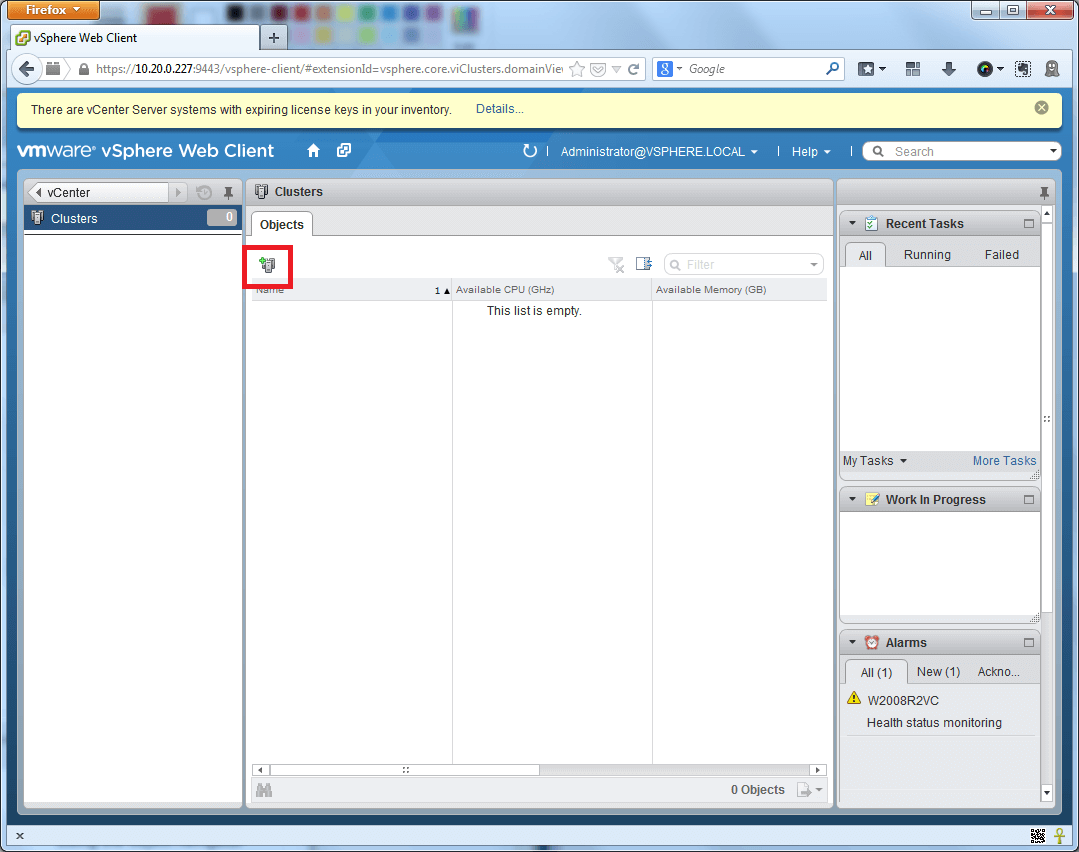
Figure 7. Add a new cluster.
Name the new cluster Cluster1 and set the location as DC1, the Datacenter you created in the previous section, as in Figure 8. Click OK.
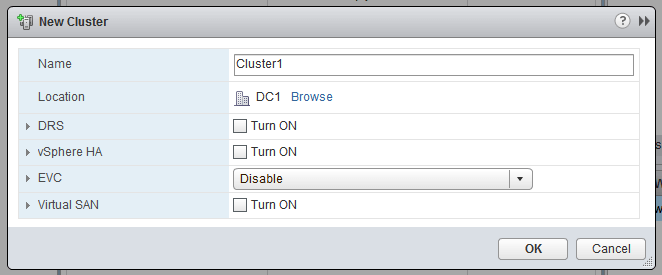
Figure 8. Name the new cluster.
Add the ESXi host
Now we need to specify the ESXi host that will act as the hypervisor for the cluster. To do that, execute these steps:
Under vCenter, select the Hosts page, as in Figure 9:
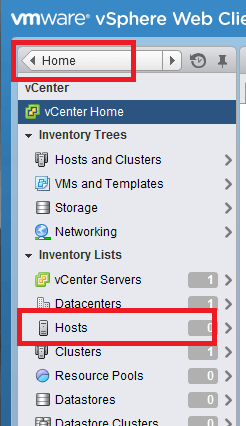
Figure 9: Select the Hosts page.
To add a new host, click the Add host button as shown in Figure 10:
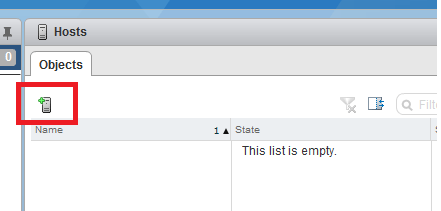
Figure 10. Add a new host.
In the Add host Wizard, as seen in Figure 11, specify the IP address for the ESXi host and specify that it is to be located in Cluster1, which is itself in the DC1 Datacenter. (To find the IP address for the ESXi host, look at the screen for the ESXi host itself; it will be displayed in the lower-left-hand corner of the black and yellow screen.)
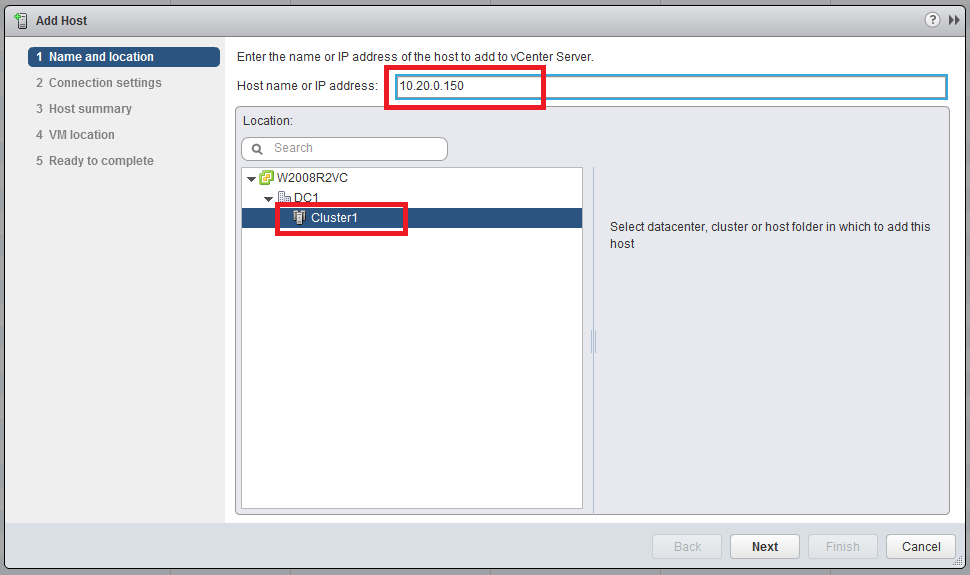
Figure 11. Specify the IP address and location of the ESXi host
Add an appropriate username and password for the ESXi installation, as seen in Figure 12. This is likely the root user and the password you specified during installation.
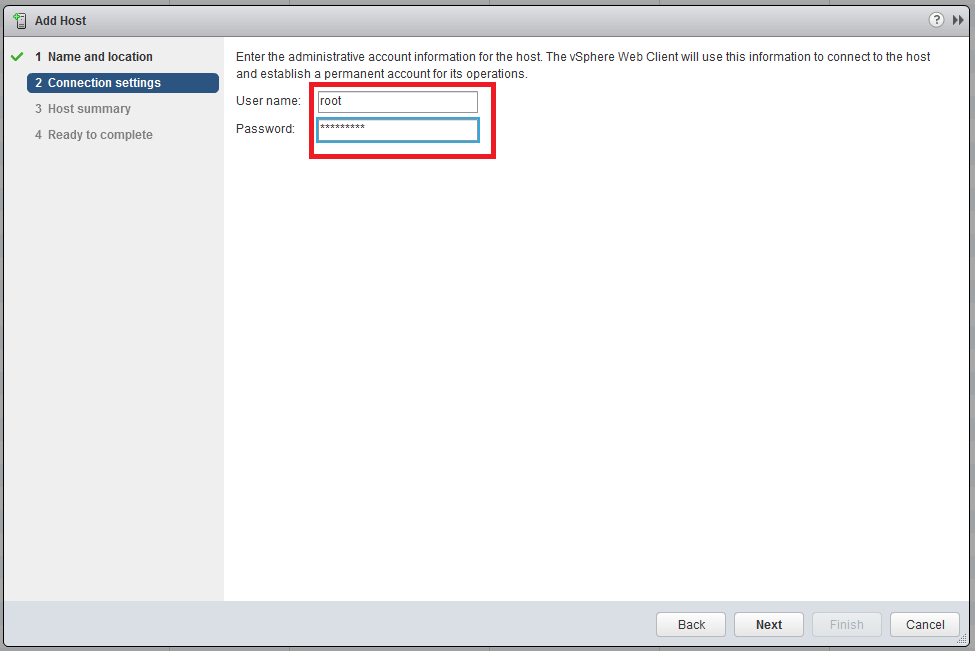
Figure 12: Add the administrative username and password.
If a security alert pops up, click Yes to accept the new host, as in Figure 13:
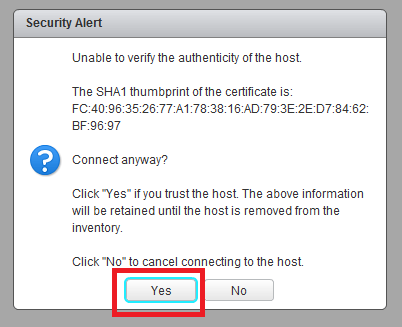
Figure 13: Accept the new host.
6. On the next two screens, click Next to accept the defaults and finish the Add new host wizard. After a few seconds, you should see the host status change to Connected, as in Figure 14. As you can see, it's located in Cluster1, ready to host VMs.
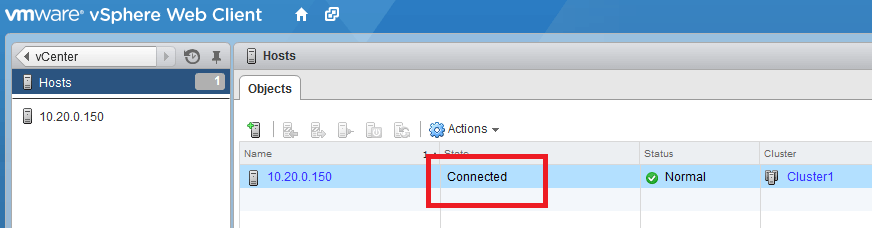
Figure 14: After a few seconds, the ESXi host should be connected
Configuring the vSphere Cluster
It's important to configure the vSphere cluster before installing OpenStack, so that the controller can talk to it. You'll also need to configure the network properly.
As far as OpenStack is concerned, the network vCenter is managing will be the "VM Fixed" network, so you will need to create it in such a way that Fuel knows how to recognize it and utilize it from within the cluster. To do that, follow these steps:
Click the Manage tab, then click Networking. You should see vSwitch0 and all of its networks, as in Figure 15. Click the Add Network button.
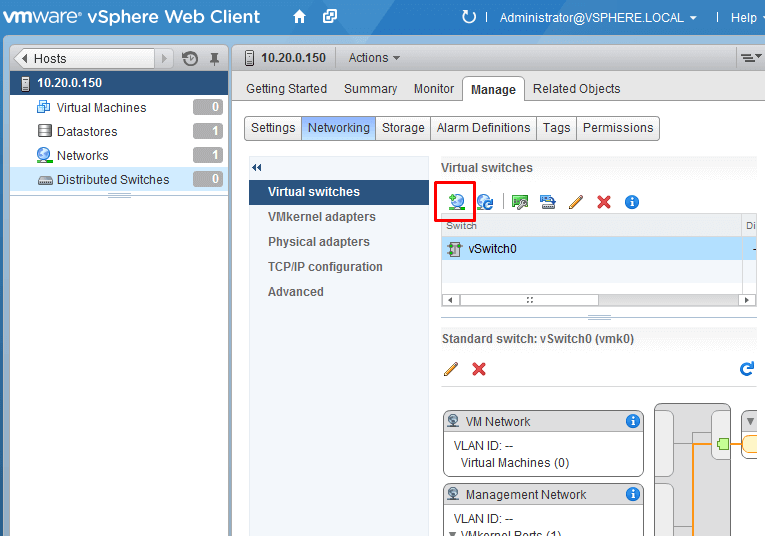
Figure 15. Add a new network.
In the Add Networking wizard, select Virtual Machine Port Group for a Standard Switch.
Make sure network will be created in vSwitch0, as in Figure 16:
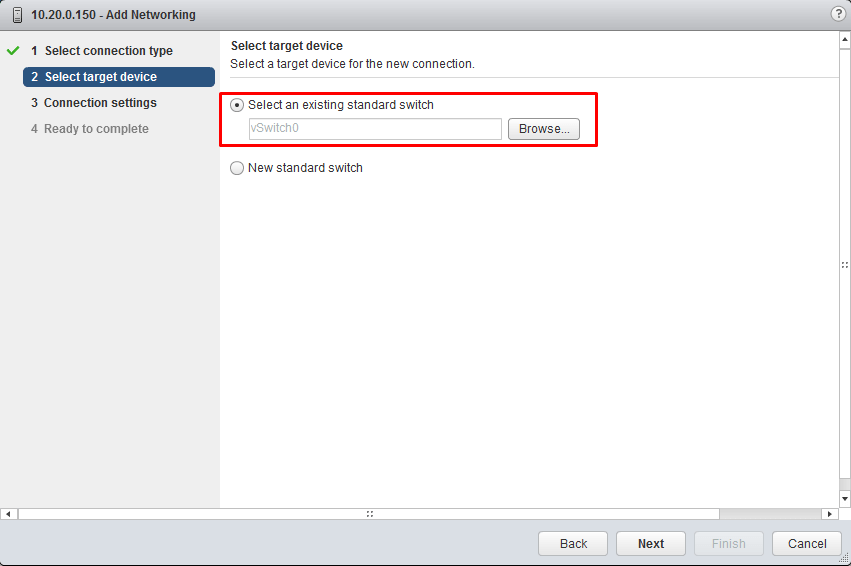
Figure 16. Make sure the network will be created in vSwitch0.
By default, Fuel creates a controller that expects a network called br100, and a VLAN ID of 103 for the VM Fixed network. You can change that, of course, but to stay with what Fuel expects,
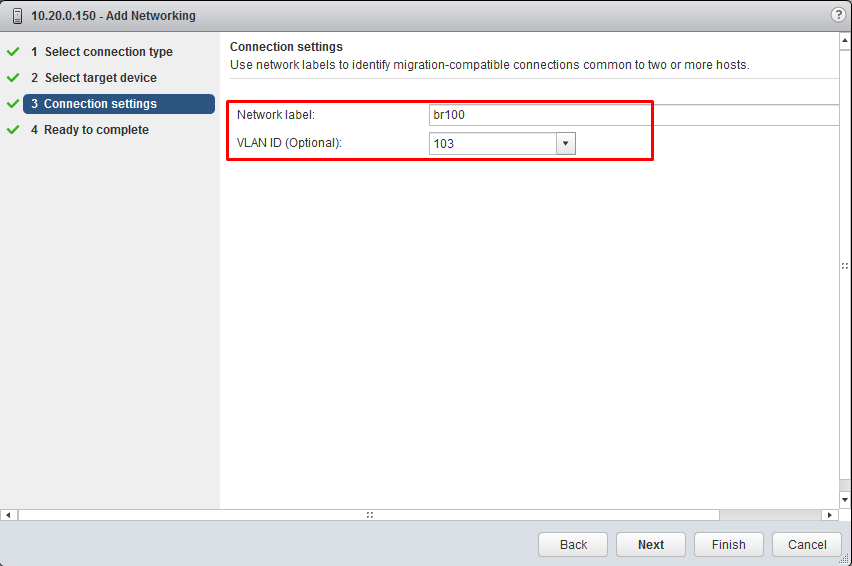
Figure 17. Give the network parameter values Fuel will expect.
Click Next twice to finish the Add Networking wizard.
At this point you should have a fully functional vSphere cluster. In part 2, we'll look at integrating it with an OpenStack cluster.


